How to Create an eCommerce Website With Elementor and EDD like a pro
Hello readers. Today I’m going to talk about how to create an eCommerce marketplace from the very beginning. For the webpage creation purpose, I’ve chosen the Elementor Page builder and EDD. Why is that? Because Elementor permits you to effortlessly make any sort of site without the need to get familiar with any code. You can even make an amazing eCommerce site utilizing Elementor and EDD. However, before diving into the game, you must know the basics. Both EDD and Elementor has amazing features one needs to know to get used to them.
Easy Digital Downloads, by all means, an envied e-commerce plugin system for selling software-based products. EDD provides an add-on which the site owner can use to license each and every product sold on the website.
From this point on, I’ll walk you through how you can utilize Elementor to make a stunning eCommerce website. I’ll show you the whole thing step by step of pursuing a smooth plan. Introducing WordPress, Elementor, and EDD. Though these tutorial type blogs make you sleepy but trust me, no one else but you will get the benefit of this. Moreover, some expert tips and tools included at the end of this blog. Make sure to burn these steps in your memory. Let’s get started!
Getting Started to Make Your Website With Elementor
To start with Elementor, you’ll have to purchase a hosting plan first. What you need are:
- A domain name and hosting
- WordPress
- Elementor plugin and a theme
These 3 things will get your base ready. From this point, I’ll be showing you how to get, install, and customize domain, WordPress, and Elementor. Let’s go through one by one.
Step 1: A Domain and Hosting
The first thing to do is, get a domain name for your website and a hosting plan. I personally recommend BlueHost because it’s the best hosting company. This company provides solid uptime for your eCommerce store, meaning very fast loading speed. In addition, they will provide you with a domain and 1-click WordPress install facility to create an eCommerce Website.
Start with BlueHost. My best suggestion for you is to choose the ‘Plus’ plan from the site. This plan not only gives you unlimited broadband but also unlimited server space also. Moreover, they will assign one of their experts for your website to solve any problems at any time. So, buy the best services at the best price.

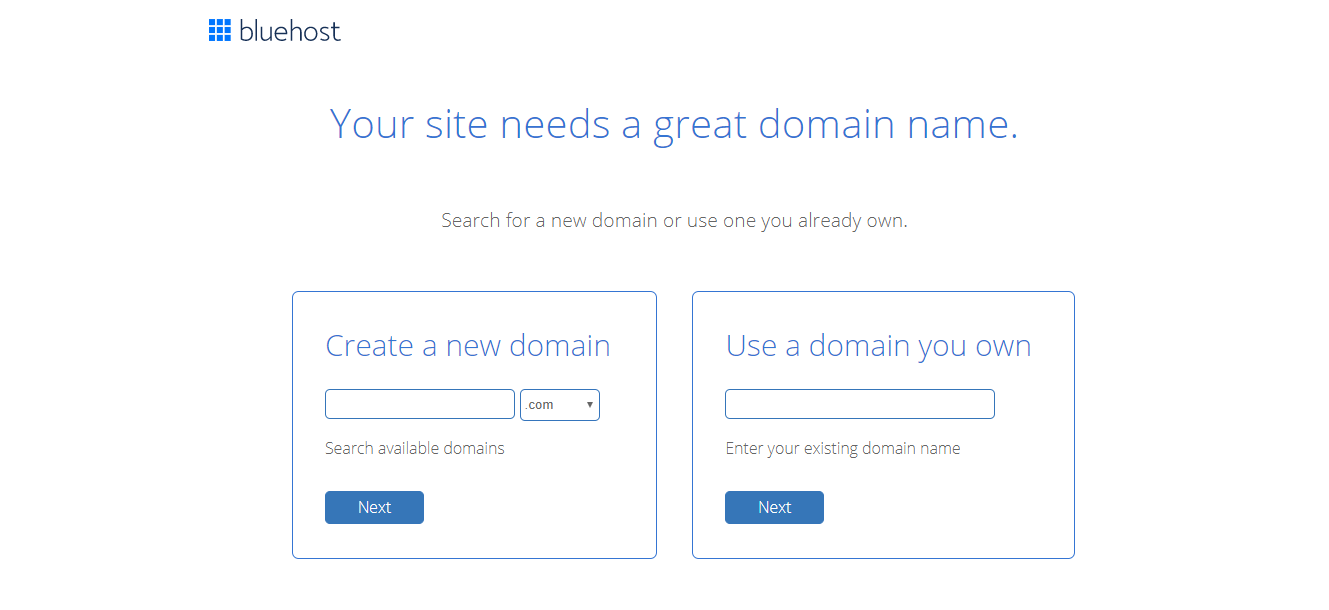
Alright, now you have chosen a plan. The next step is giving a name to your domain. After clicking the ‘Select’ button on the Plan tab, you will be forwarded to a page where you’ll get to name your domain.
After you submit your payment, BlueHost will create your account and you will be able to go to your customer area.
Step 2: WordPress
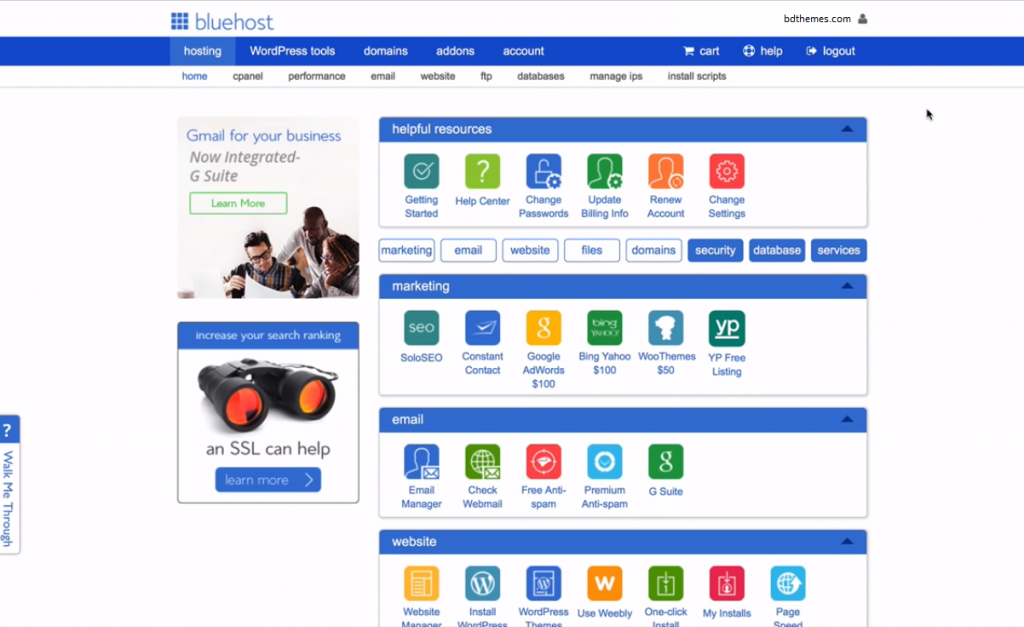
The next step is to install WordPress. In your Hosting tab area will be a blue bar with a ‘website’ name tag on it. Click on the ‘Install WordPress’ button from there. WordPress is crucial for creating an eCommerce Website.

Choose a username and password that you’ll use to login to your WordPress website. Make sure to copy it and store it somewhere very safe. Then, click the ‘Next’ button and wait for BlueHost to finish installing WordPress on your site.

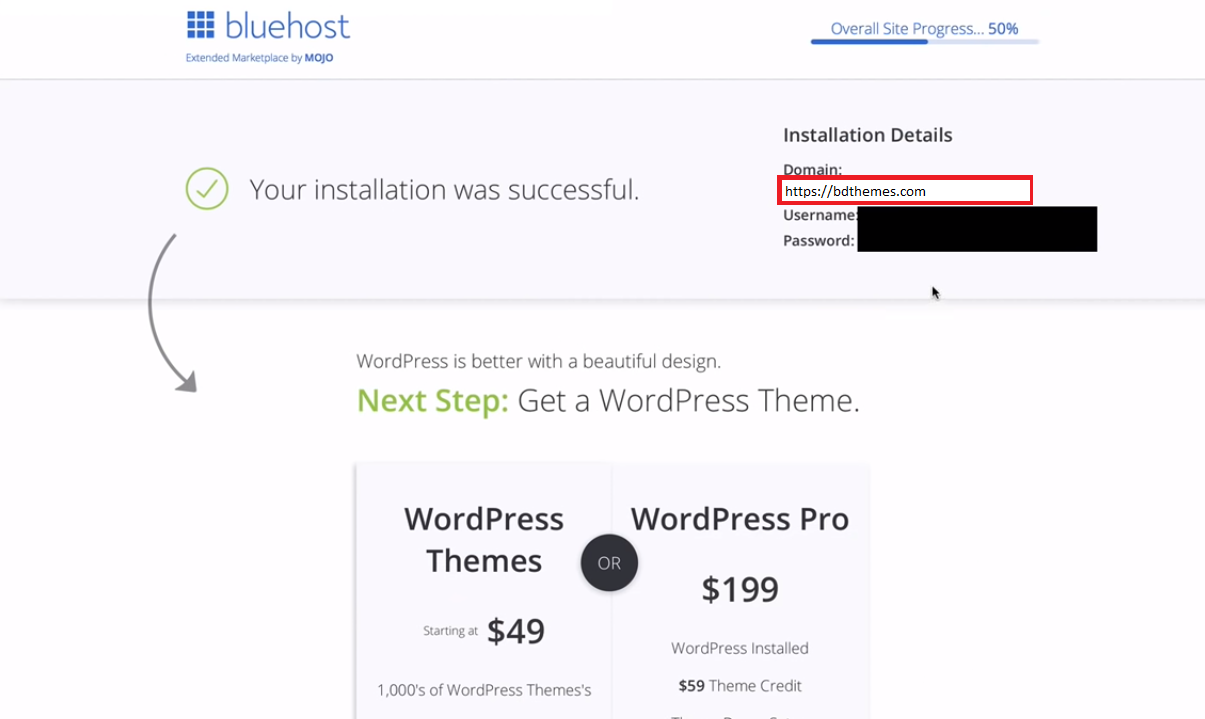
After completing the installation, click the ‘View credentials’ button. Here, you’ll see your domain, username, and password under the “Installation Details’ Tab. Click on the domain link and you’ll be redirected to WordPress user page to log in. There you need to enter your username and password to enter the WordPress dashboard.
By default, there will be a custom dashboard installed by BlueHost.
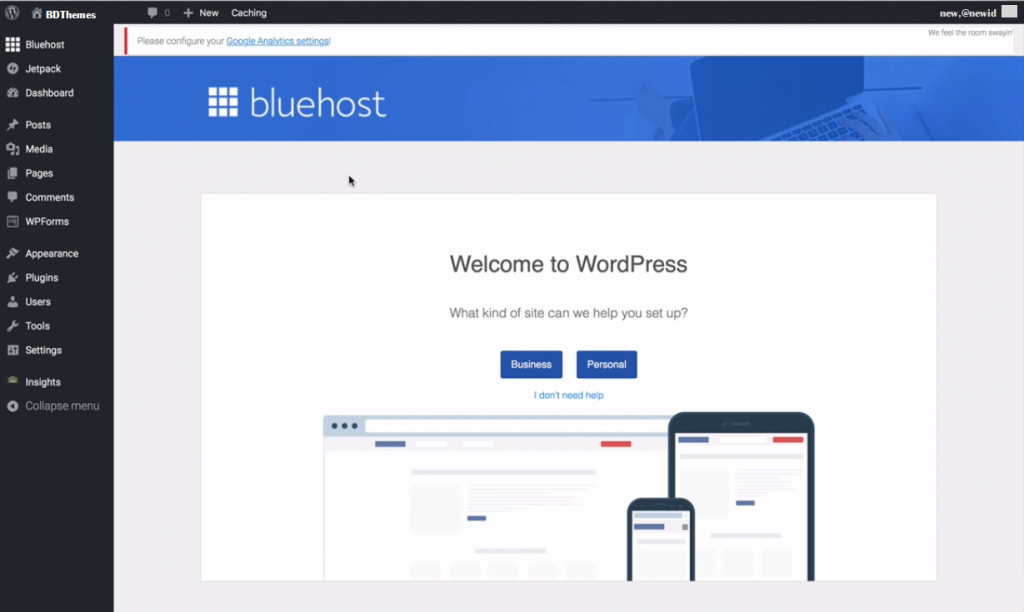
Before installing Elementor, there’s one more thing to do here and that’s changing the permalink structure to make it more user and SEO-friendly. Go to Permalinks and then select the Post Name option. Save your changes.
Step 3: Elementor and a Theme
Now let’s move with the simple steps for installing Elementor and a theme to create an eCommerce Website with ease.
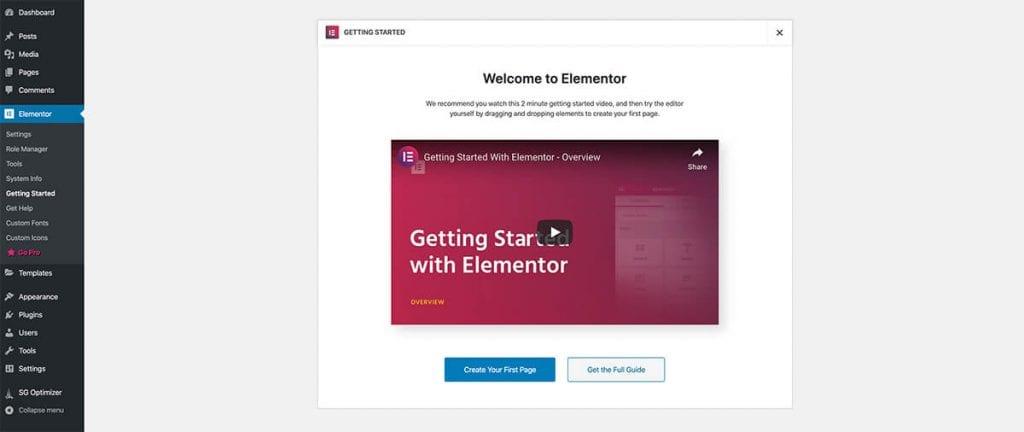
First, go to the Elementor website and download the free version of it. You need to enter your email to receive your free copy. After it’s downloaded, go to your WordPress dashboard and from there, go to Plugins > Add new. Locate the downloaded Elementor file from the local disc and install it.
Or, from the Dashboard/Plugins, manually search for Elementor Plugin and install it from there. After installation, click on Activate.
For installing a theme, go to ‘Appearance’ and select ‘Themes’. I am using ‘Astra’ theme as a reference for this blog. Search Astra theme from Dashboard and then install it. You must activate it to make it work.
After that, click on Astra Options and select the option to install the Importer plugin. Then select Elementor as your page builder from there.
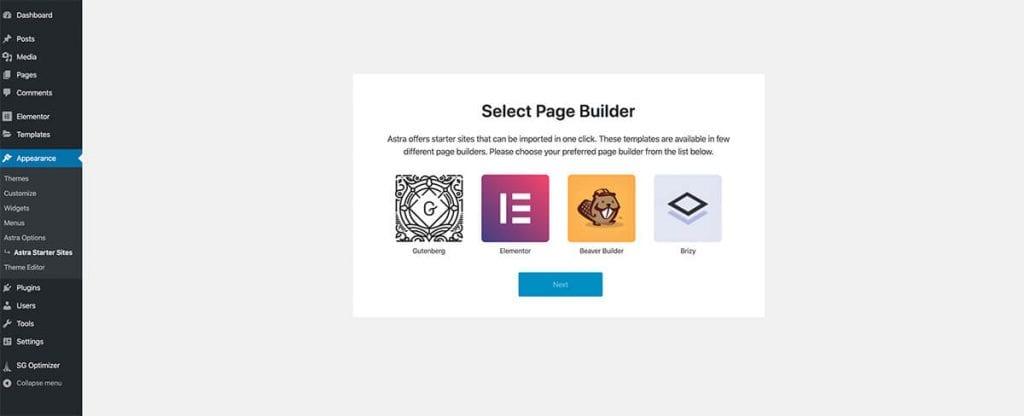
Once the template has been set, you can start customizing your site.
Pro Tips:
 To ensure the best customization and stability output, I’d suggest the Rooten theme. Rooten theme is a premium theme that is very optimized, SEO friendly, super light, and super fast theme. With advanced Gutenberg compatibility support, the Rooten theme is a highly customizable and global web responsive theme.
Customizing Your Website With Elementor

At this point in the tutorial, I’ll show you how you can customize the theme template just like this demo page. Though it’s not necessary to customize the theme that much as they are already optimized. However, this would be preferable for creating a unique style.
The steps we need to follow:
- Home Page and Theme customization
- Making Contact Form
- Creating Samples
- Products And WooCommerce Settings
Let’s not waste any more time and read thoroughly.
Step 1: Home Page and Theme Customization
At the WordPress dashboard, you can see your site name on the quick list. Click on the site name and from there, click Edit With Elementor. Elementor provides its interface and building blocks to customize the homepage. You can add more elements such as headlines, text, buttons, callouts, grids from the selection menu. As a drag and drop system, you can create anything without the need for coding.
You can remove sections you don’t need by right-clicking on them and delete them. You can also duplicate sections via section menu and rearrange them by dragging.
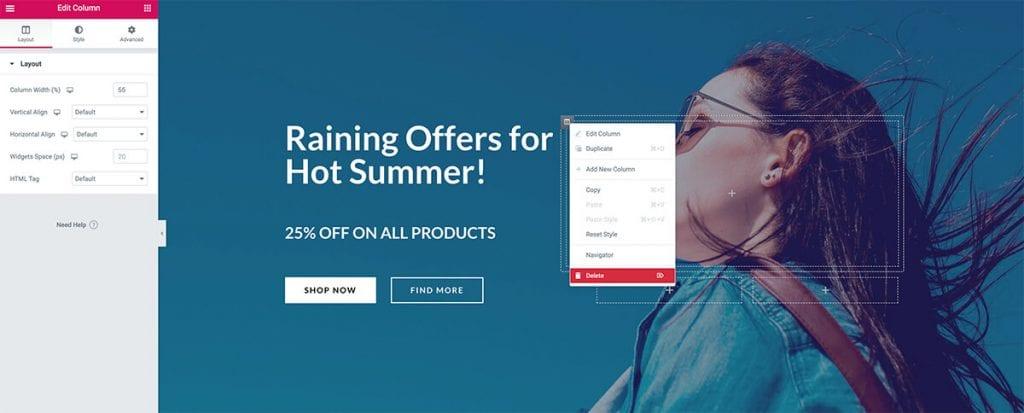
For every particular section, you’ll be able to customize the background, spacing, and more for that section.
If you want to edit a particular block, all you have to do is click the pencil icon and you’ll be able to adjust fonts, colors, background, spacing, and other settings.
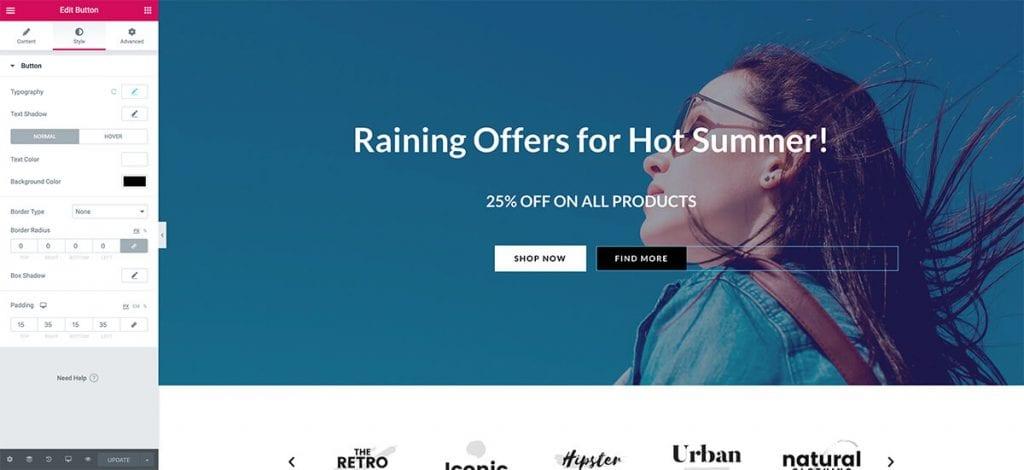
After the customization of your site is completed, click on the Update button and the changes will be applied. Simple isn’t it?
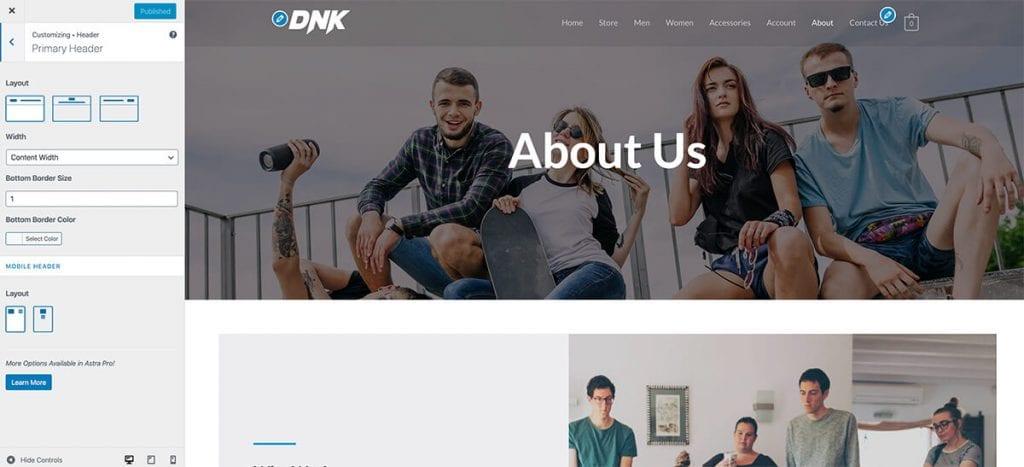
Alright, now that your home page is ready, head towards to customize your site with the Theme Customizer. Visit your website and then click the Customize option or in your dashboard, go to Appearance > Customize. There you’ll be able to override the theme settings according to your taste.
Step 2: Making Contact Form
By adding a contact form to your website you can give people access to the mail you’re using in your Contact page. For this function to work, go to your WordPress dashboard and click on Plugins > Add new. Search for WPForms and install and activate the plugin.
You’ll see the plugin’s homepage with a button to create a form. Click it and choose a Simple Contact Form and make sure that the form is linked with your primary email address. You will see a shortcode given by WPForms for the form you’ve just created. Copy it and save it for later. This contact is crucial if you want to create an eCommerce Website.

Now go to the Elementor editor page from the contact form. In the Elementor interface, search for the Shortcode block and paste the form’s shortcode. Once the page is updated, your customers will be able to contact you.
Step 3: Creating Products
In this step, you need to go to your WordPress dashboard and setup the WooCommerce plugin through its instructions. This is where you’ll create and configure the base options for your store. After the setup is completed, we can start creating our products. Let’s start by creating a simple product. Go to Products > Add new. Here you’ll be able to add a title and a description for your product. There are more options to add product images, set your price, and configure stock management settings where your customers can see the number of products you have in store. A well-categorized collection of goods is needed for creating an eCommerce online store.
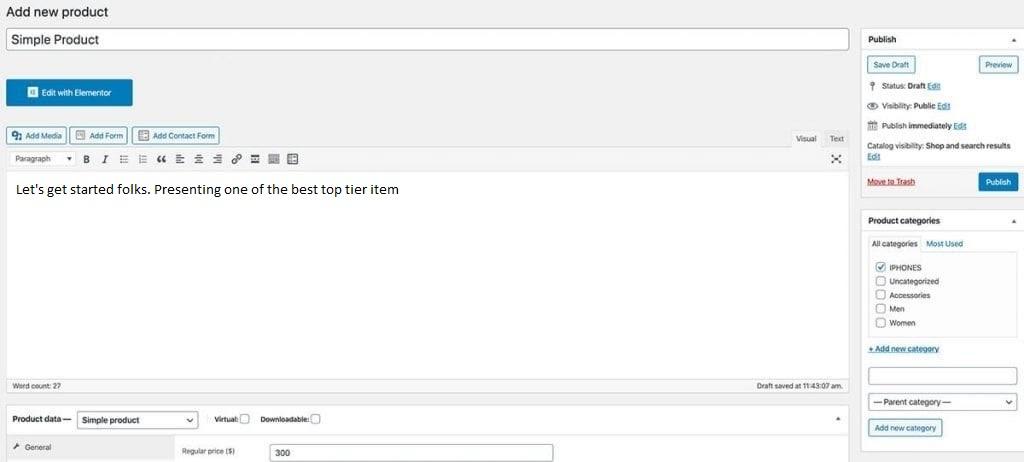
Also, you can enter categories and tags for your products to make your store more organized.
When you’re done, click the Publish button and now the product will be available and visible in your store.
Step 4: Products And WooCommerce Settings
WooCommerce automatically by default makes your items and products appear on your store page when activating this plugin. Also, you can showcase any product you want thanks to the shortcodes WooCommerce provides. Moreover, there are other customizable settings in WooCommerce that you need to configure. More or less they are stated below.
-Taxes are although automated but you can also configure them manually.
-For shipping, you’ll need to configure the shipping rates and zones for your store.
-As for the payment methods during the setup process, WooCommerce asks you to set up a payment method. You can enable Paypal, Stripe, 2Checkout, and other payment methods with WooCommerce extensions.
– Also, by creating coupons, you can easily create promo codes for your customers and vouchers your store for promoting or selling certain items or variables.
Easy Digital Downloads
Now let’s talk about the application of EDD in this website creation. Software Licensing for Easy Digital Downloads provides license key generation, activation, checking, and hand-over system. With this, you can provide license keys along with your digital products that can properly license and activate the buyer’s copy of the software. Useful when you are selling WordPress plugins, themes, or any other kind of software, including video games and desktop applications. This licensing addon makes your work easy as it registers each product and its sale automatically. So, no worries over the sale.
Just like any other plugins, search for EDD at the add new plugins menu in WordPress and install it. Activate it from the Dashboard and configure EDD as your preferable format.
Configuring EDD
Configuring EDD is the most important part of this tutorial. You just need to follow these simple steps and things will be ready in minutes.
Step 1:
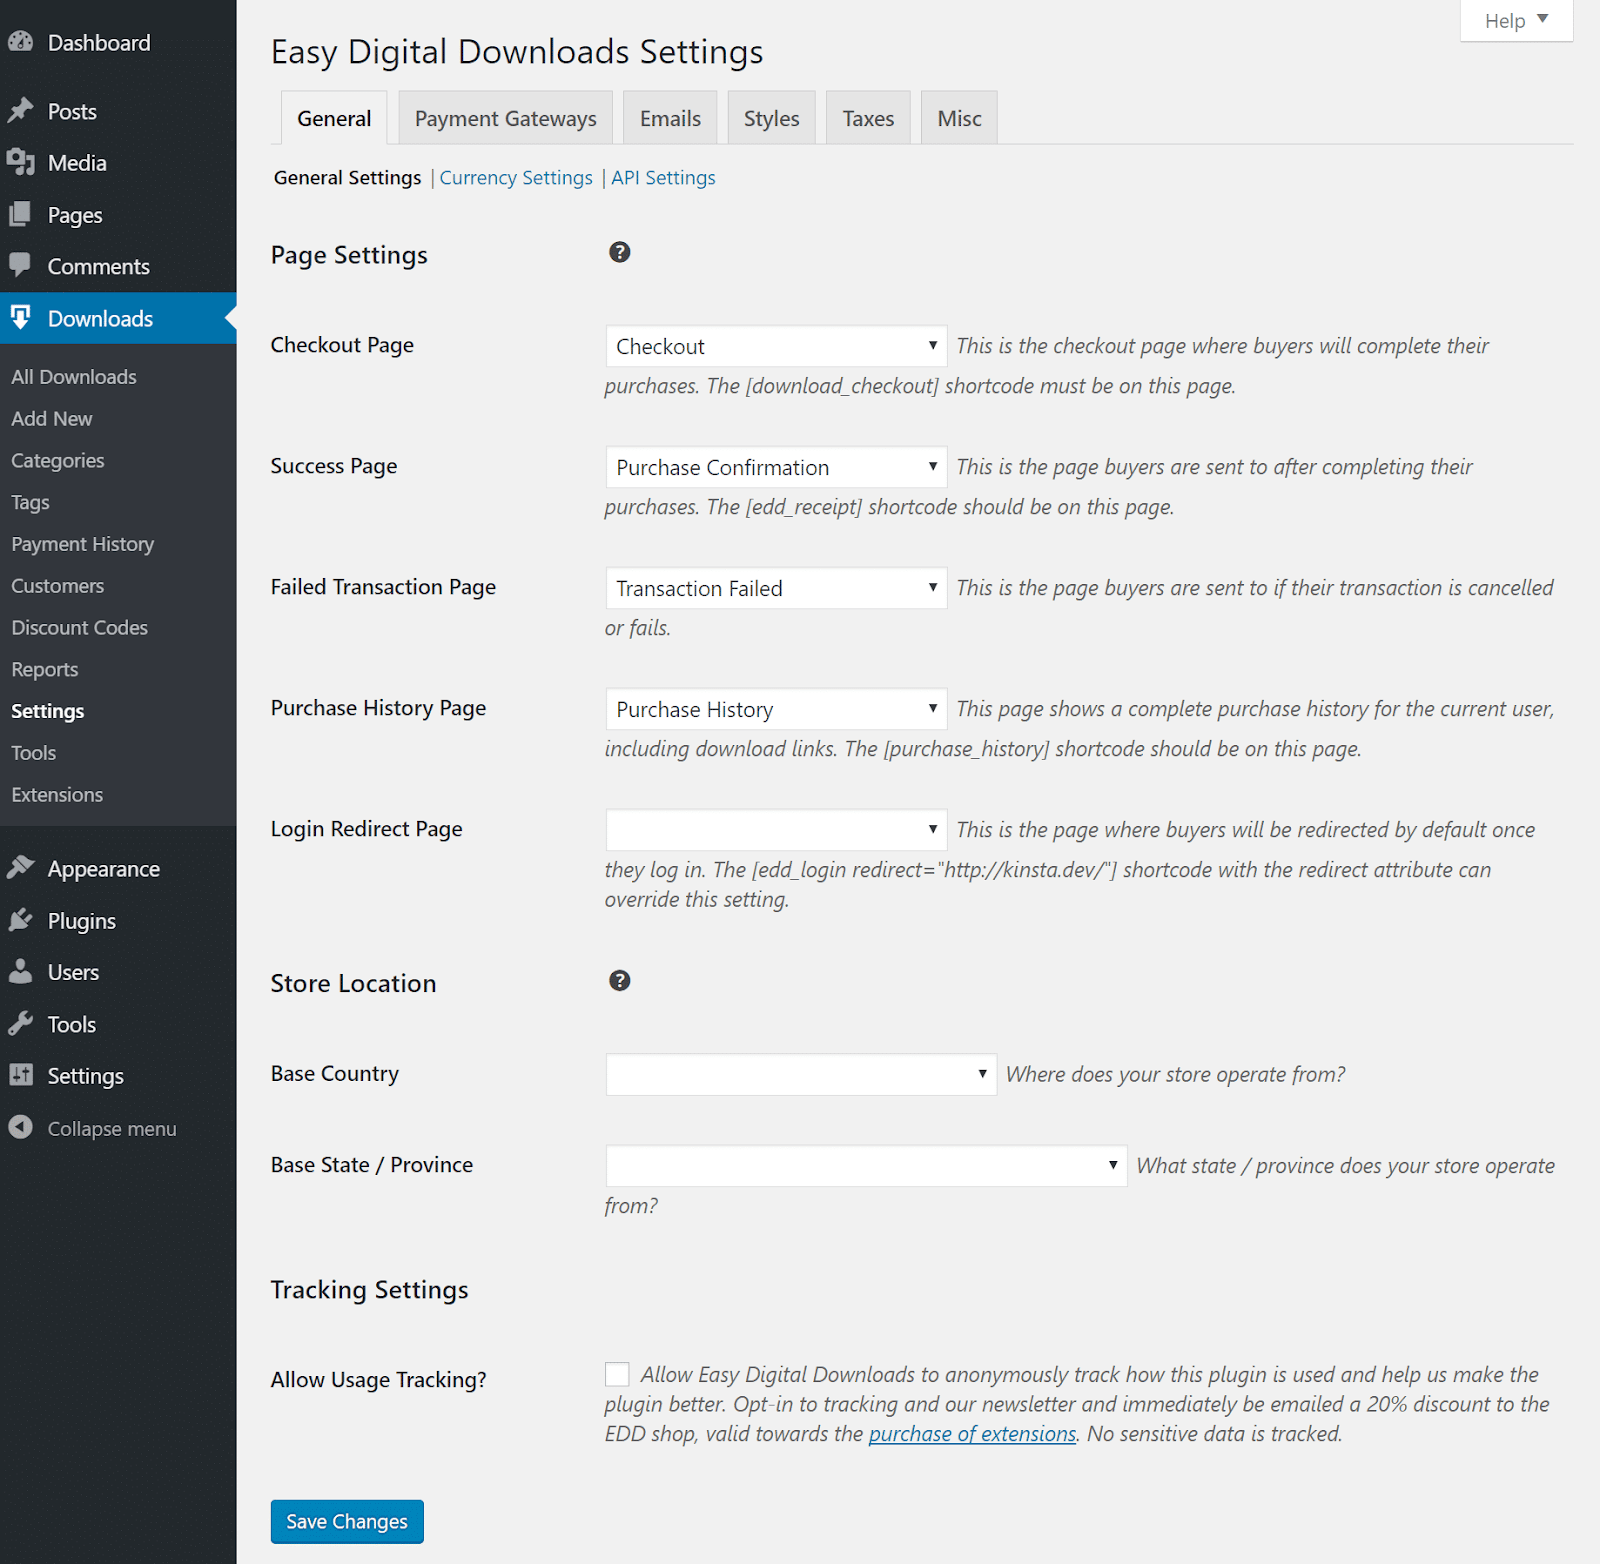
First thing is to configure options for checkout, payment, redirects, etc. To configure it you need to click into settings under “Downloads” which is now on the left-hand side of your WordPress dashboard. EDD has a brilliant feature that automatically creates pages in your WordPress site for checkout, purchases confirmation, etc. So those settings don’t need to be changed if you are running a simple configured store.
Step 2:
Next thing, click “Payment Gateways”. From this section, you can choose the payment gateways you want to use on your website for processing every transaction. By default, PayPal standard, Amazon, and test payments are choosable. You can also use premium extensions to use other payment gateways such as Stripe, Braintree, Dwolla, GoCardless, etc. By default, PayPal standard will process transactions via their site. This means your customer will check out on your site, get posted to PayPal, and then get redirected back. If you want them to stay on your site, you can upgrade to PayPal Pro payments or use another provider like Stripe. Also, you can run the test payment system to observe the simulation of the payment system on your site.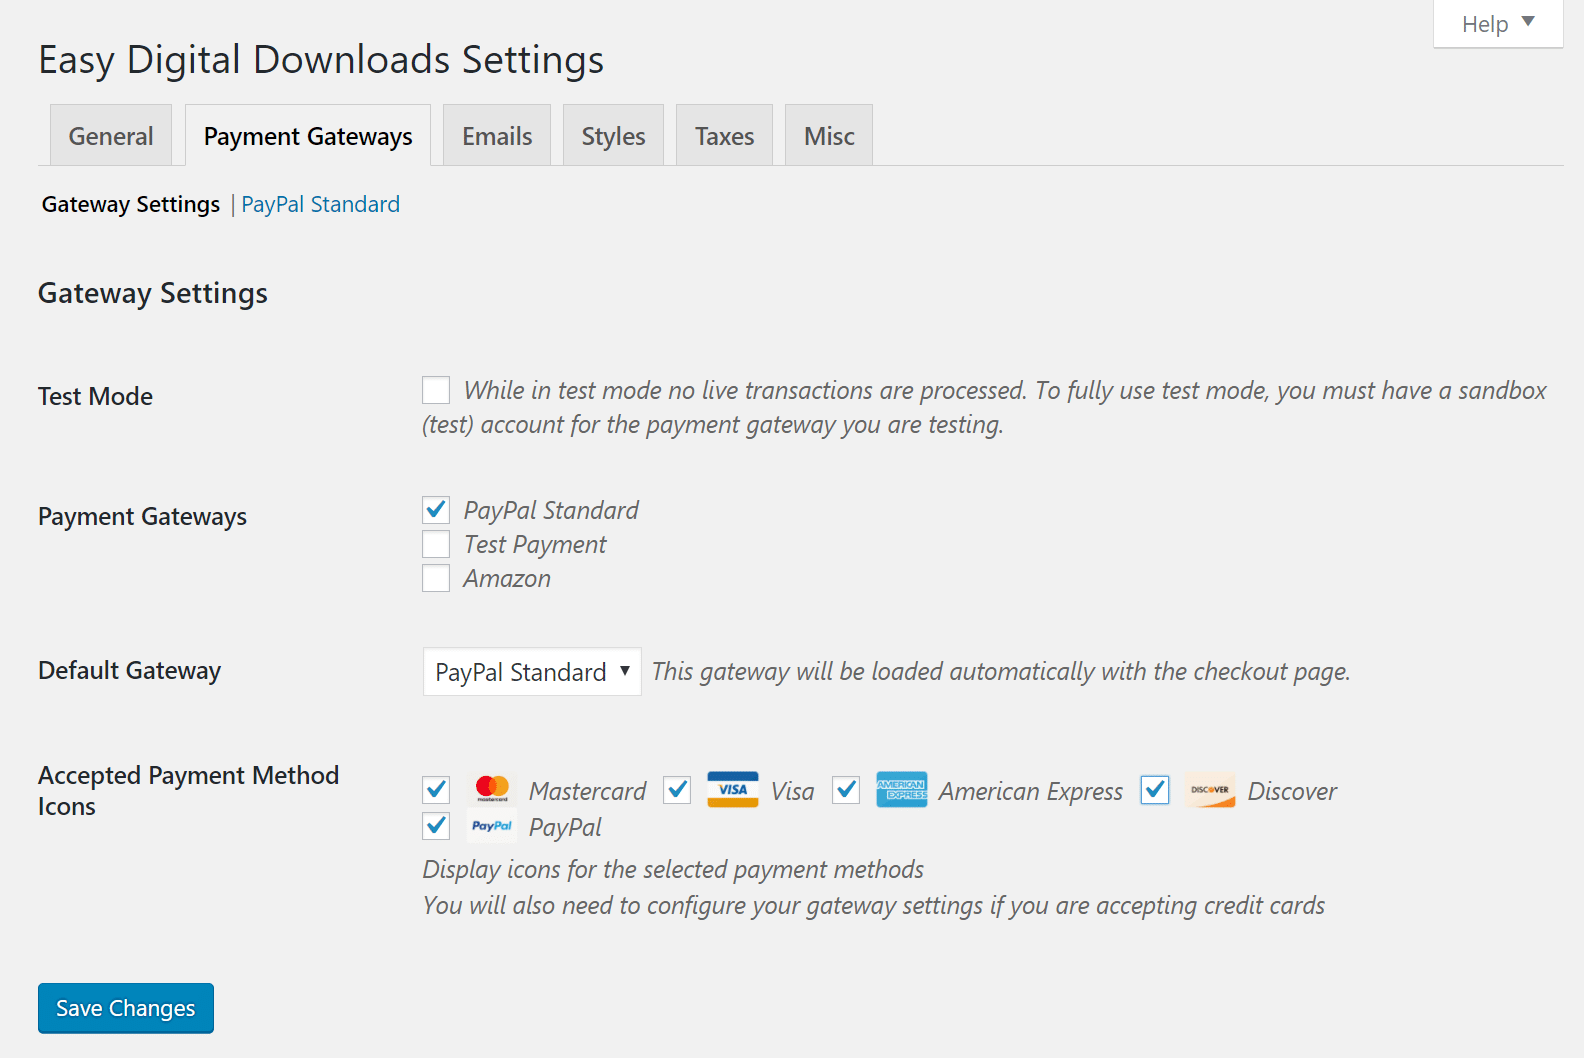
Step 3:
Now, click into the subheader “PayPal Standard.” This is if you are using PayPal you need to put in your PayPal email and it will automatically import the gateway settings for PayPal. It will use PayPal’s default page style unless you change it to PayPal Pro.

Step 4:
For this section, a logo would be perfect to represent your website. All the mails stated here are auto-generated for both administrators and customers. These mails will be arranged automatically upon command.
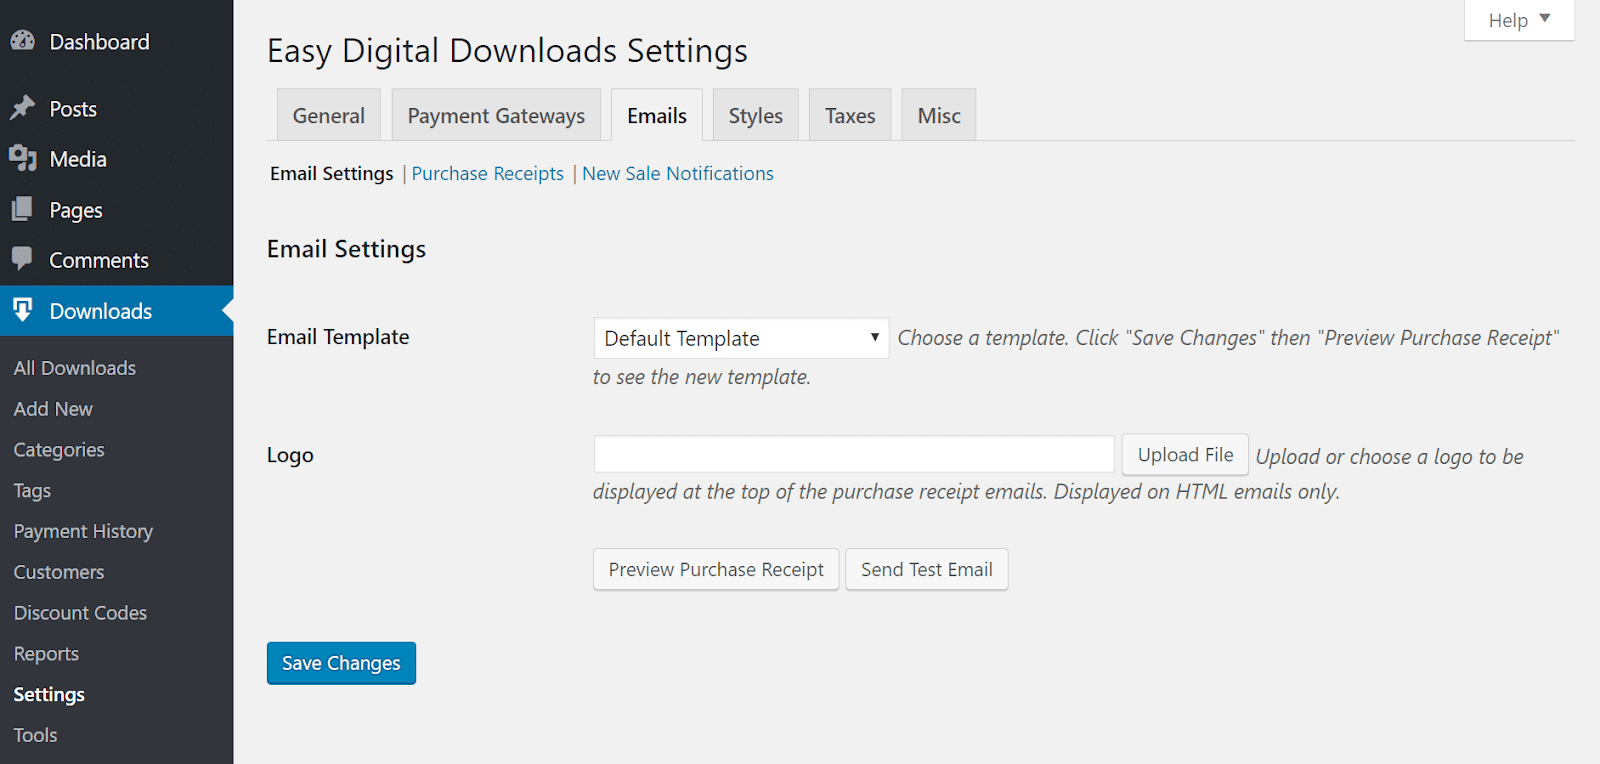
Here is an example of the default EDD email template that is sent to a customer, along with the logo. The email includes a link to your digital download file.

You can also setup styles, taxes, and other diverse settings. Although none of these actually need to be changed, still you have plenty of room for further extension. Moreover, one great thing about EDD is that it has multiple customizable menus for further development. Then again, there are additional options for you to immediately redirect to checkout after adding an item to the cart.
Also, you can allow item quantities to be changed. Buying items require that users be logged in to purchase files. You can also allow customers to use multiple discounts on the same purchase. Though I would not prefer this service. Additionally, you can set file download limits, download link expirations, disable the ability to redownload files. And lastly, enabling an option for terms of agreement upon checkout.
Adding Digital Downloadable Files
Now, after finishing the EDD setup, it’s time for inserting digital downloadable files to your WordPress EDD store. Note that, depending on what extension you use, this could also be services offered instead of physical files. You’ll be able to grasp it with just 2 easy steps.
Step 1:
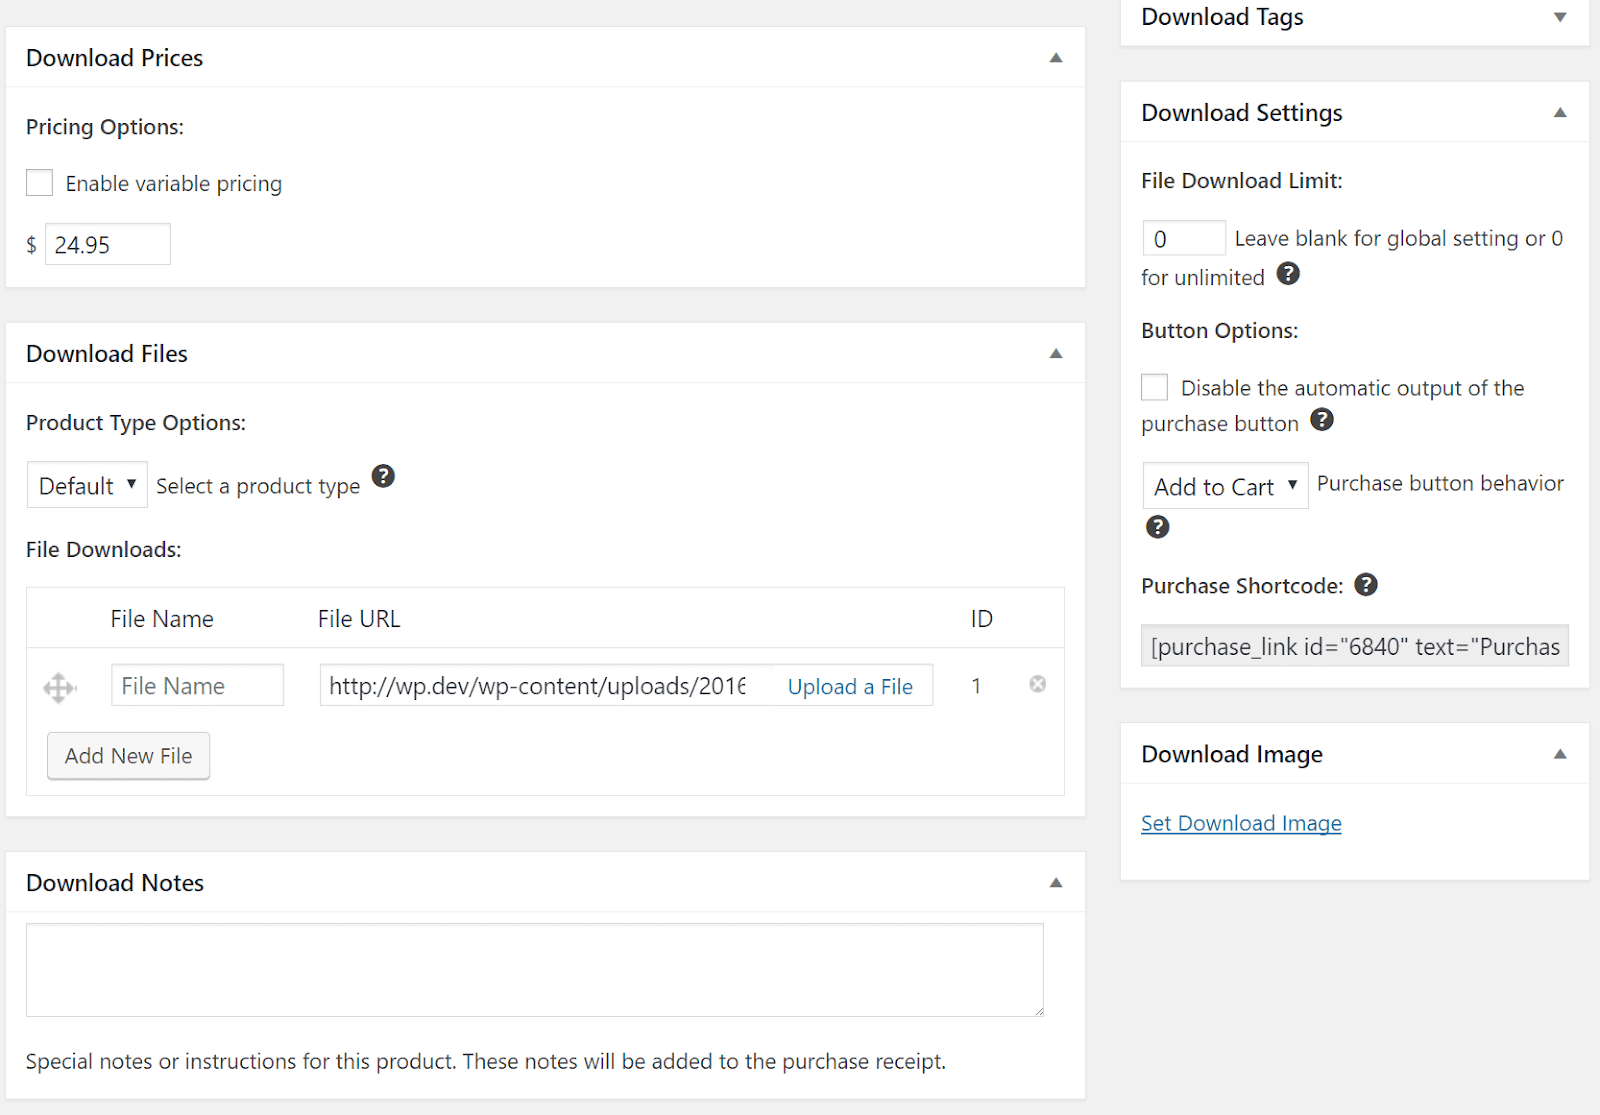
Click “Add New” under Downloads and name your digital file. You can add a description, category, download tag, etc.

Then give your download a price. Variable pricing is also available with a click of a button. You can then upload your digital file, whether it is a .zip, .pdf, .mp3, etc.
Step 2 (NGINX only):
Another fact is, you need to ensure the folder where you keep digital download files is secured. If left unchecked, anyone can freely browse the location and download the file for free. WordPress would show you a warning sign at your site until you fix it: “Download Files Not Protected on NGINX.” Only NGINX integrated systems need to follow this step. But for those running on Apache, a rule is automatically applied to your .htaccess file.
To secure your directory, add the following to your NGINX config.
rewrite ^/wp-content/uploads/edd/(.*)\.zip$ / permanent;
After including the code above, all users that are trying to browse to the directory of your downloadable file will simply be redirected to your homepage.
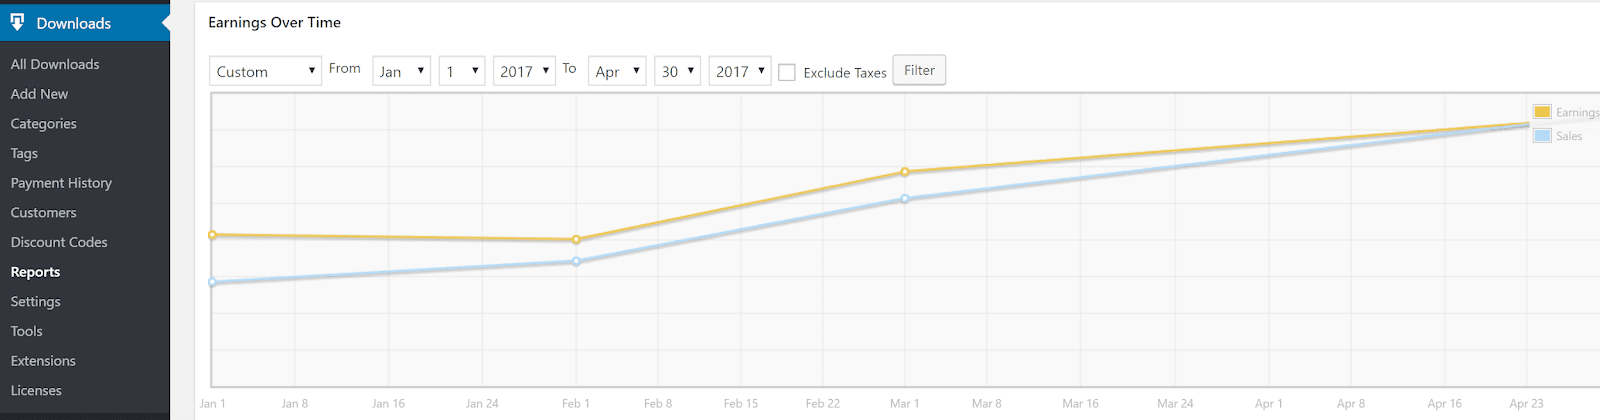
Report Checklist:
Make sure to check out the reporting data and payment history data from time to time. A pretty handy feature of PayPal is that it automatically syncs itself with EDD. So if you sell a product and get paid via PayPal, it will also mark it paid in the EDD log. This feature also includes refunding. This monthly curve shows the records done by the EDD system over earnings.
Maintain Taxes and VAT Payment:
What more confusing then online market Taxes when it comes to Easy Digital Downloads! Thankfully, to ease your worries, EDD made solutions. This includes things such as auto-invoicing, charging VAT to countries that require it, etc. Pay your taxes super easily with:
- Quaderno
- Freemius
- ProteusPay
- WP Route
- OmnipayWP
Simple and easy right?
key management
With a very simple interface, you can easily view and manage customer license keys.

Each individual license key includes a complete details screen that makes all relevant purchase and customer data easily accessible.

You can enable the license key generation on each product in your store separately. Every product gets its own settings, allowing you to easily sell many different product variations and non-software products at the same time.
Conclusion:
In this blog, the steps and processes I talked about are simple and easily doable. With Elementor, all your trouble of using any codings or so have been resolved. Also, using EDD, you can achieve a safe and secure sale for each of your products without even worrying.
Did you get all of this? Sweet. Let’s not waste more time and go make some coins.
Expert Advice: A must-have plugin for your growing marketplace
Among these tonnes of plugins and add-ons, choosing the right one and the best one is tough. I can understand your worries and concerns. Let me ease you.
Presenting the best add-ons for Elementor Page builder plugins, Element pack. Now you might wonder why Element Pack?
Because Element Pack is the most optimized add-on based on the WordPress Elementor plugin for creating your premium website.
This plugin has a vast inventory ready to be deployed on your website. Also With 100+ plugins, 140+ ready to use pages, over 1000 unique blocks, Element Pack has made it to the position of Top 6 worldwide. All the blocks and tools you need to make an entire website are made and stored in the Element Pack database. The only all in one product in the world!
What every successful website designer wishes for is premium and optimized tools. And Element Pack responds confidently to that wish. So, don’t hesitate too much and make a run for it!
Thank you for reading this blog. Enjoy the day!