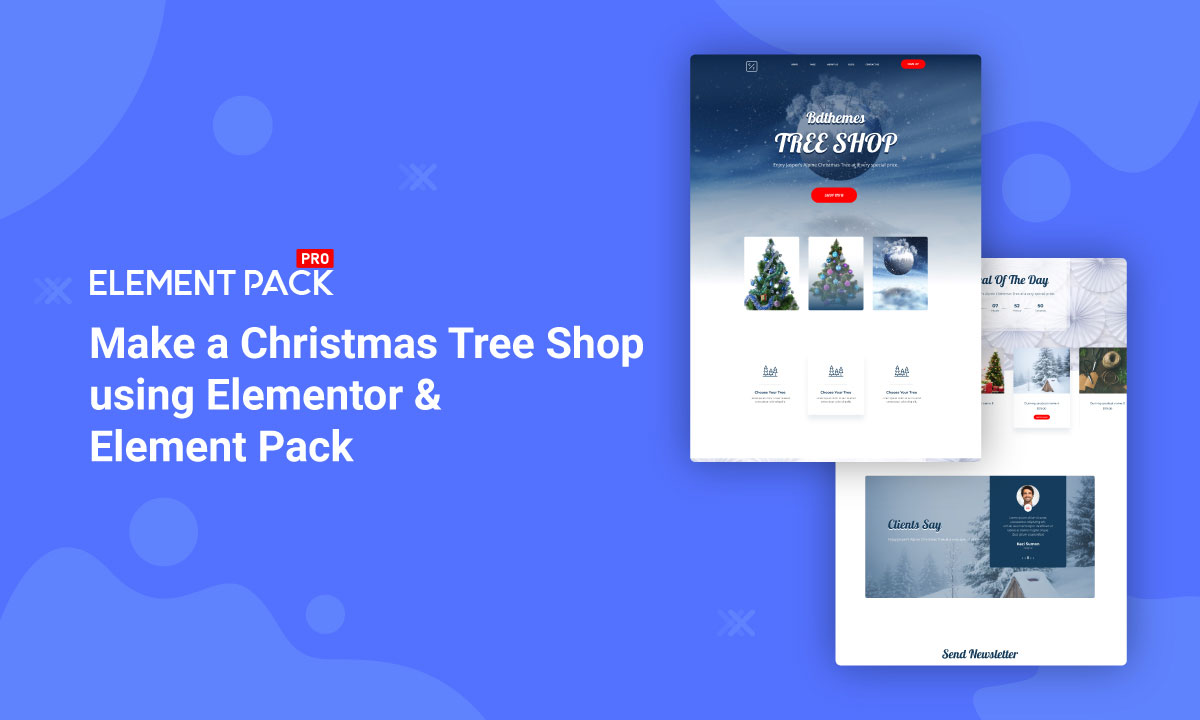
Make a Christmas Tree Shop using Elementor & Element Pack [updated]
A beautiful online Christmas Tree Shop is the dream of every shop owner. If you are having trouble with the details and design. Worry no more, you’ve made it to the right place. Today, I’m going to show you how to make a Christmas Tree Shop with Elementor.
Creating a website without any prior knowledge of coding was a myth before. But now, what was impossible before, is a trend! Elementor is the most optimized website building tool globally for its drag and drop system.
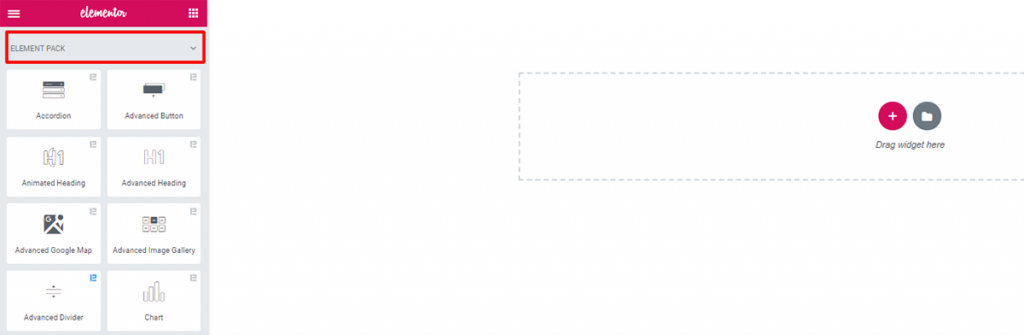
For web-page building purpose, I’m going to use the Element Pack add-on. This is a beautiful toolkit made by BDThemes to use with Elementor. Alright, time to start the engine.
Introducing Element Pack
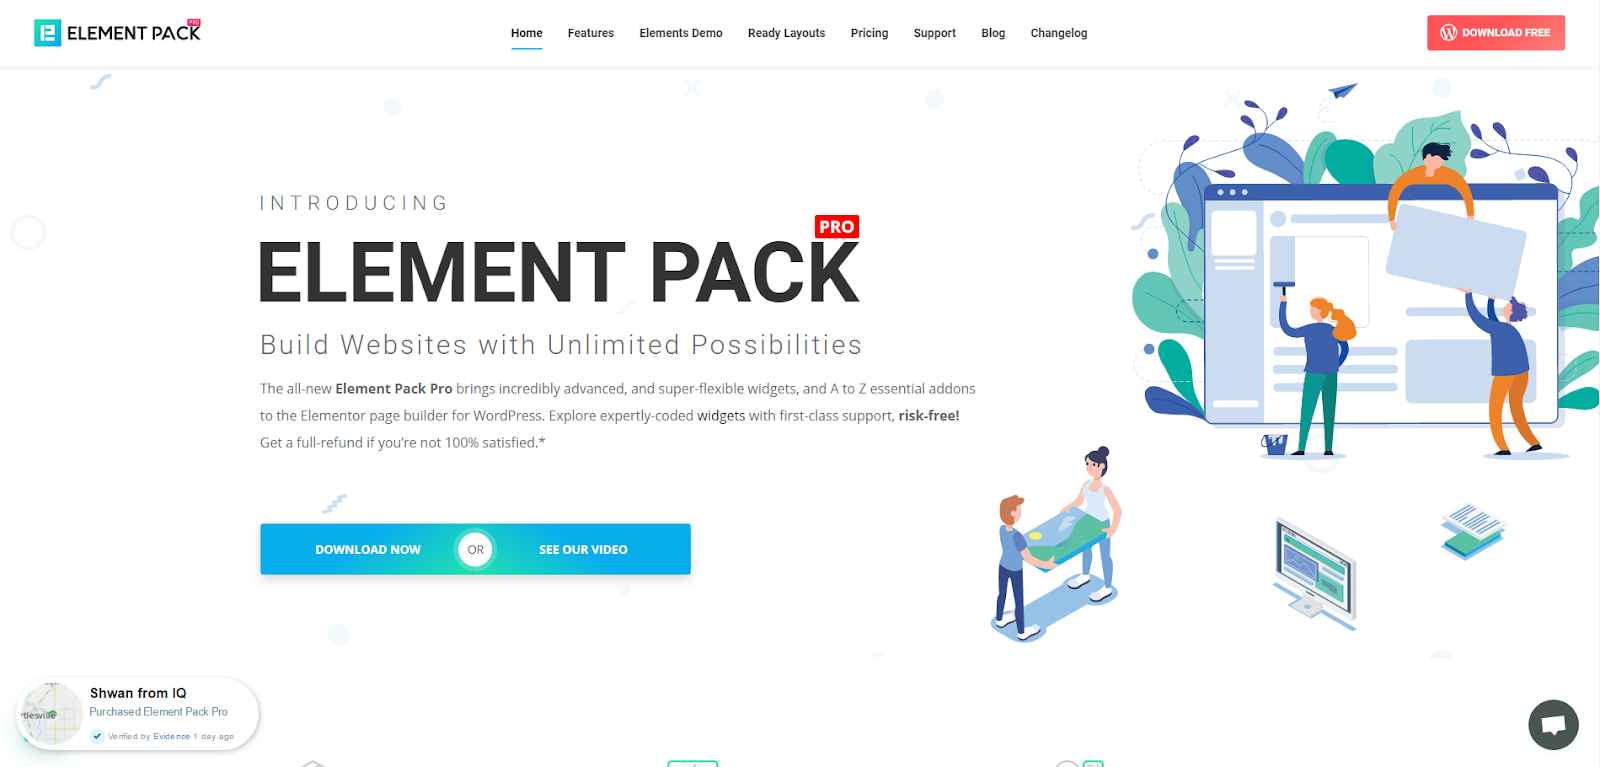
Element Pack is the most optimized add-on for creating your premium website. Element Pack has a vast inventory ready to be deployed on your website. With 190+ plugins, 270+ ready to use pages, over 1800 unique blocks, Element Pack has made it to the position of Top 5 worldwide.
Don’t bother dragging this and that and make things more complicated. The savior of your trouble is here. Element Pack also has a lite version, totally free. So, what’s more profitable than this? Use now.
Installing WordPress and Elementor
WordPress is a free and powerful content management system worldwide for creating websites. You can download and install it easily within a couple of minutes. And, you can install Elementor from inside WordPress. Hence you need to take a couple of steps to create hosting for the Christmas tree shop.
For more knowledge, please see the article “————-”. That blog covers the whole process of hosting your shop.
Creating Christmas Tree Website with Element Pack
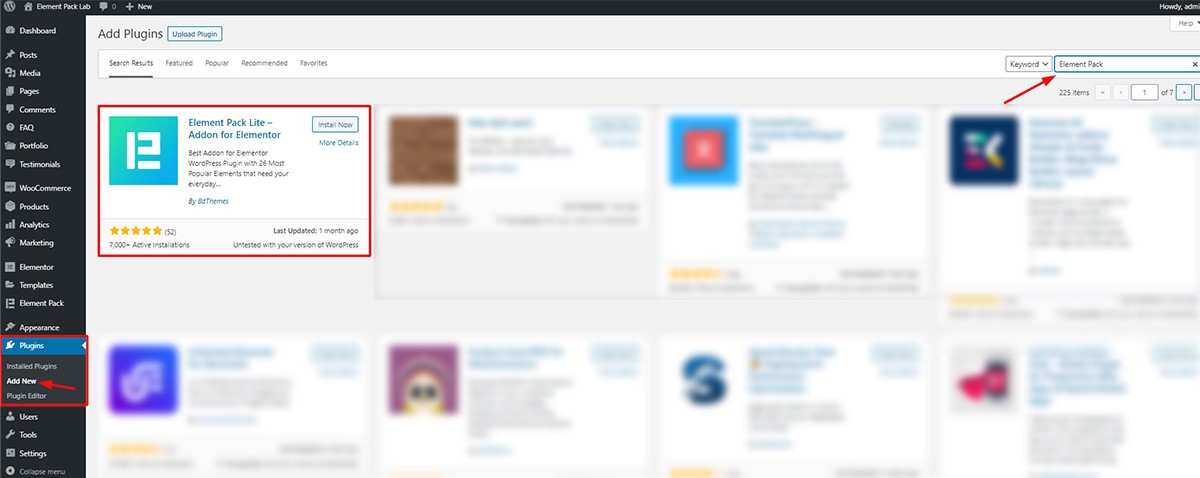
After the installation of WordPress and Elementor, Click on your shop’s dashboard and follow the instruction to install the Element Pack Lite add-on.
To go to your Dashboard, simply write down your website address and add /admin at the end.
>www.yourwebsite.com/admin
This should bring up your shop’s WordPress Dashboard. From there,
- Go to Dashboard> Plugin> Add New
- Type ‘Element Pack’ at the Keyword section
- Press ‘Install Now’ on the boxed part
Done! Now let’s create a new page and start our work. Note That, Element Pack Lite is a ‘free to use service’ given by Element Pack Team. However, to get the best widget on the trend, you have to buy their Pro package. Though it’s cheap and reliable.
Creating New Page for Christmas Tree Shop
After setting all the widgets into their places, let’s pick up the pace and create a new page. Here, we will be creating our shop from scratch.
Go to Dashboard> Pages> Add New
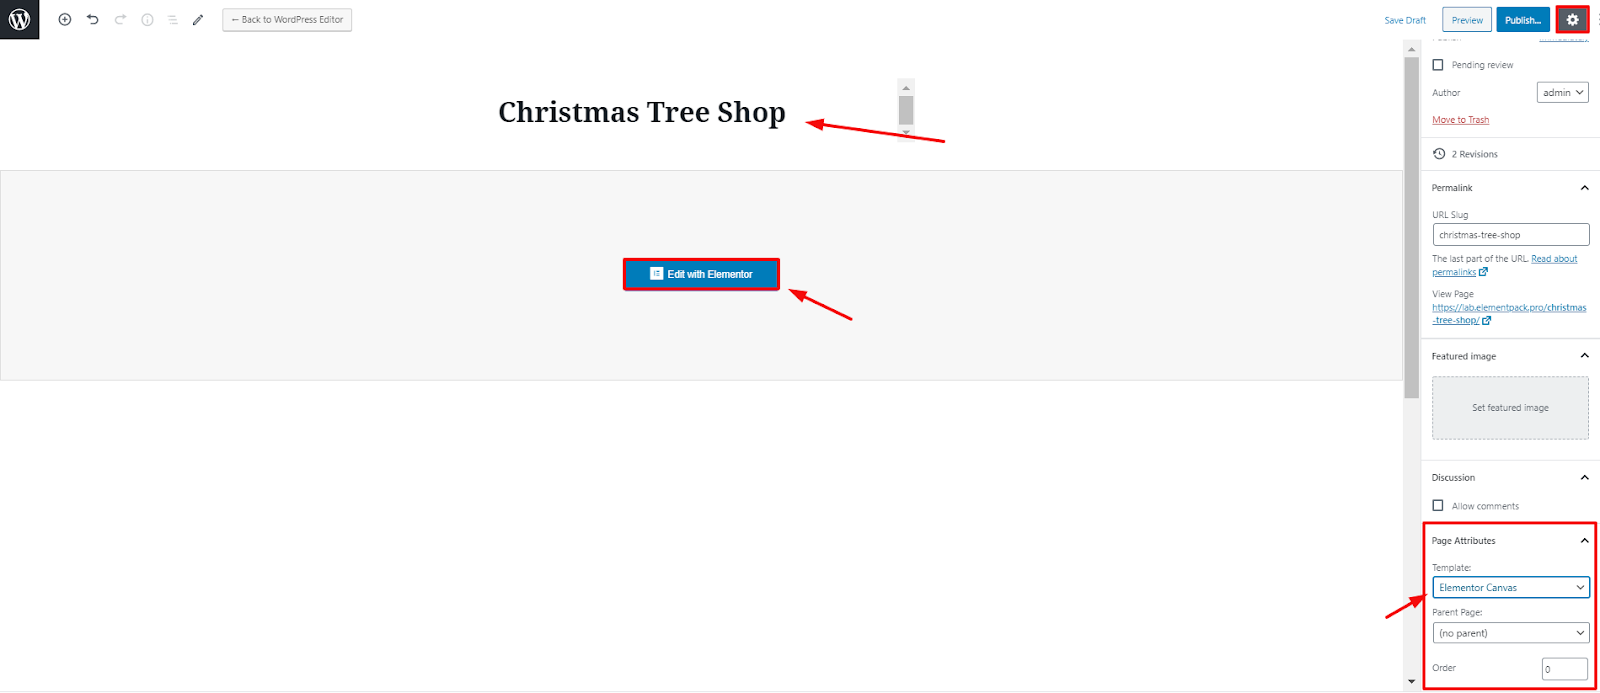
After Clicking ‘Add New’ you will get a page like this. The bolded text on the top is the title of your shop. Click on the little square on the top right corner and you will get page settings. Change the template of your shop to Elementor Canvas. This way, it’s easy to customize from the very beginning.
Now Click on the ‘Edit with Elementor’ button and move on to the next part.
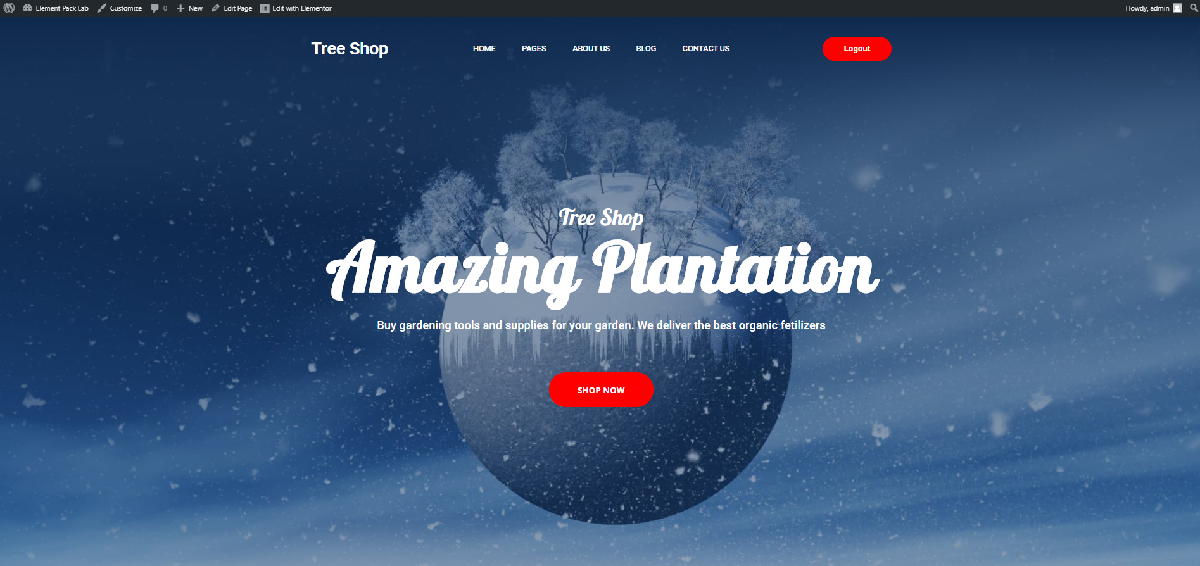
Landing Page of Your Christmas Tree Shop
In this blank canvas, I am going to use Element Pack widgets to make the landing page. A landing page is something known as a “static page”, or a “destination page”. It’s a single page that contains all the information that the owner wants to display.
Things You Must Add to Your Christmas Tree Shop Landing Page
Now, before moving to the next part, here are the things you need to know about a page. These items are the core things that make your shop appearance stunning to others.
Hero Section:
The most important part of the landing page is the hero section. It’s the first thing you will see after you go to a website. Hence, you must place the most important things like title, subscription form here.
Features Section:
In this part, you need to describe your main business. You can put the main features or services and their details here.
Portfolio:
You can show examples of your work to the visitors in this part of the landing page. It’s important that you drag the interest of others to your shop with quality examples.
Testimonial:
This part holds good reviews of your satisfied clients.
Footer:
This is the last section of your landing page. As your visitor has already reached here, you need to make another offer to them. Engage their needs by directing them what to do next.
Creating the Hero Section of Your Christmas Tree Shop
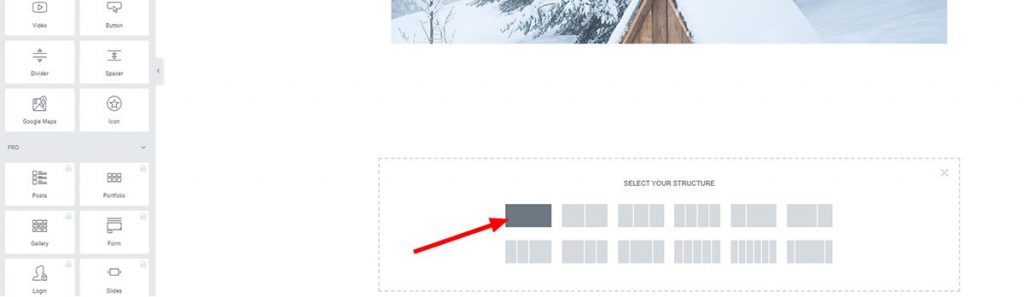
This Landing page is created with the widgets made by Element Pack. Making this type of Amazing landing page is not so easy. So, what you need now is to sit tight and watch the steps carefully. Let’s start by selecting the basic structure of the landing page.


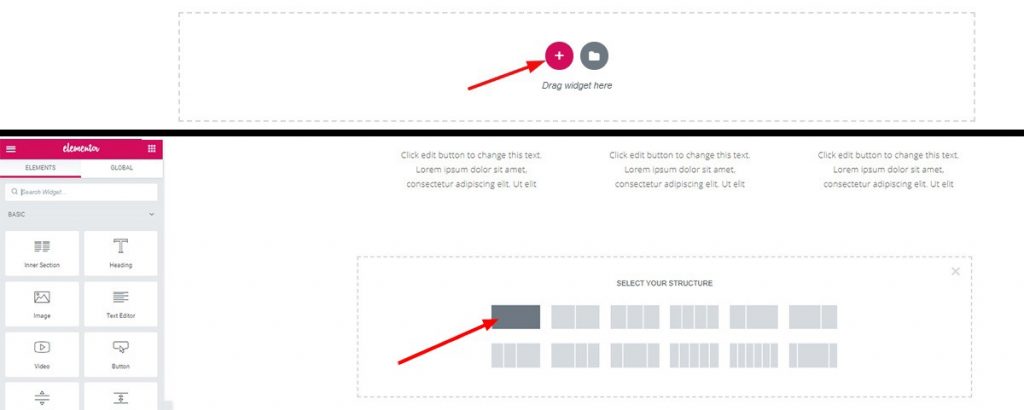
Step-1:
Click on the red button and select 1 column structure.
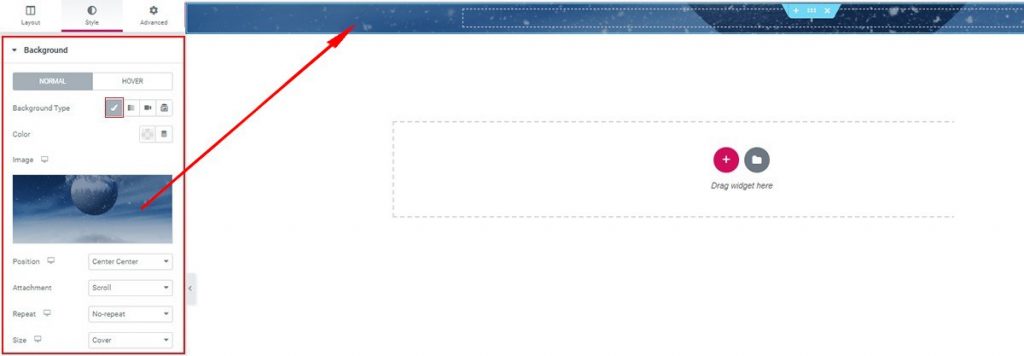
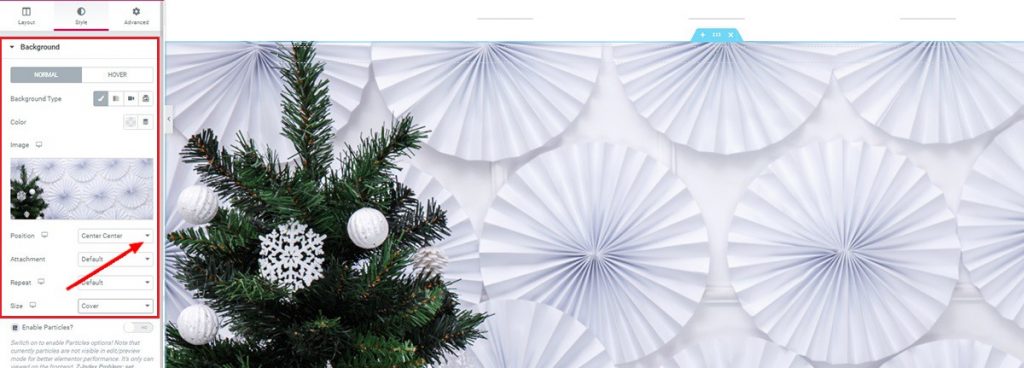
Step-2:
After that, go to the Style tab and put the background image on the landing page. Now, remember you need to choose the right image that goes well with your Christmas Tree Shop theme.
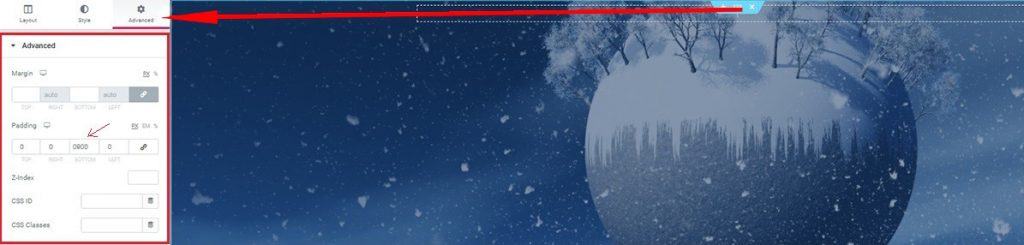
Step-3:
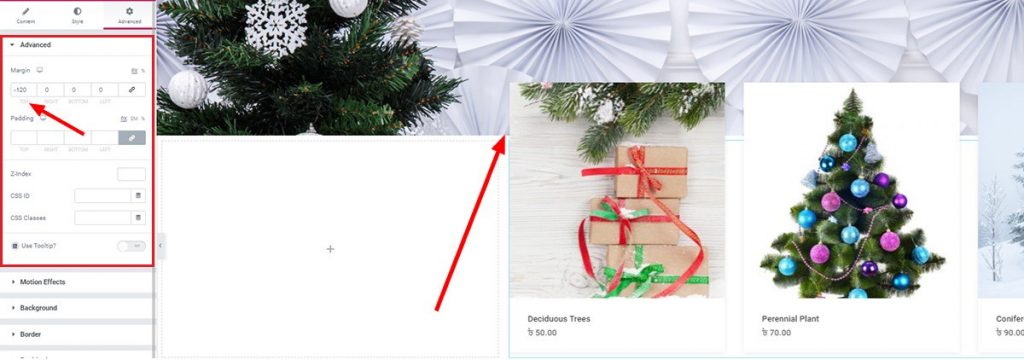
Now, go to its’ Advanced tab and edit the padding. Put 900 as the bottom padding value. This will make the section length big without affecting the Widget input area. By doing so, you can make your image appear without inconvenience.

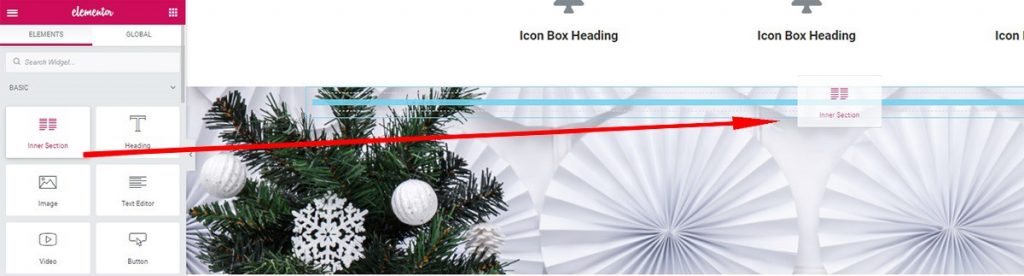
Step-4:
Now, add Inner Section widget from the basic Elementor toolbox. This widget makes a separate section inside the previous section. Once done, we move to the next part.
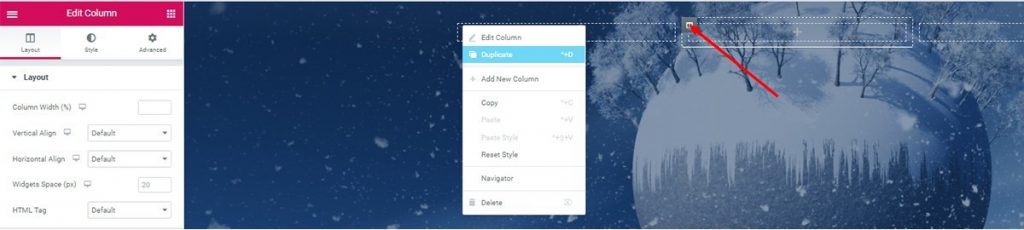
Step-5:
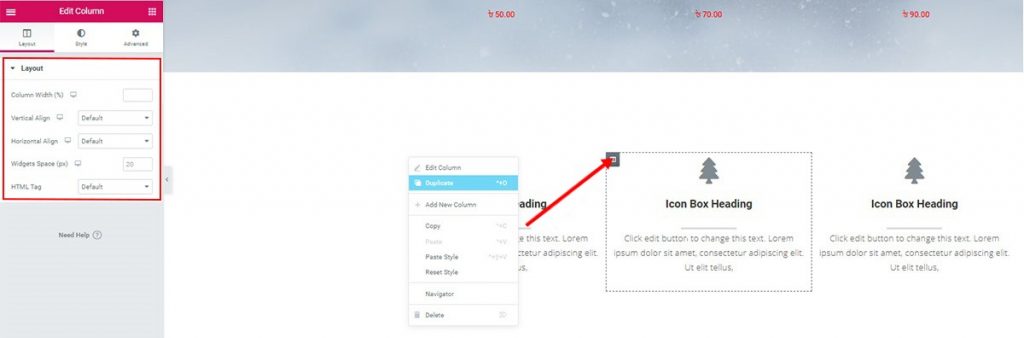
Click on the marked Column icon and select Duplicate to make a 3 column Section.
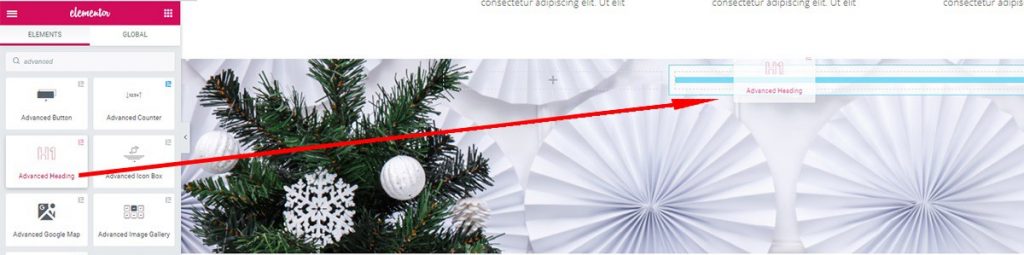
Advanced Heading Widget

Step-6:
Drag and Drop ‘Advanced Heading’ widget by Element Pack on the first column. You can turn it into a cool heading for your shop.
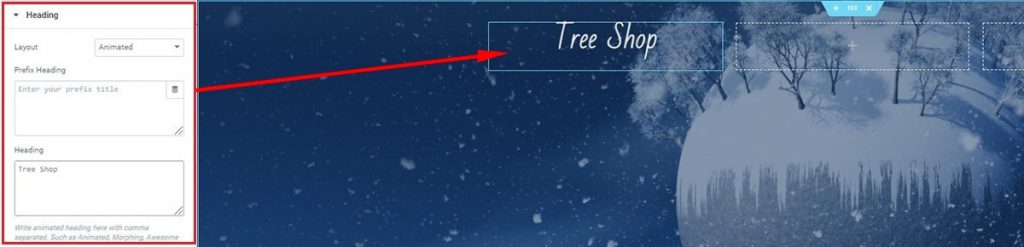
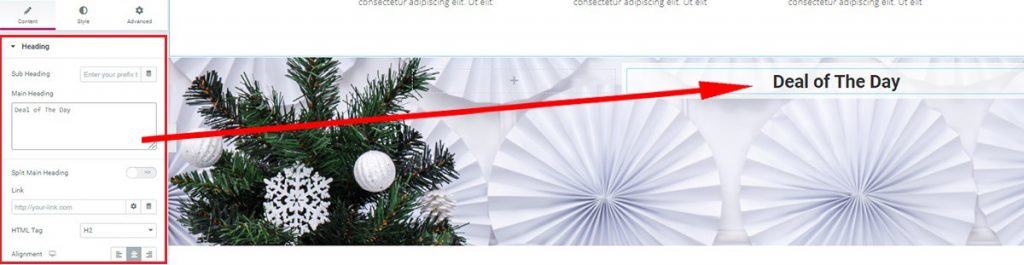
Step-7:
After dragging and dropping the widget, you will get to its Content tab. The Heading section is under the Content tab. Type your heading there.
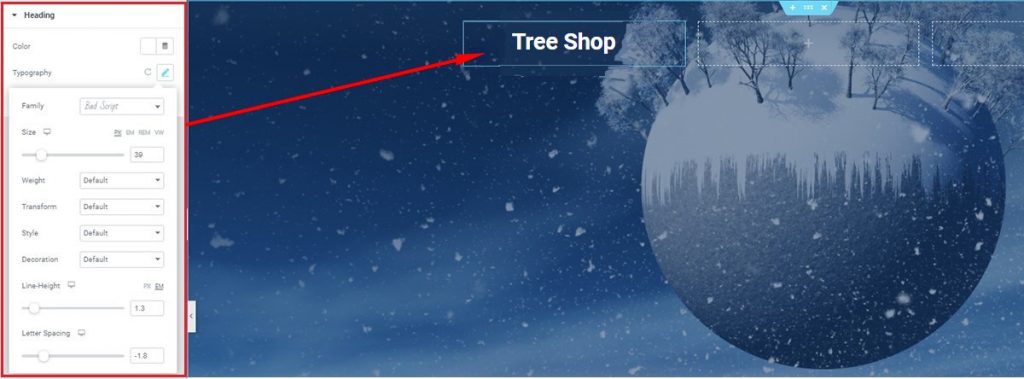
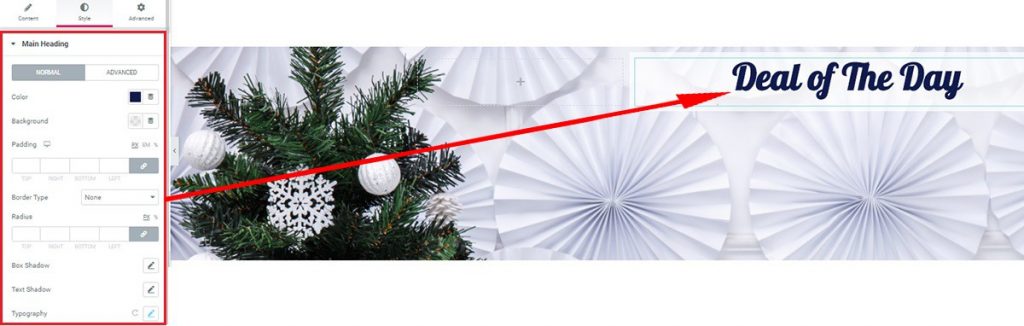
Step-8:
Next, go to Style tab> Heading> Typography and change the look of the title in the top section. You can find additional settings there. Try each of them and give a unique look to your title.
Scroll Navigation Widget

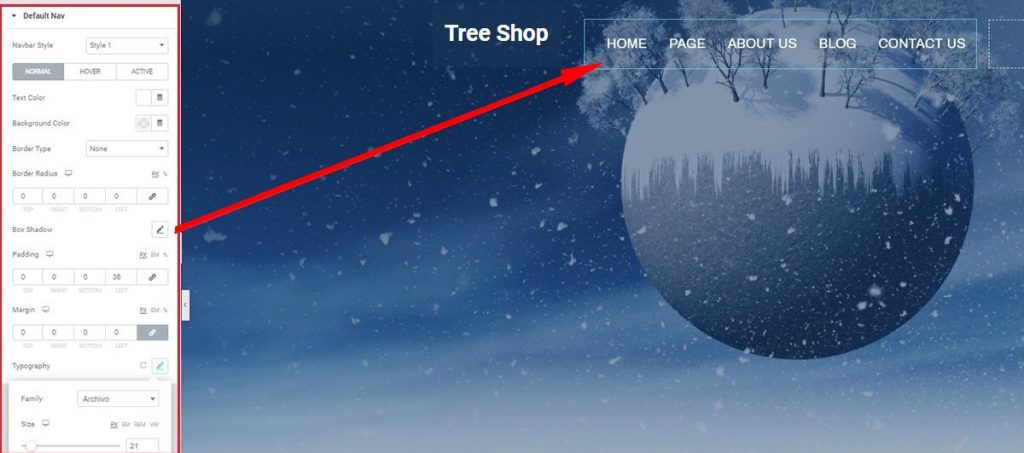
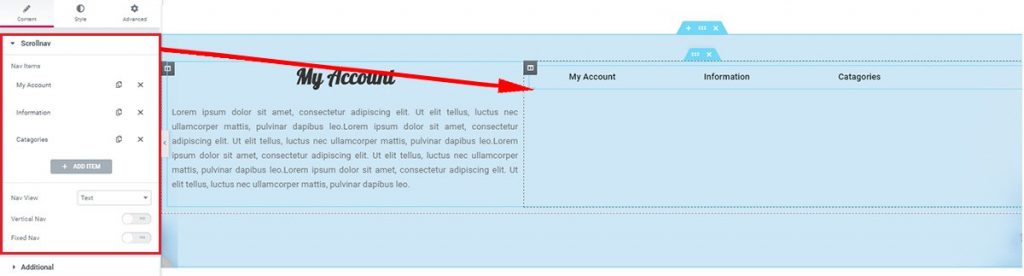
Step-9:
Up next, drag and drop Scroll Navigation widget on to the 2nd Column and start editing it right away. Note that, this widget, made by Element Pack, shows a menu bar for your Christmas Tree Shop.
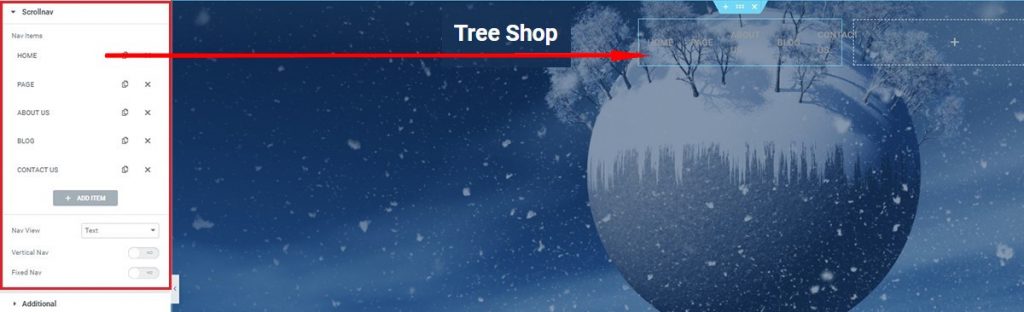
Step-9:
In the Content tab, under the Scrollnav section, you can see a bunch of repeaters that you can increase or decrease in number. Take a handful of repeaters and make your own menubar.
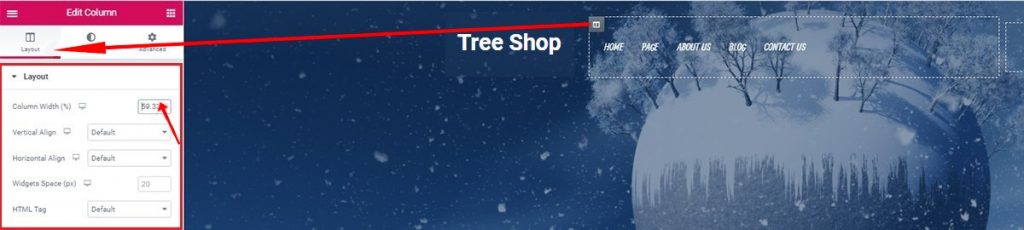
Step-10:
Again, click on the 2nd column icon and increase the column width close to 60. The change will give more space to arrange your Menu buttons.
Click on Column icon> Layout> Column width.
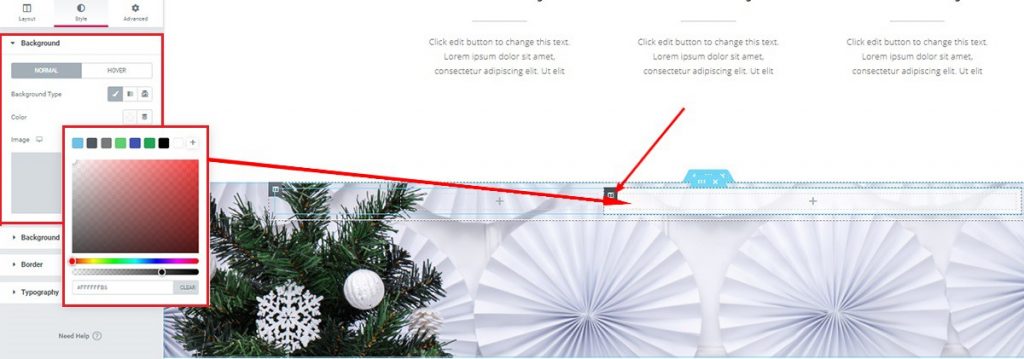
Step-11:
In the Style tab, you may change the background color, add some padding, edit the typography, and more. Bring up your own design and see the differences.
Advanced Button Widget
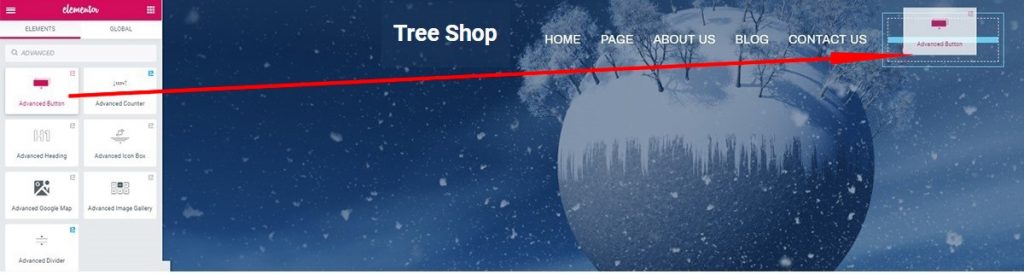
Step-12:
This widget is giving you a clickable button that you can link to your subscription page. It’s easy to use. Also, gives a satisfying look on your shop.
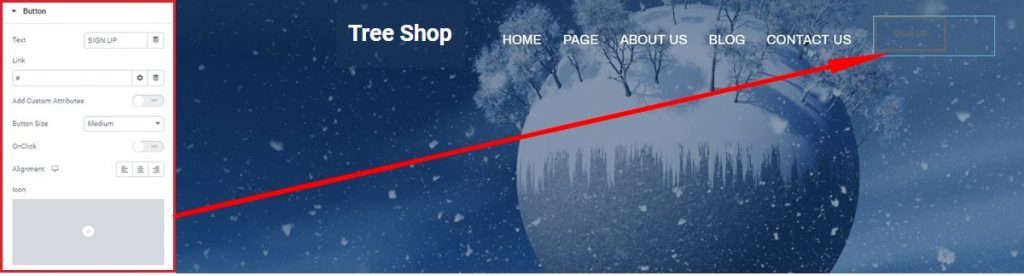
Step-13:
However, you can put any text to show on the button. For that,
Go to Content tab> Button and see the options.
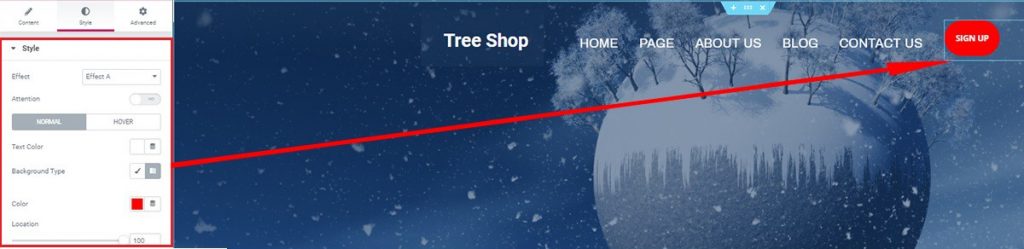
Step-14:
Moreover, you can also give it different looks as you like from the Style tab. Note that, a button that has an appealing color is very likely to be clicked by everyone.
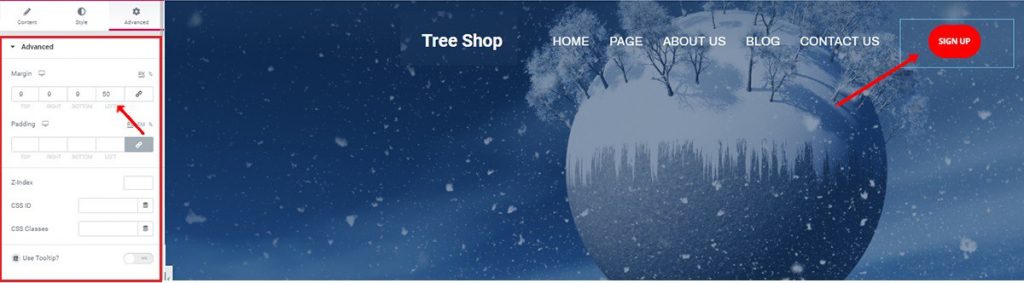
Step-15:
And lastly, add some margin values to position the button wherever it suits best.
Go to Advanced tab> Advanced section> Margin.
Advanced Heading Widget
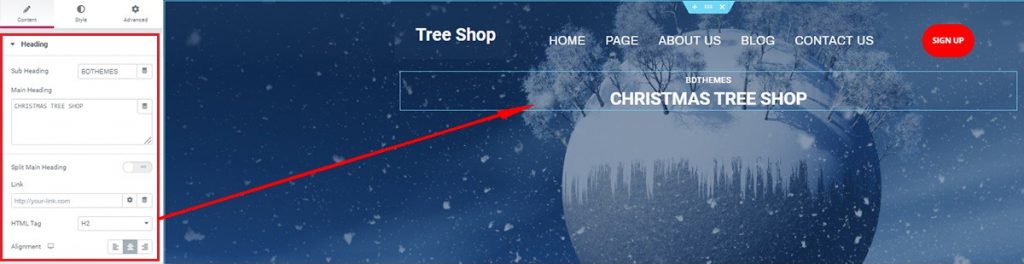
Step-16:
Let’s move on to the Advanced Heading widget. It’s a pretty handy widget compare to the free one Elementor provides. After dragging and dropping it under the previous section, you will see its Content tab. Here, you may name boldly of your Christmas tree shop with a sub-heading and main heading.
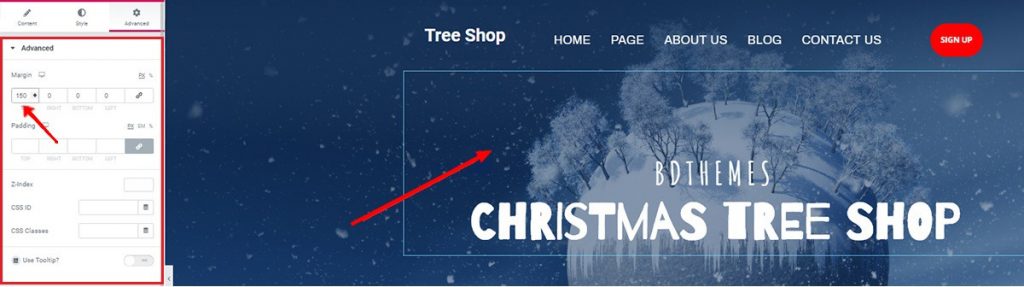
Step-17:
From the Advanced tab, you may add some values to the margin to reposition the heading as fitting. You may notice that the Style tab is missing from the explanation. Well, let’s leave that to your taste.
Text Editor Widget
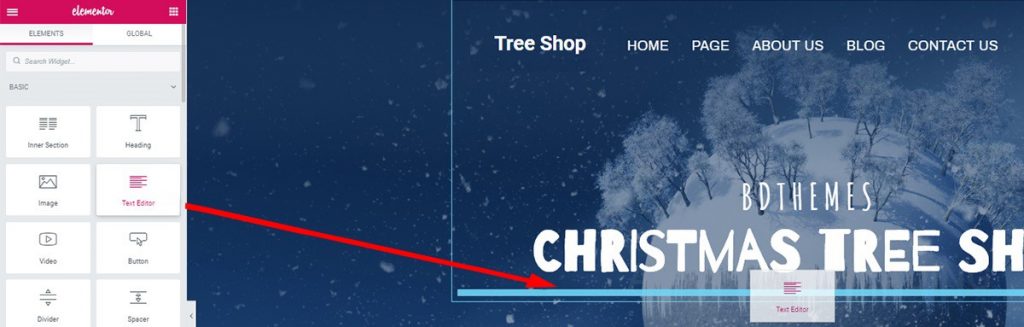
Step-18:
Well, you may add a line or two under the heading. This adds more weight to the hero section as it makes it more eyecatching.
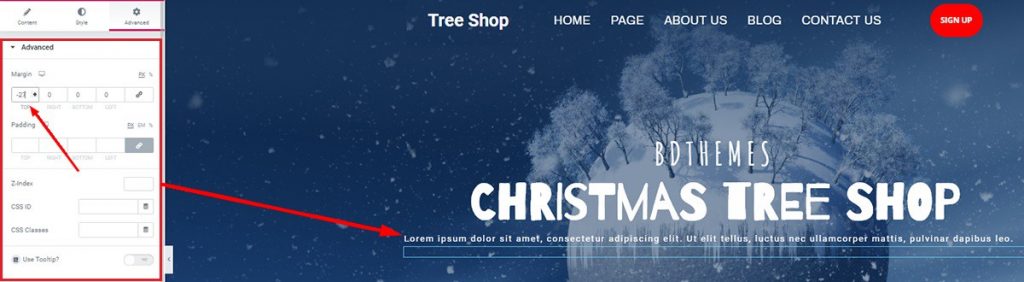
Step-19:
You can try adding top margin value in the negative to close it up under the heading area.
Finalizing Hero Section For Christmas Tree Shop
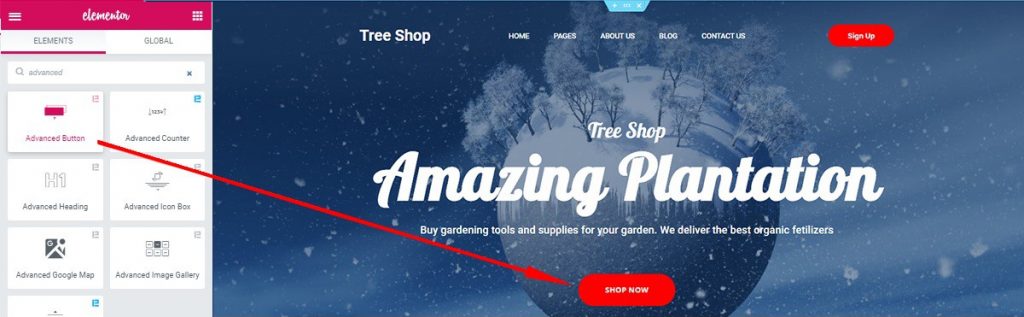
Step-20:
Just add another Advanced Button widget (made by Element Pack) at the end and see the full hero section. Amazing right? You may have noticed that the heading has a different look. Well, you can change it anyway.
Go to Advanced Heading> Style tab> Typography and change it away.
These selected widgets made by Element Pack were used to make this stunning hero section.
- Image/Logo
- Scroll Navigation
- User Login
- Advanced Heading
- Advanced Button
Product Showcase for Christmas Tree Shop
Time to show your goods to your visitors. Let me show you how you can do this step by step.
WooCommerce Product widget
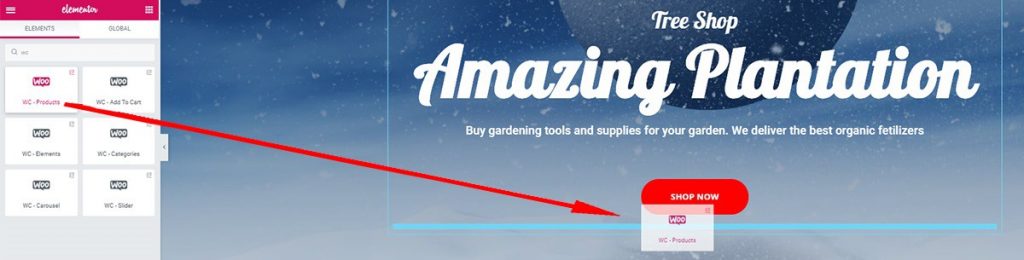
For the next step, drag and drop WooCommerce Product widget from Element Pack. It’s a 3rd party widget that is to be configured with the WooCommerce plugin on the dashboard.
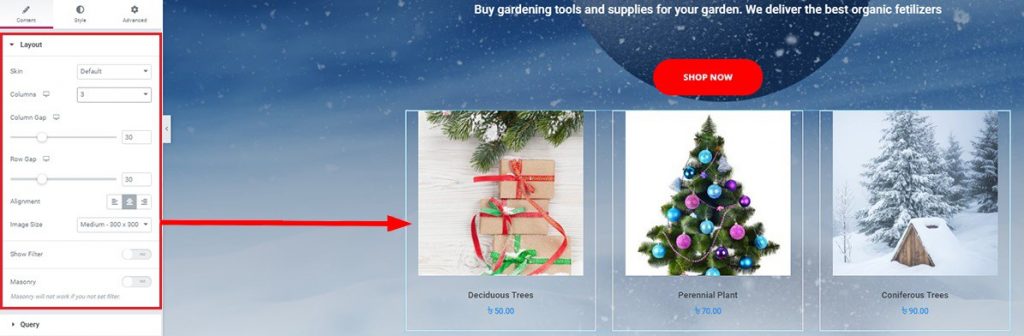
After listing your products, you can show your clients what goods you are offering. The best way to reach the customers is to showcase your product in your shop.

You can make the product images round and display at your Christmas tree shop. Convenient and looks great!
Go to Style tab> Image> Border Radius and change the settings.
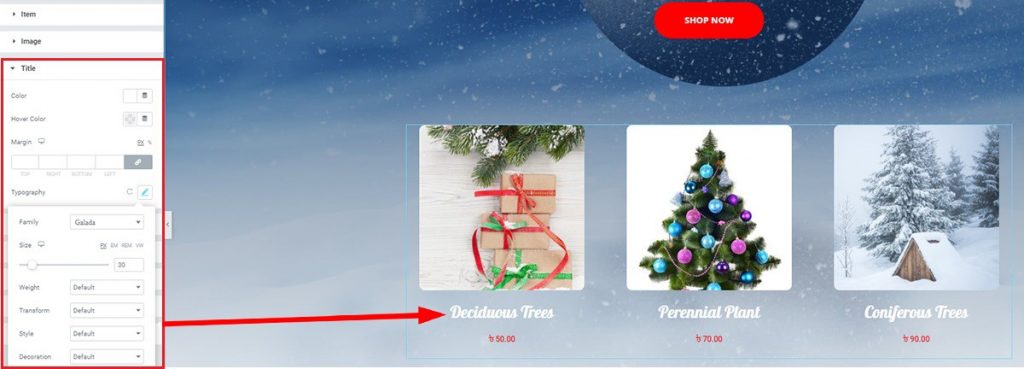
If you want to add a twist to the product titles, just change the typography of the title from the Style tab. Look for the perfect font that matches the background.
Features section of Christmas Tree Shop
In this section, you are about to show your visitors why they should buy from you. Throw in some of the features that define your shop and it will Boom the market. Let me show you how you can edit this section.
Advanced Icon Box Widget

After you make another section, don’t forget to edit the padding of the section. When you finished, add the Advanced Icon Box widget. This fine widget will definitely give your shop a premium look.
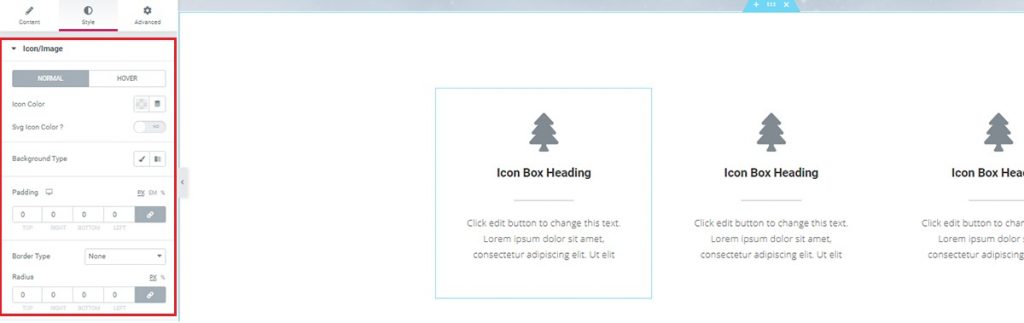
You can add any colors, edit the border, and also add paddings to adjust the height of your icon box.
Of course, you can duplicate them easily to reduce extra work. Just edit the duplicates to separate one another.
With this widget, you can give out a lot of information in a tiny package. Thanks to Element Pack for making such convenient widgets for us. Learn more about them at Element Pack Demo.
Special Promotion of Christmas Tree Shop
Make your visitor stuck with ‘Countdown widget’ to the shop by throwing your best discount product on the full-scale page. As a fact, your Christmas tree shop visitors can’t resist your offer. Also, another Woocommerce Products widget to display the offer products. Let’s get into it!
Step-1:
Click on the red plus and make another 1 column section.

Step-2:
Click to edit the section and from the Advanced tab, set the bottom padding to 250.
Step-3:
Set a good looking background for this section. Make sure the color-contrast is matching sequentially with the whole page.
Step-4:
Now drop an Inner Section widget from the drag and drop menu.
Step-5:
Set the 2nd column color as white from the Style tab.
Step-6:
Now drop an Advanced Heading widget on the 2nd column.
Step-7:
Edit your choice of heading from the Content tab and Style tab.
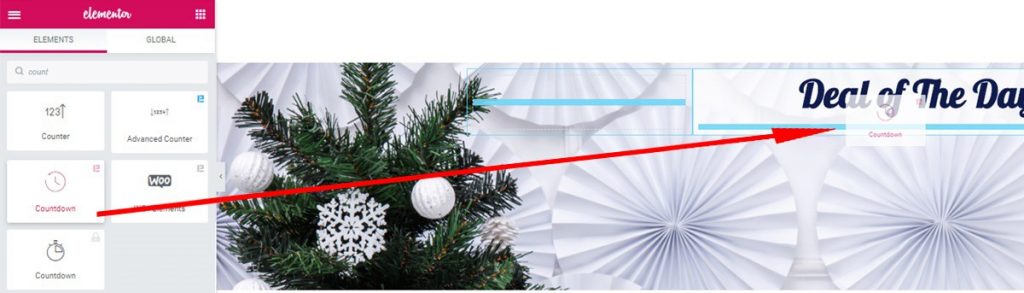
Step-8:
Drag and drop the Countdown widget, made by Element Pack.
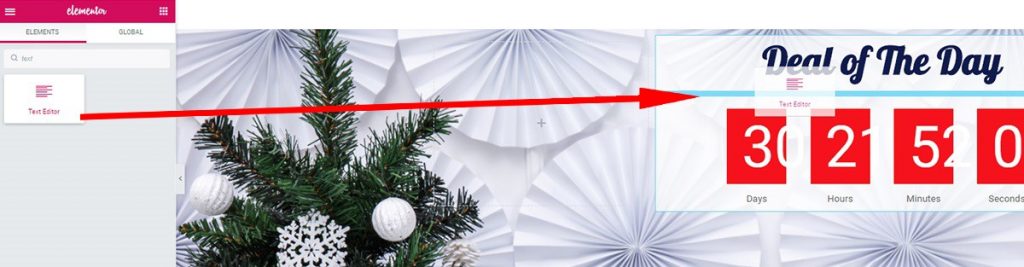
Step-9:
At this point, you can insert a Text Editor widget between the heading and countdown widgets. This will give out a premium look at this section.
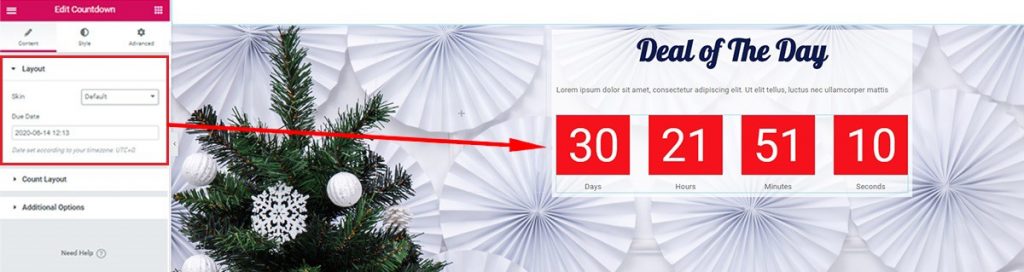

Step-10:
The layout under the Content tab shows the basic settings for the Countdown widget. You can change the background color and font of the countdown timer from the Style tab.
Go to Style tab> Typography> and see other options.
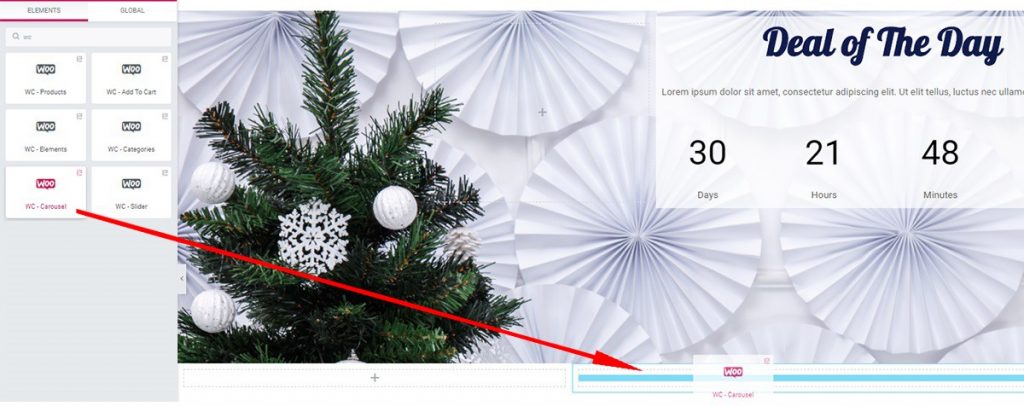
Step-11:
Now make another section at the bottom and drop a WooCommerce Carousel widget into there.
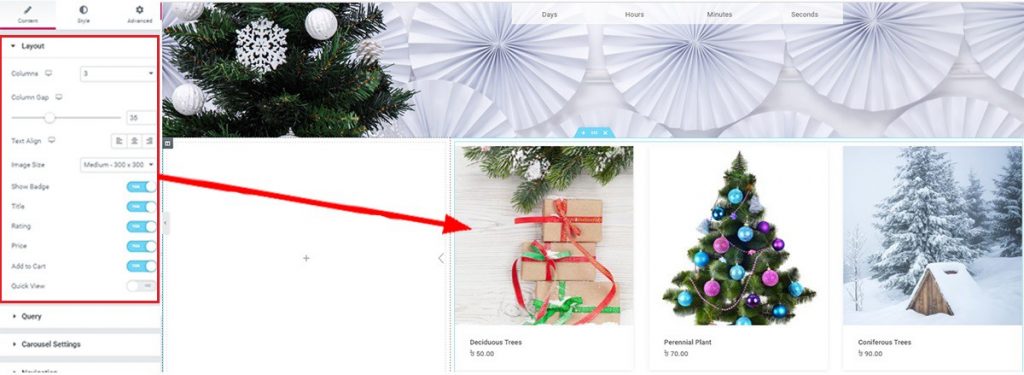
Step-12:
You can edit the Layout section or Querry Section under the Content tab. By editing these, you can choose what products should display in this Carousel.
Step-13:
Twist things into a bit more gorgeous looking by putting negative value in the top margin. This action will toss a part of the carousel widget into the upper section. While keeping its shape over the background, it looks like a stunning finish, doesn’t it?
Alright, at this point, you have completed half of your page. Though a little bit lengthy, trust me, you will thank me after finishing this article. Take some rest and continue to the next section.
Client Review of Christmas Tree Shop
Showcase the reactions of your clients, 5-star comments, or shoutouts in this part. Make your visitor understand what you have achieved so far with your Christmas tree shop. Of course, Element Pack has an amazing widget ‘Testimonial Carousel’ to cover this up.
Making this section is easy. Just follow the steps.
Testimonial Carousel Widget
Step-1:
At the end of the special promotion section, add a new section, and set its background with a deep color image.
Step-2:
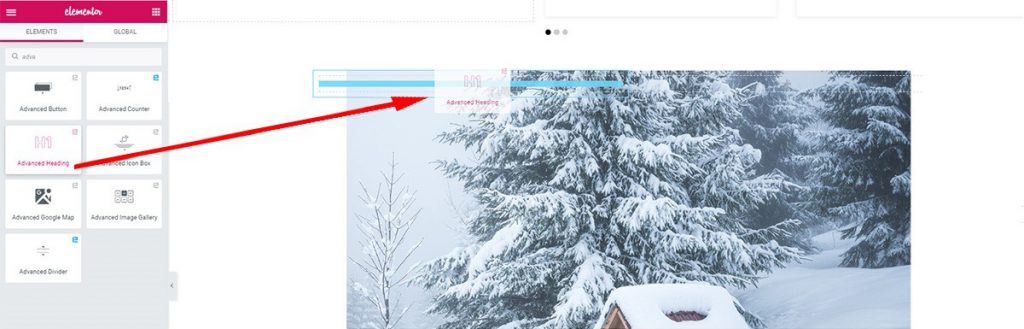
After adding some bottom padding on the section, add Inner Section widget. In the first column, add Advanced Heading.
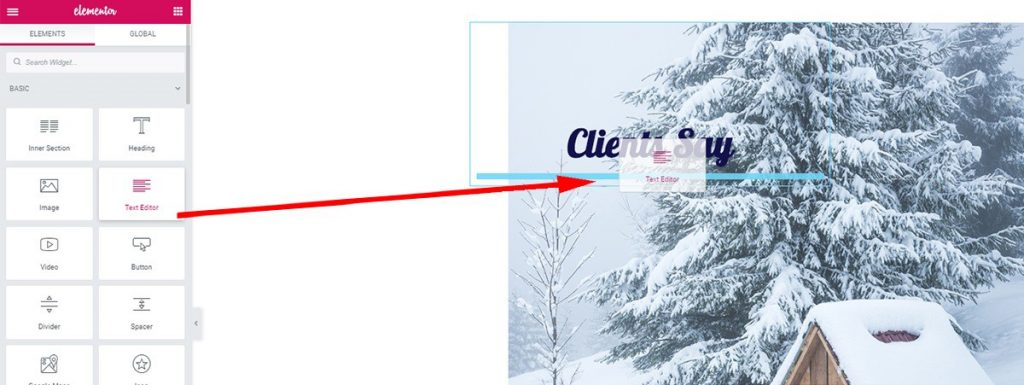
Step-3:
Add margin on the header column and drag-drop a Text Editor widget underneath.
Go to Advanced Header> Advanced> Margin> and add 150 to the top.
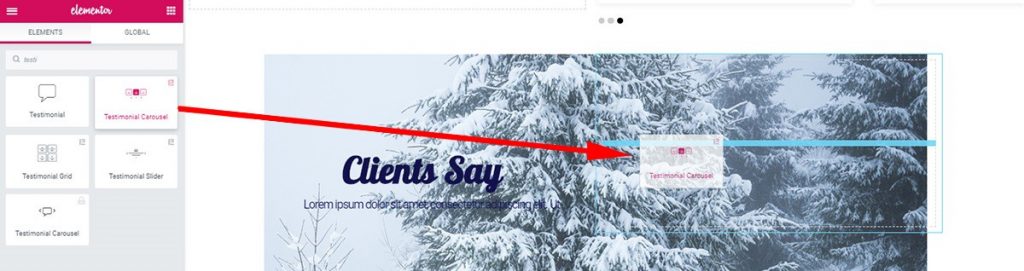
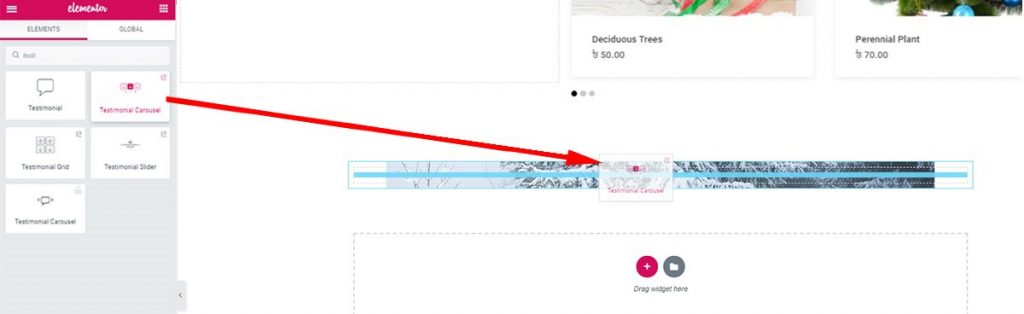
Step-4:
After giving the first column the look you want, move onto the next part. Drag and drop the Testimonial Carousel widget on the 2nd column. Note that, this widget is listed as a 3rd party on the Element Pack plugin.
Step-5:
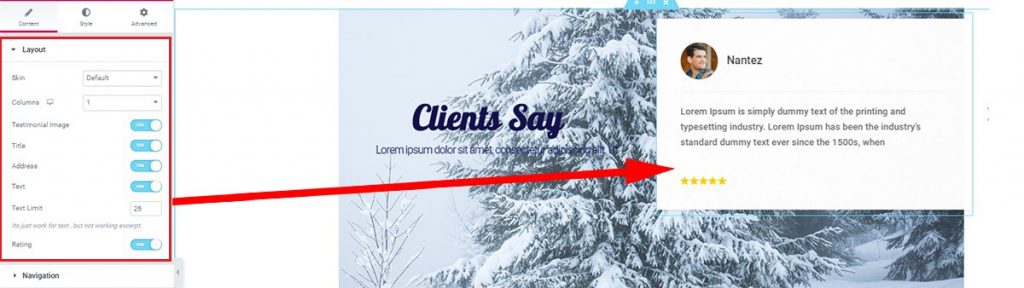
The testimonial widget will show the data presented on your website automatically. Or you can input manually from the dashboard. There’s a bunch of options in the Layout section under the Content tab. Make sure to check those out.
Step-6:
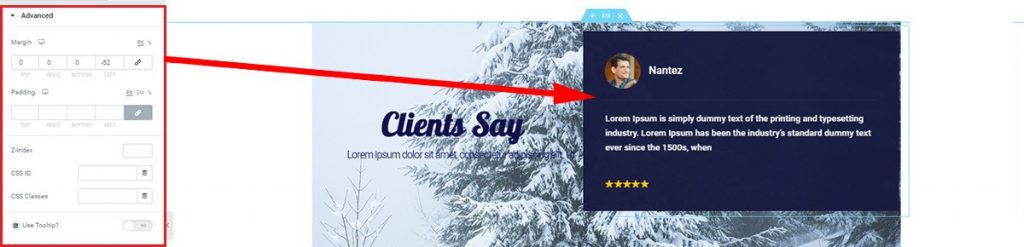
Lastly, check out the Style tab to give this client review box a unique look. No need to worry that much. Just match the color of your Christmas tree shop theme to this section.
Newsletter of Your Christmas Tree Shop
Ensure your customers’ privacy and call them to action by adding this section into your Christmas tree shop. Mailchimp widget by Element Pack is used in this case. This lets your customers drop in for information and get hook up with your business. See how it’s done-
Mailchimp widget
Step-1:
Add a new section underneath the Client Review section.
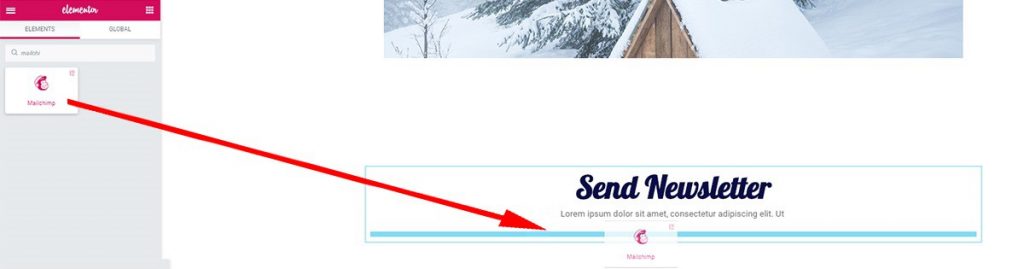
Step-2:
Then, add Advanced Header widget and Text Editor under it. And, lastly, add Mailchimp widget from the drag-drop menu.
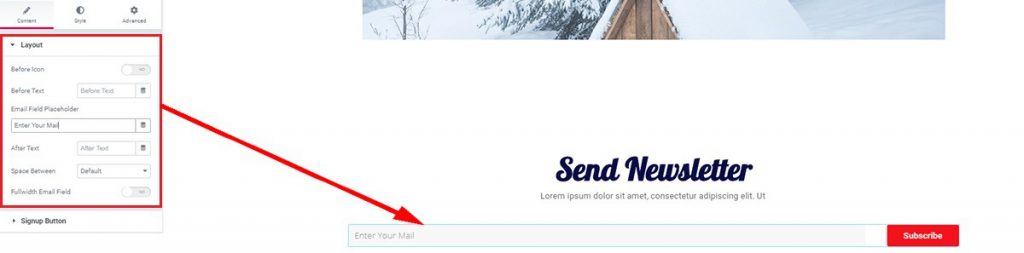
Step-3:
You can edit the layout inside the Content tab. Change the email field specifier or button text from here.
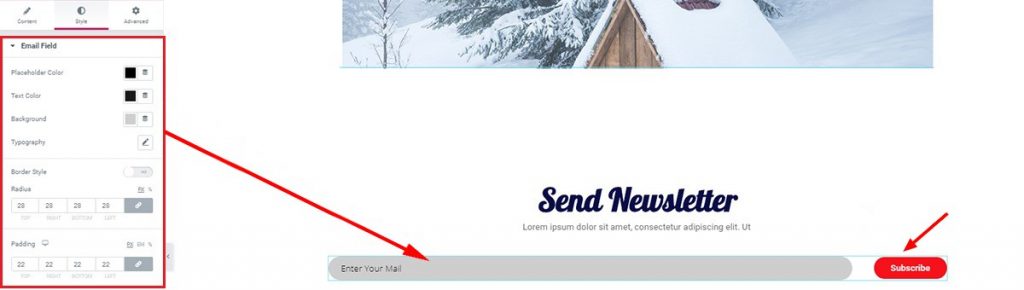
Step-4:
You will get more options to further customize the looks of the Mailchimp widget from the Style tab. Create a stylish Newsletter to attract people towards your Christmas tree shop more.
Footer of Your Christmas Tree Shop
Lastly, make another call for action to your shop website visitors. Make him his own account option to lure his interest in. Also, make an additional product list, or encouraging FAQ to let them know that they desire your goods. This part is important because it creates more attraction in the end. Using widgets made by Element Pack you can achieve this easily.
Now that we have many ready templates to use as footer, I will just show you an easy way of making one. Let’s get going-

Step-1:
Create a new section and select a colorful background for it. Then drop an Inner Section widget from the menu. Now, insert the Scroll Navigation widget into the 2nd column. As you already know how the widgets work, I won’t be explaining this time. Take another look at the Hero Section.

Step-2:
Now insert Advanced Heading and Text Editor widgets simultaneously on the 1st column.
Step-3:
And after a bit of editing, your footer should look like this.
Conclusion:
Woah! You have made it to the very bottom of this article. Congratulations! Now that you have read the whole process, I guaranty that you can make one right now. All of your hardworking and this huge amount of focus will pay off. You can make your dream Christmas tree shop on your own now.
!!Big News!!
The Christmas Tree Shop webpage is now available as a Template on Element Pack. Grab your free template now!
Thanks for keeping patience. Enjoy a good day!