Build WooCommerce Website Using Elementor and Element Pack plugin
We know you’re looking to inaugurate a WooCommerce Website and start trading products over the Internet, aren’t you? It is a little bit a daunting task but not impossible. In this post, we’re going to show you actual steps to help you to build WooCommerce Website using Elementor and Element Pack.
This kind of website is a combination of some tools such as Elementor, WooCommerce, and a suited theme (recommended Rooten Theme). If these tools are new, you might look them up.
Let’s move on and see.
Building WooCommerce Website step by step
We’re going to show you step by step how to create WooCommerce Website using Elementor and Element Pack.
Step-1: To begin with, you’ve to make sure that you have an installed WordPress CMS (Content Management System).
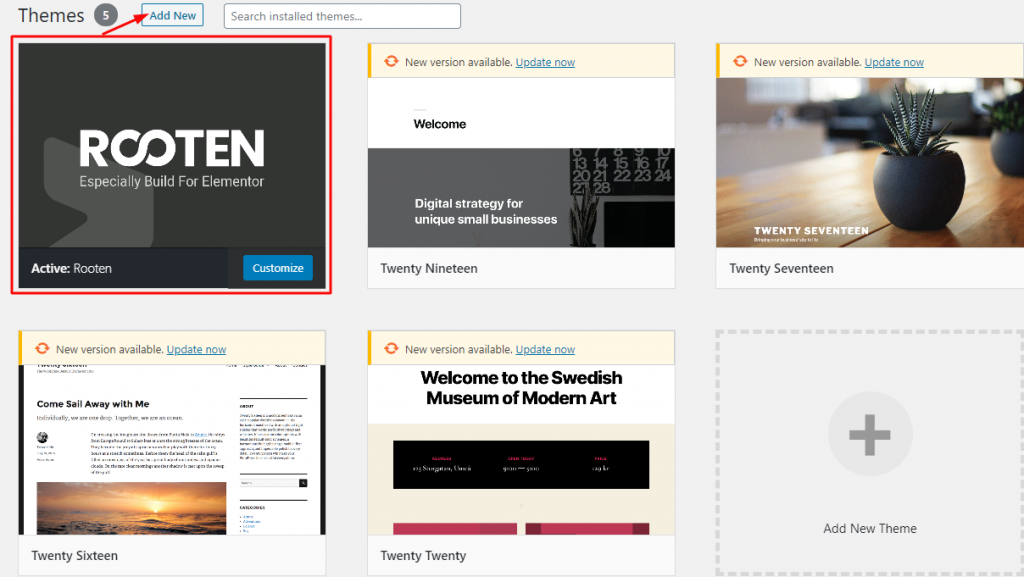
Most importantly here, you will have to install a theme first and then activate. And to do that go to WordPress Dashboard > Appearance > Theme > Add New.
Step-2: In this step, you must install and activate the Elementor a page builder Plugin.

Simply go to WordPress Dashboard to Plugins > Add New > search Elementor in the search box > then hit Install and activate.
If done, you’ll find the plugin exactly left side in the panel of the dashboard.
Step-3: This step will let you install and activate the WooCommerce plugin. Remember, this plugin will be one of your main tools.
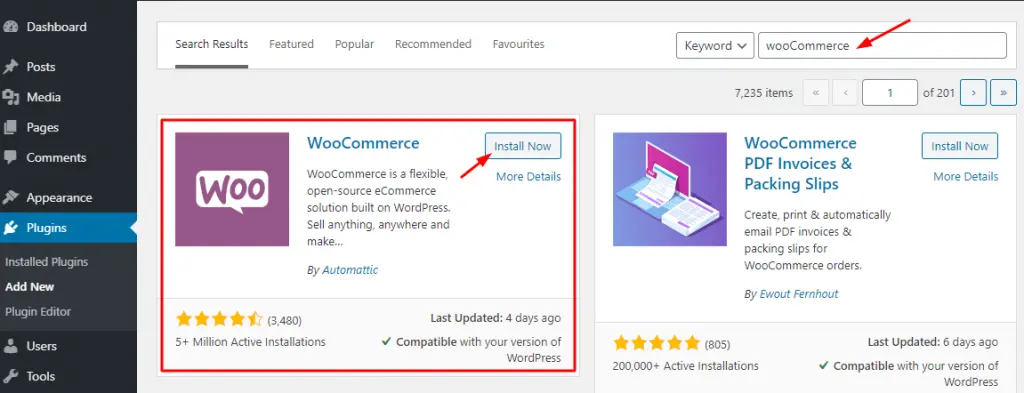
Just go to WordPress Dashboard to Plugins > Add New > search WooCommerce in the search box > then hit Install and activate.
Furthermore, you have to go through a few more options namely:
i. Providing Basic Information
ii. Setting up Payment Gateways
iii. Shipping Configuration
iv. Connecting WooCommerce with Jetpack
v. Finalize the setup of WC
To do all these things, visit elementor.com
Is this enough? Quite enough but we’ve to go a little forward.
Adding Products With WooCommerce
Products menu will allow you to add the products you want to populate and sell.
Step-1: Here you can add your product items with Categories, Tags, and Attributes. Just go to Products > Add New. Every time you have to add products in this way.
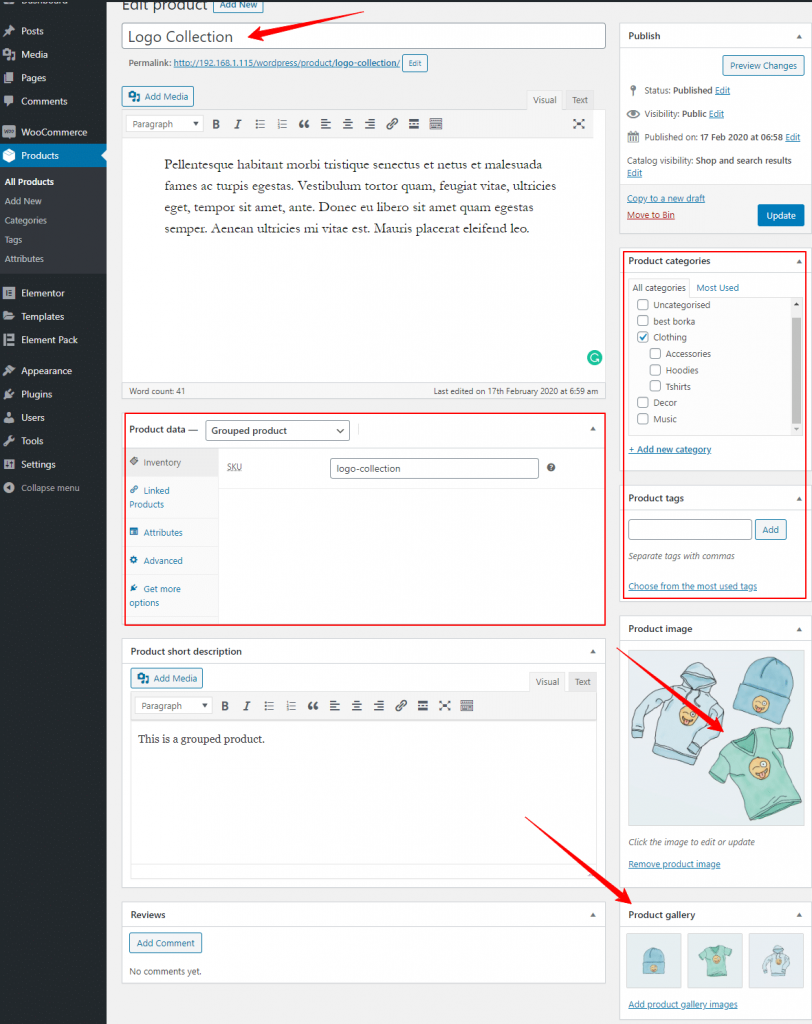
One more thing is to do that you can set Product data, short description. Look at the screenshot above carefully.
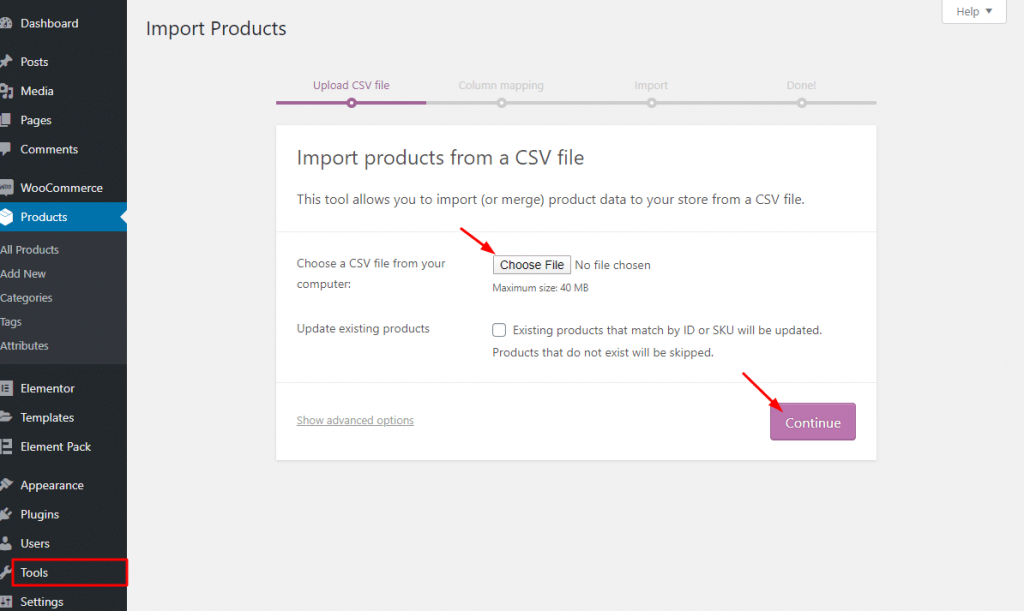
step-2: If you want you can show sample_products data in CSV/XML file provided by WooCommerce. Simply go to Tools > Import > WooCommerce Products(CSV)> then hit on the Run Importer. You can do this only for demo purposes.
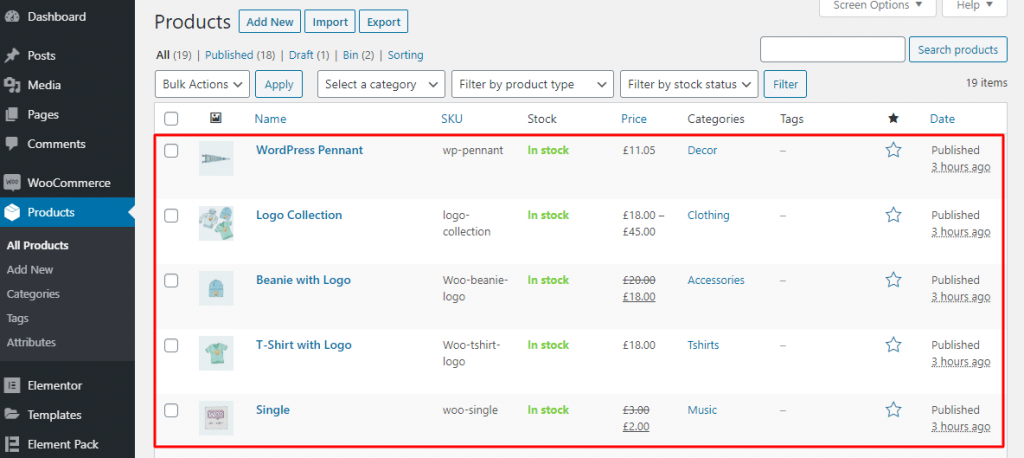
Step-3: After adding products, from the Products > Add New and saving, you can find your products in the list under as you can see.
Product Page via Elementor and Element Pack
It is very certain that you can also customize the look and feel of your products with Elementor. There is a little trick I wanna suggest you allow a plugin Element Pack to get a better look and feel of products. Yeah, these two plugins integrate with WooCommerce.
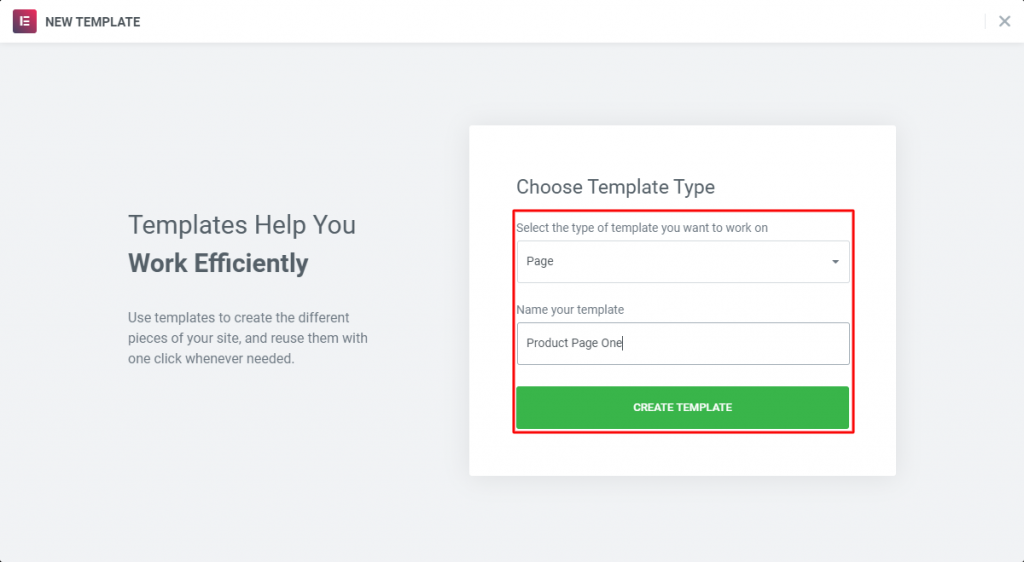
Step-1: To create a new product template, simply go to Templates > Add New.
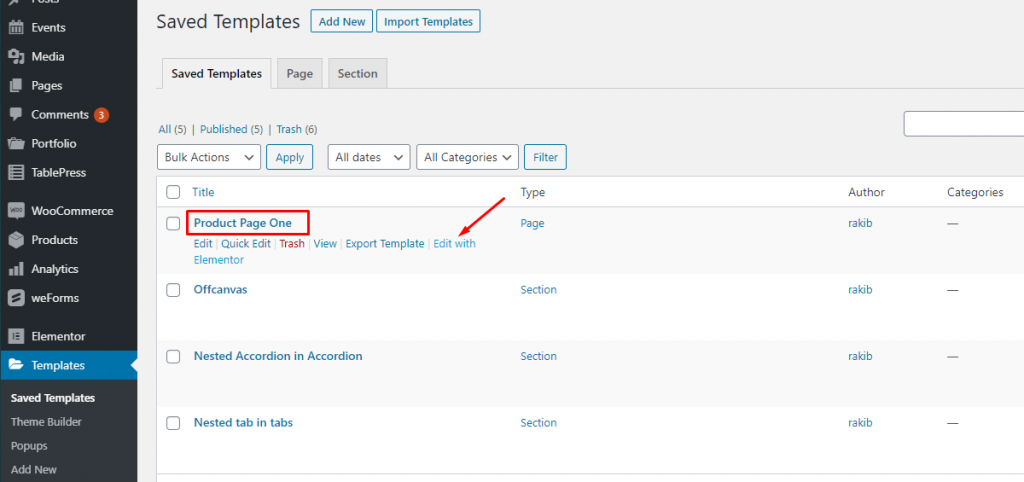
After creating a template and publishing, you’ve to open it in Elementor. After that, you’ll find a variety of widgets for WooCommerce.
With the default Widgets of Elementor (Free/ Premium), if you install Element Pack, you’ll find more widgets to create your products page. See the photo below.
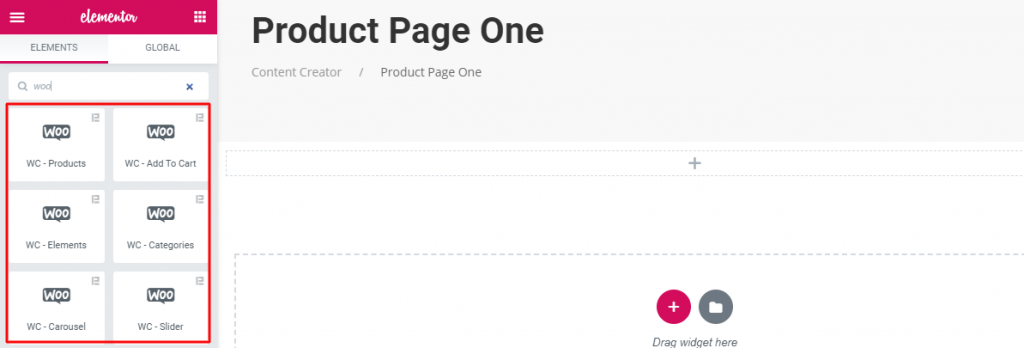
This plugin has some very strong widgets including WC-Products, WC-Add To Cart, WC-Categories, WC-Slider, WC-Elements, WC-Carousel, and WC-Mini Cart that will give you supports in the terms of showing products and services for WooCommerce.
Step-2: In this step, I’ll show you how to use Widgets of Element Pack for WooCommerce.
First, drag and drop any widget (mentioned above).
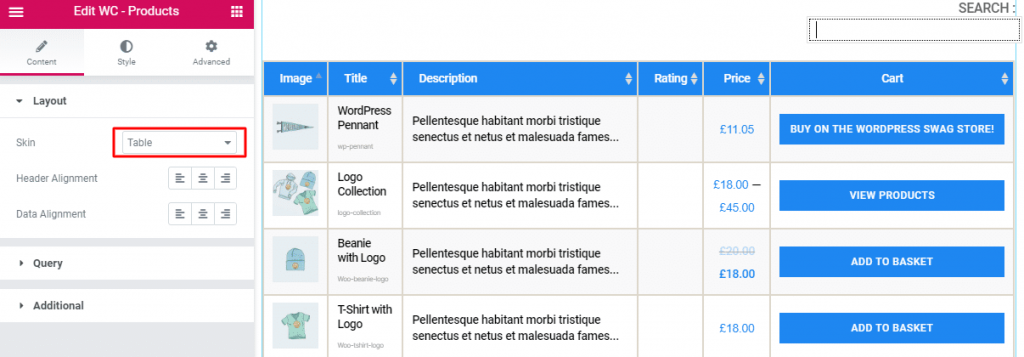
Layout:
This widget in the Layout section will allow you to show your products grid-wise and table-wise by the Skin controls.
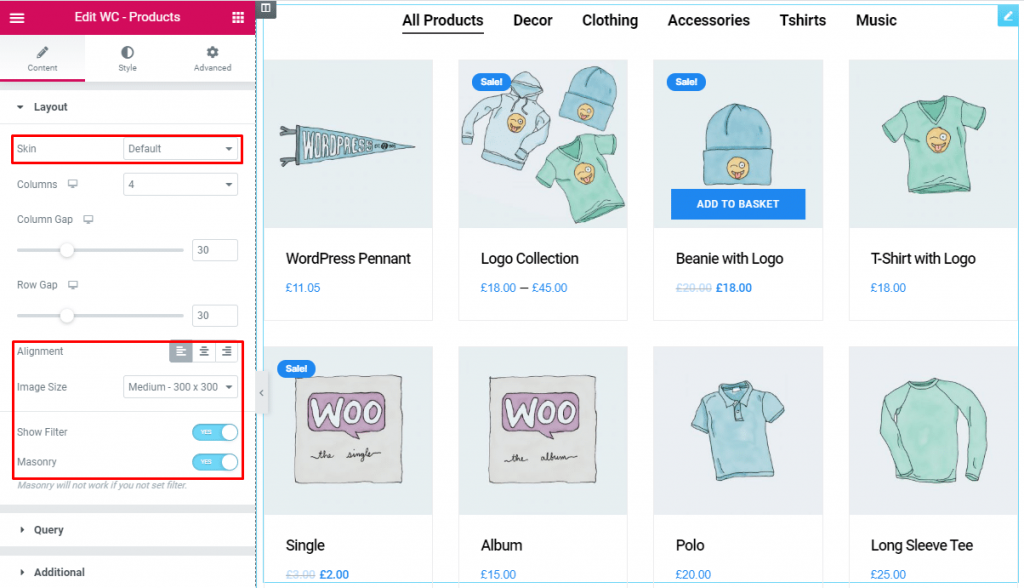
Moreover, in this section, you can set the product image size and product filtering with masonry.
Simply, go to Layout > Skin(default/table) > Alignment> Image Size > Show Filter > Masonry.
Query:
This section works for setting the source location of data that you need to display by the reference like Author, Categories, Tags, and Formats. The references can be different in accordance with the source location. Read more
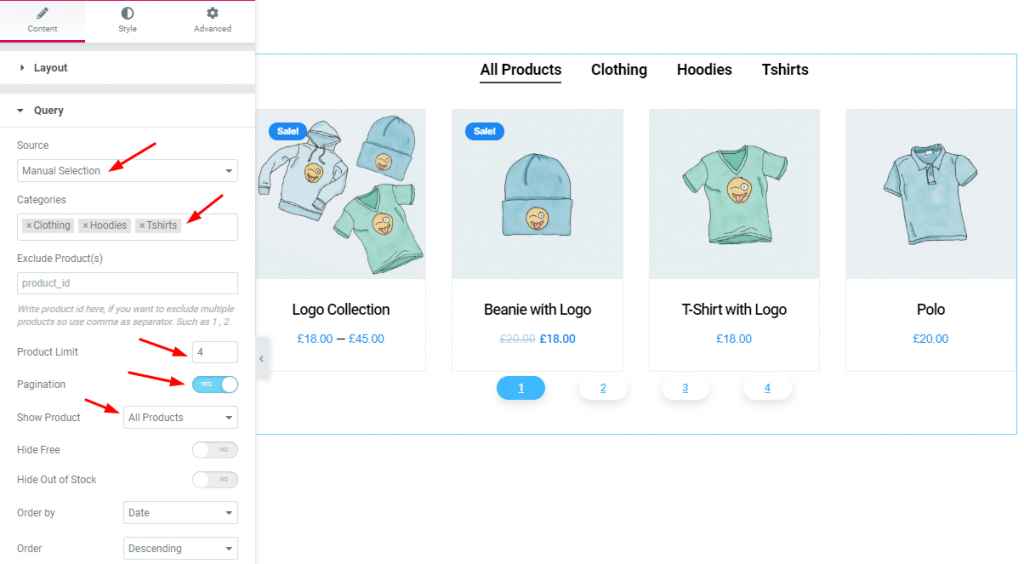
Go to Query > Source (Show All / Manual Selection) > Show Product (All products/ On Sale/ Featured).
Most importantly, you can set Pagination and Product Limit and you can show product id-wise from Exclude Product(s).
Additional:
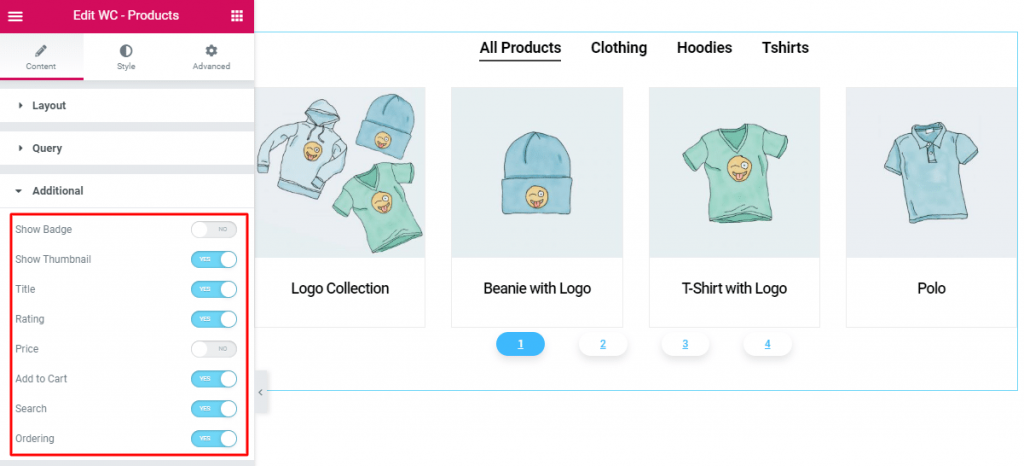
From this section, you have a chance to manipulate the Badge, Thumbnail, Title, Rating, Price, Add to Cart, Search, Ordering of the products. Just work with Yes/NO switcher button.
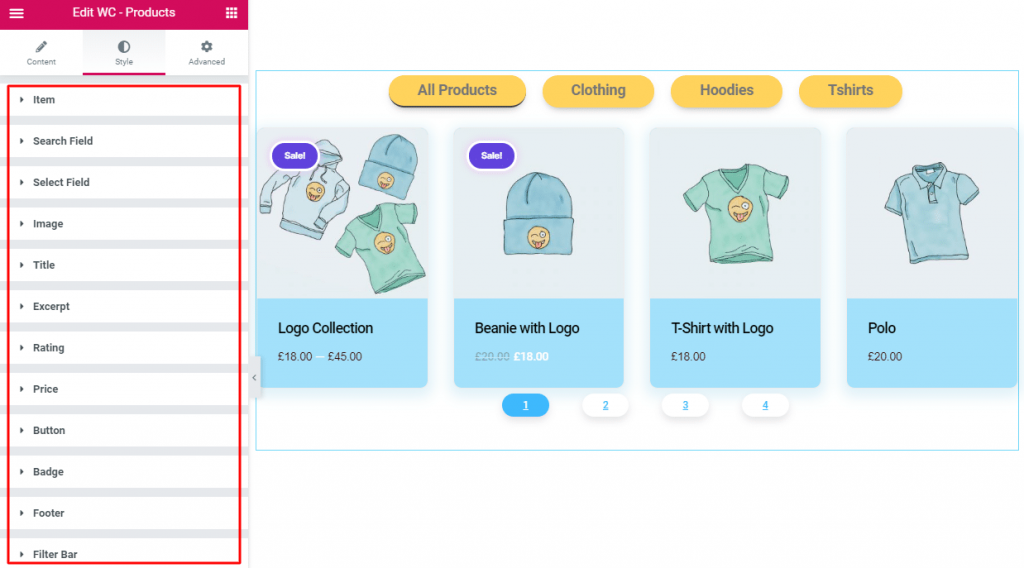
Style Tab:
For styling, you will have to Style Tab and give style as you can see the below screenshot. Here, you’ll be able to style the content section by section such as Item, Search Field, Select Field, Image, Title, Excerpt, Rating, Price, Button, Badge, Footer, Filter Bar.
Along with WC-Products widget, you will find 6 more widgets in the Element Pack plugin as I’ve mentioned above. Using the widgets, you will be able to display your products for sale.
WooCommerce Management Details with Options and Settings
Here, I’ll explain each and every menu item one by one so you know exactly what’s going on there.
Orders
This one will show the current status of orders at your shop. You will see here are the numbers and type of items sold, and to whom.
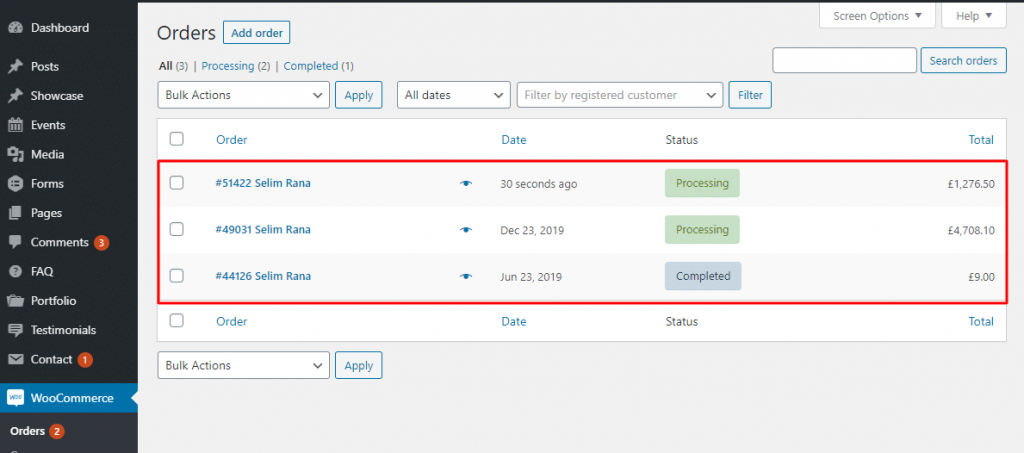
In addition, you will experience many different statuses (pending payment, on hold, refunded, failed canceled, etc.). You can click on each order to modify billing or shipping addresses, add notes, refund order, change the contents of the order, and more.
Coupons
We think it is a very familiar concept to you. Here, you can create and manage discount codes.
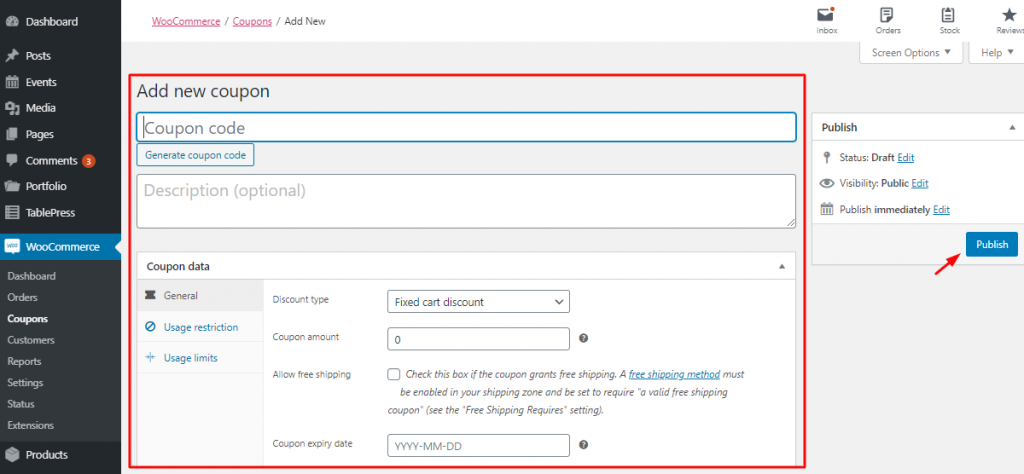
Especially, you can handle coupons expiry date and usage restrictions and limits on how many coupons are available to be used overall or per customer.
Reports
This section will inform you of the detailed summaries of every aspect of your shop.
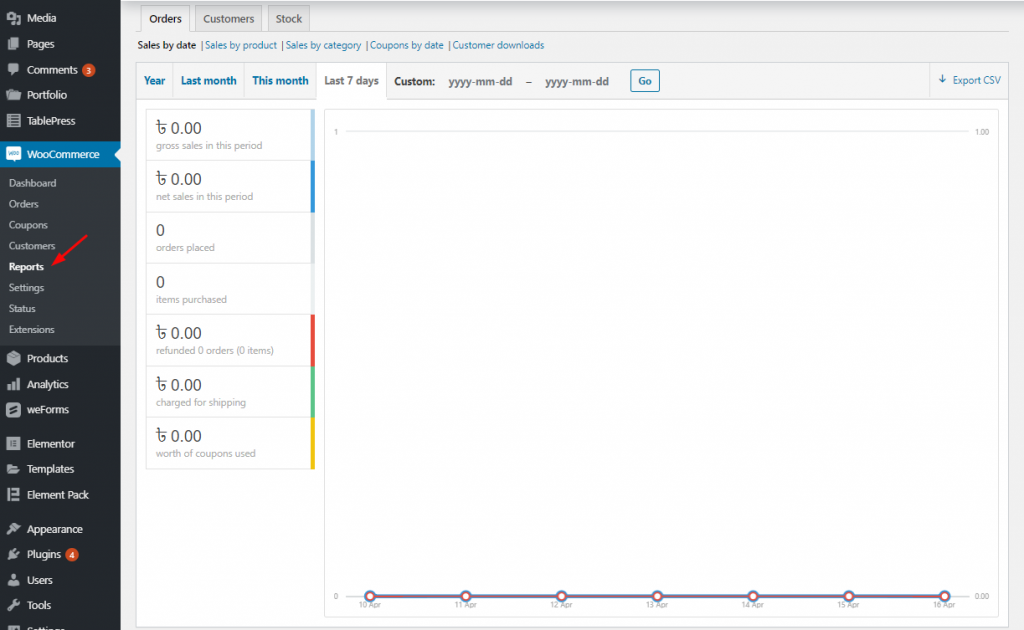
This includes orders placed, items purchased, refunds, issued, shipping costs collected and coupons used and it also holds gross and net sales of the last 7 days, months, year or custom time frame.
Moreover, along with sales by product, categories, coupons used or customer downloads, you may find detailed information on customers, taxes, and stock.
Settings
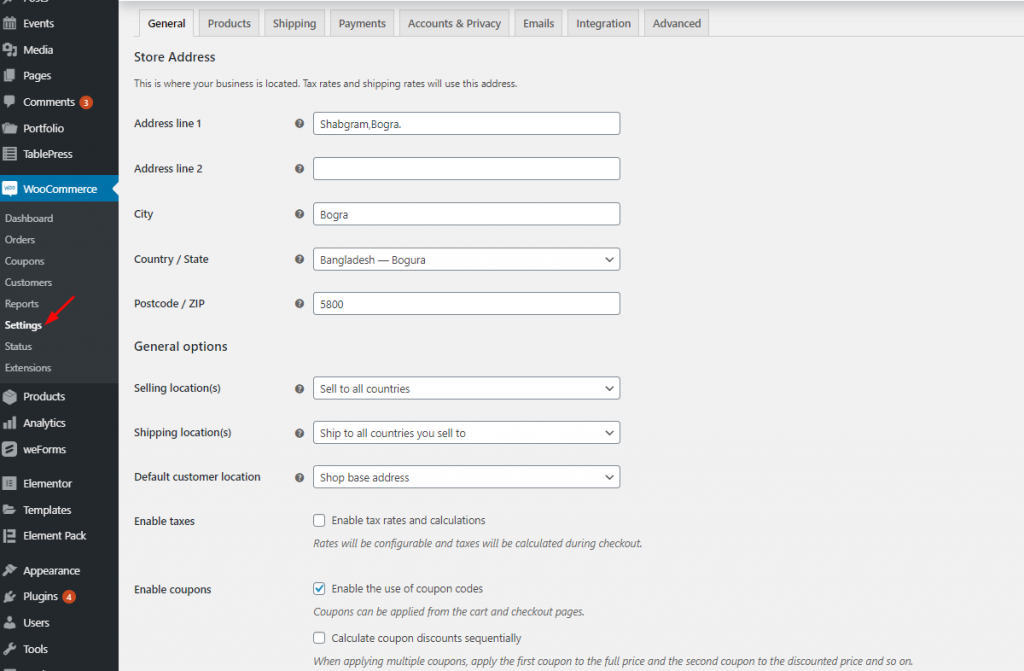
If you gotta control everything in your online e-shop. It has a lot of configuration options to help you.
Status
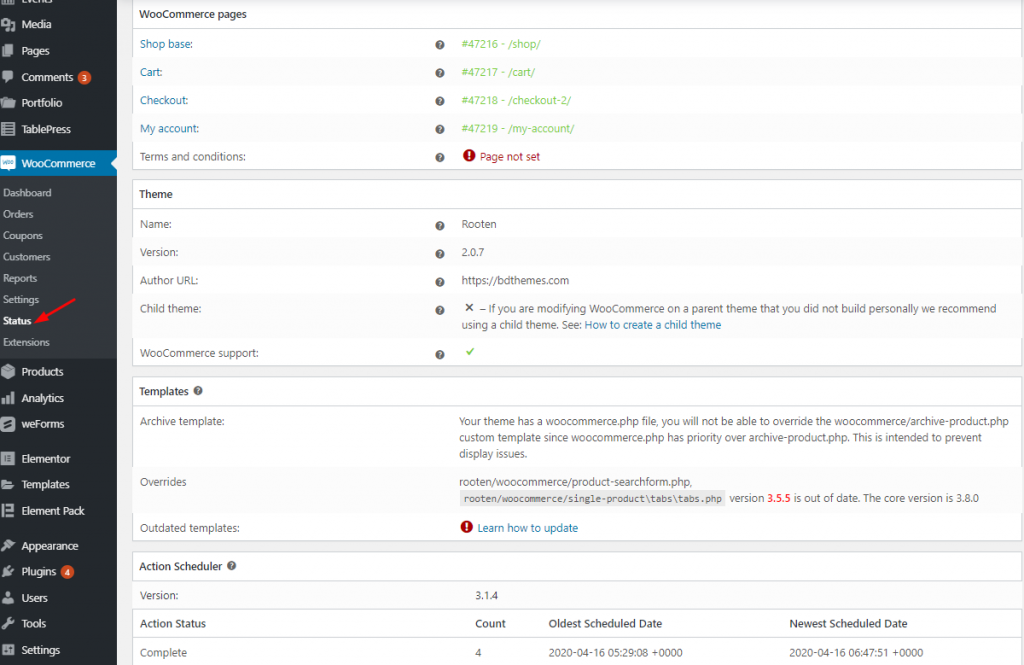
This menu offers you an overview of the health and performance of your online shop.
Extensions
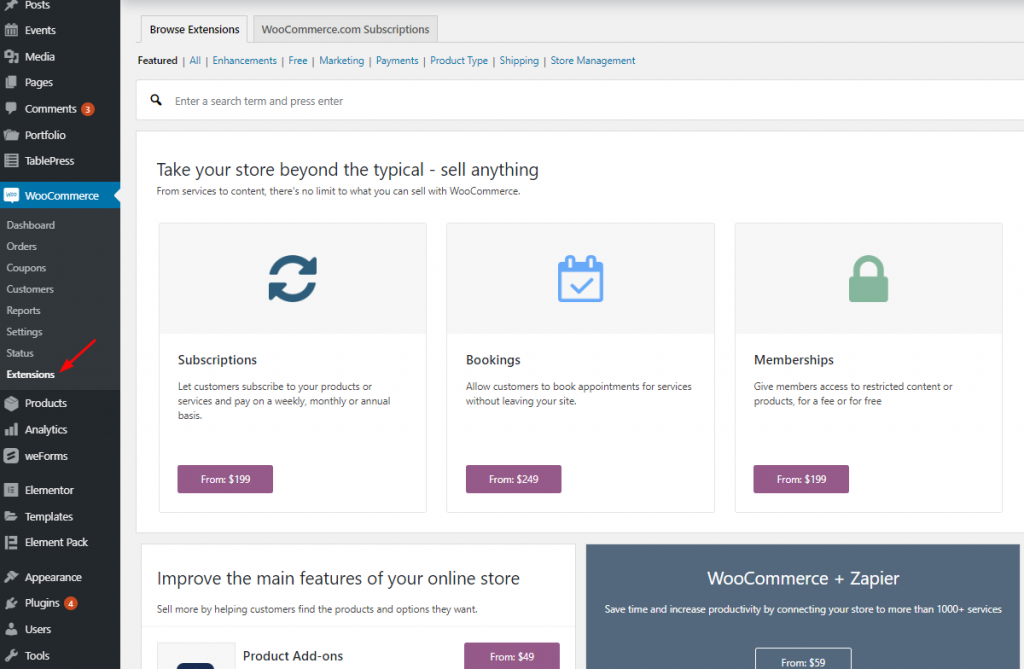
From this menu section, if you interested to enable any extensions suitable, you can easily do that.
The Theme for WooCommerce
Finally, at the very beginning of this article, I quoted about WordPress theme (Hello, OceanWP, GeneratePress, Astra, and more ) is required to build WooCommerce Website. Here, considering the hard task of choosing theme, I’m going to recommend you Rooten Theme (Multi purpose theme) one of the best WordPress Themes.
Conclusion
We’ve gone through a few easy processes that will surely take you on the right track of Building WooCommerce Website.
You can feel the confidence to get two cool and mature plugins – WooCommerce and Elementor that give you the necessary tools for an online store. Now, you know how to create and set up your online shop.
However, The free version of both of the plugins is enough to get you up and running. Our store is ready. We wish you all the best, man.
At last, if you find any issue further and struggle, please comment us.