Develop a multivendor ecommerce website using Dokan and Elementor [Updated]
Developing a multivendor ecommerce website is the best marketing strategy/business plan in 2020. While there are very few movements in retail markets due to lockdown, large trading happened in online markets.
Nowadays, street business is converting into online business. The online marketplace has more than 2 billion people trading more than 3.5 trillion US dollars in a year.
So, it makes sense that you want to grow your business online.
In this blog, we will tell you the best way to build up a multivendor website using Dokan and Elementor.
What is a Multivendor website
A multivendor website is a simple ecommerce website that supports multiple vendors at a time. The admin runs the whole site and gives partial access to the vendors.
A multivendor website doesn’t sell things on its own. Rather it lets others sell stuff using the website as a medium. So, the website acts as a 3rd party between the buyer and seller.
However, you can develop a multivendor ecommerce website like Daraz and Amazon on your own. For that, you need to determine what type of multivendor site you want.
There are 3 types of multivendor website:
- B2B – a wholesale market for business-business
- B2C – Sale items from business to customer
- C2C – Sale items from customer to customer
How does the Multivendor website operate
A multivendor site sets up a business connection between the site owner and seller. It needs stable management from the admin and a stable supply of goods from the vendor. In detail, a multivendor site operates by-
- The seller can register on the website using paid/free membership
- Seller uploads product list and the customer can buy them
- Admin can get a commission for each sale
- All payments are made through the admin
- Admin/Seller is responsible for the product delivery
- Refund or exchange of products impacts mostly on the seller
As you can see, these are the basic operating principle of a multivendor website. To sum it up, it is a business website that is supplied by other businesses.
Develop a multivendor ecommerce website
To develop a multivendor ecommerce website, we need a couple of tools before we start. We will use our favorite Elementor page builder plugin for the site design. Again, we will use Dokan Multivendor Marketplace to build the multivendor system.
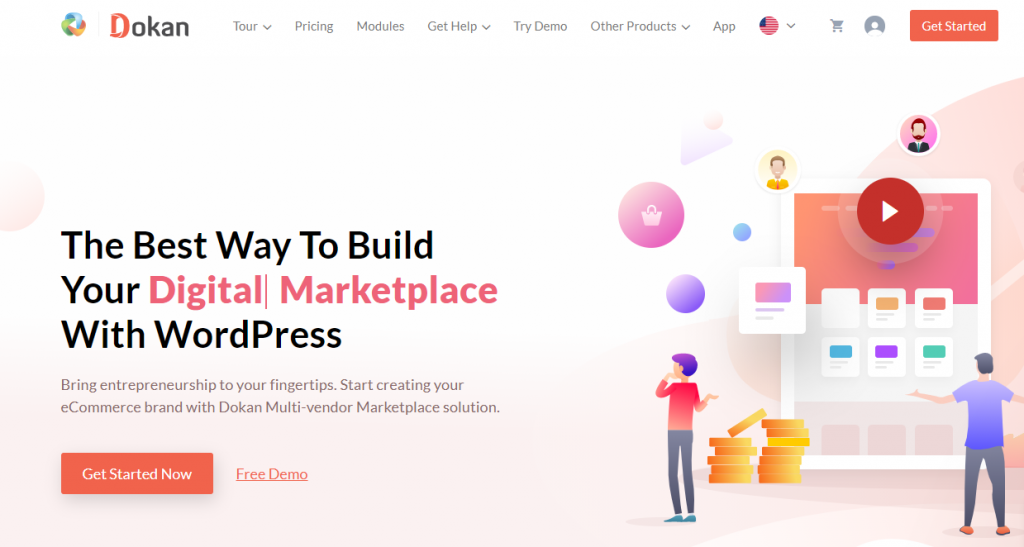
Dokan is a multivendor website development system for WordPress. It is a tool for making websites similar to Amazon within an hour.
Dokan is based on WordPress and it has great compatibility with Elementor. It operates along with WooCommerce and allows multivendor accessibility.
The reason we choose it because-
- Super fast and responsible
- Frontend dashboard for all vendors
- Statements for all incoming/outgoing transactions
- Easy to withdraw money
- Support coupon
- Support helpline tickets
- Multiple payments gateway
- Social media integration
Also, if you include the on-page features, Dokan happens to be one of the best multi-vendor marketplaces today. That’s why we are going to build our website using it.
Develop a multivendor ecommerce website using Dokan and Elementor
Before you start, you need to determine what type of multivendor website you want to design. As there are B2B, B2C, and C2C sites available, you need to choose the one you are comfortable with.
Anyway, we choose the B2B model for our multivendor website. It will be something similar to Amazon or Daraz. Make sure to focus on the following sentences coming after this part.
To develop a multivendor ecommerce website you need-
- Domain & Hosting
- WordPress (free/open-source)
- Elementor (free)
- WooCommerce
- Dokan Lite (free)
In case you install the Dokan plugin, you don’t need to install the WooCommerce plugin.
Step-1: Start with the best Domain & Hosting
A multivendor website puts a heavy load on the server due to thousands of people accessing it at a time. That’s the reason why Amazon build their own hosting platform and reduced the hosting cost.

But that can be done later. First, you need to choose such a domain that will boost your brand. Second, choose the right kind of hosting that doesn’t let your server crash or down for a long period of time.
Surprisingly, GoDaddy, BlueHost, and Namecheap is a not only good but faster-hosting provider on the market. So, you can go with any of them.
Step-2: Install WordPress on your Website
As we are going to develop our multivendor ecommerce website on WordPress, you need to install it on your website.
You can use the hosting panel provided by your host or run an FTP hosting control panel such as cPanel. Either way, make sure to go through the steps correctly.
To learn how to install WordPress, you can try this page out.
Step-3: Install the required Plugins
After successfully installing WordPress, you need to install eCommerce plugins on your website. Install-
- WooCommerce – convert your website into a single vendor ecommerce site
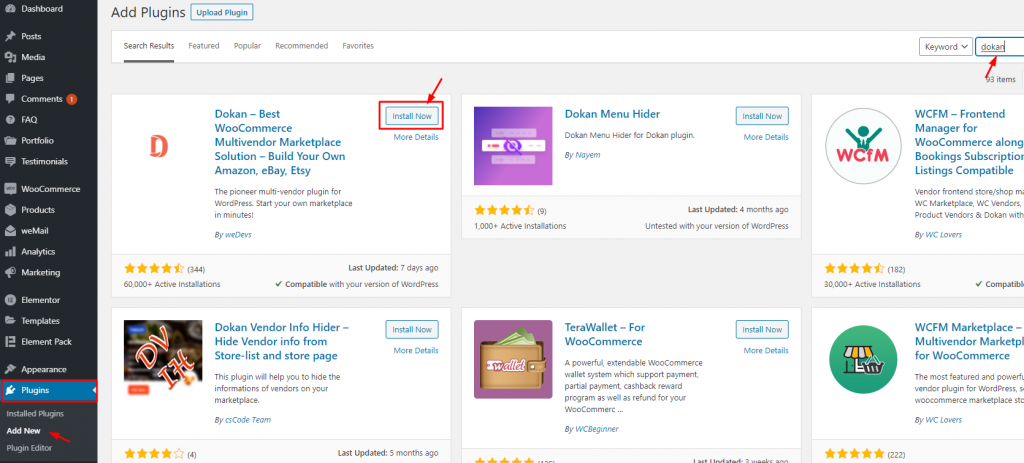
- Dokan Lite – convert single vendor ecommerce into a multivendor site
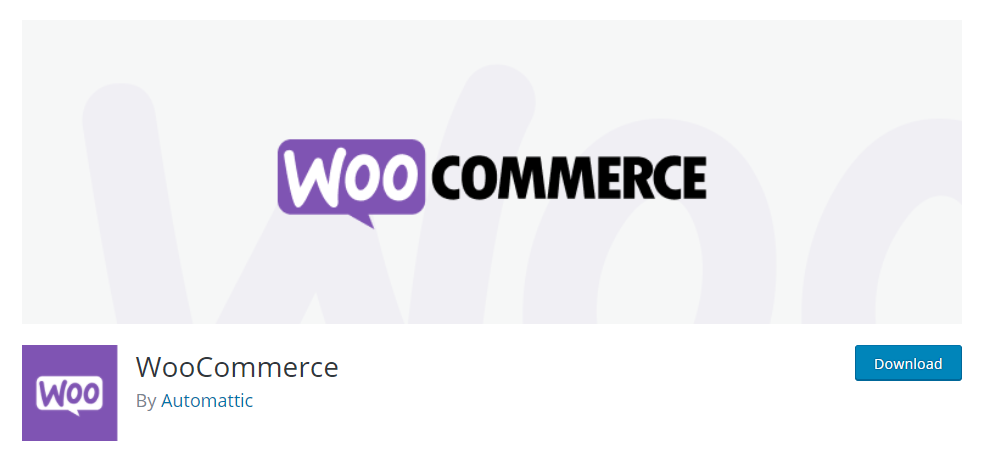
WooCommerce covers more than 90% of the eCommerce market share based on WordPress. It supports major payment gateways including Paypal, Stripe, etc. So, it is more suitable than any other 3rd party plugin.
Step-4: Design the multivendor marketplace
The most crucial part of developing a multivendor ecommerce website is site design.
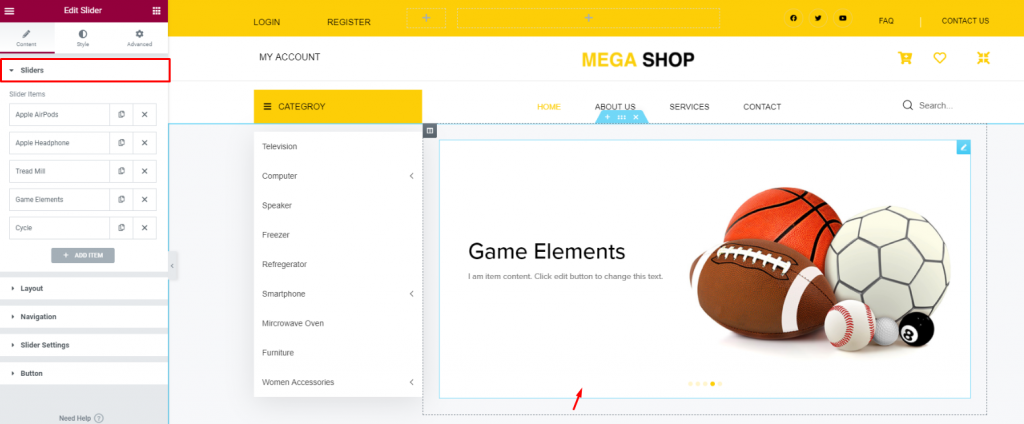
Combining Dokan with Elementor, you can customize the whole site, vendor dashboard, user page, and many more easily. Let’s configure Dokan first.
Configuring Dokan multivendor marketplace
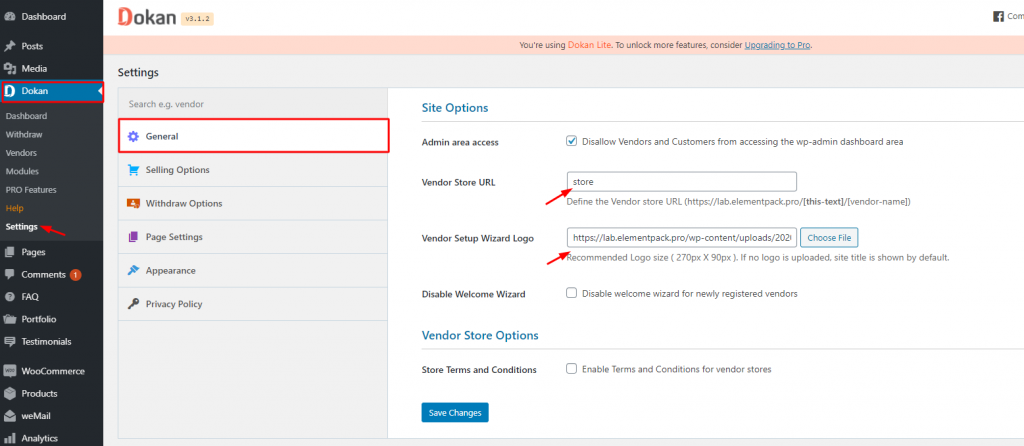
Go to Dashboard> Dokan> Settings
On the general settings tab, you can insert the vendor store URL and logo. Make sure to checkmark the check-box named Admin area access to prevent vendors from accessing your wp-admin.
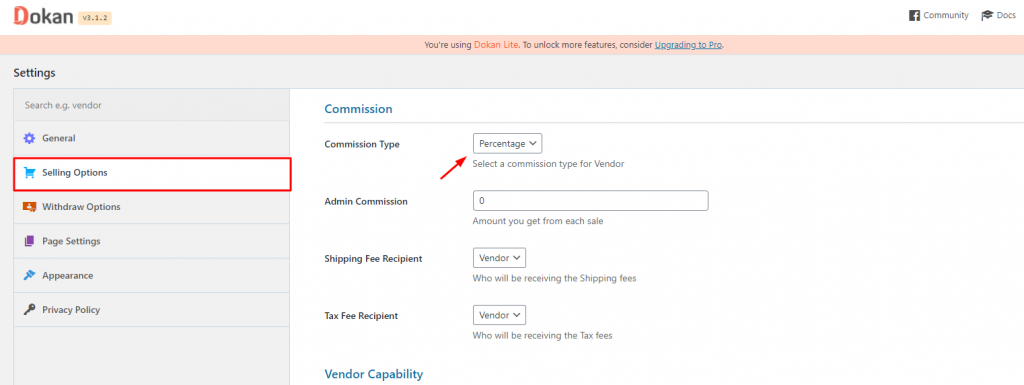
Click on the Selling Options tab and configure the commission type for the vendors. Note that the prompted commission value will be funded into your wallet.
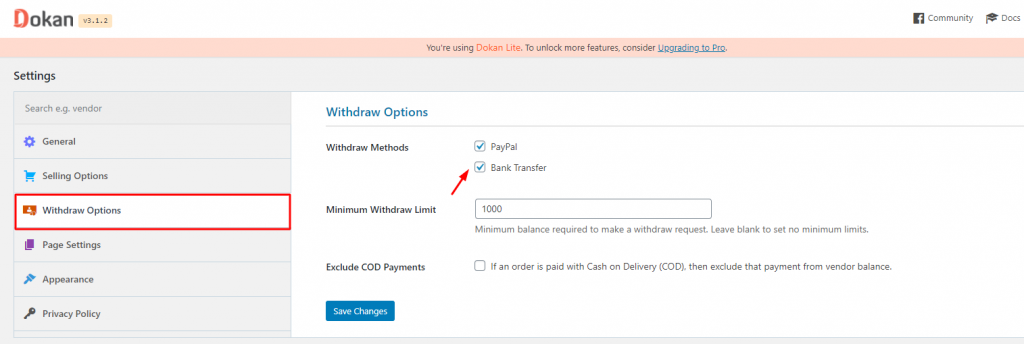
You can select a direct bank or PayPal as your withdrawal payment gateway. Set the withdrawal limit unless you have tax involvement in your area.
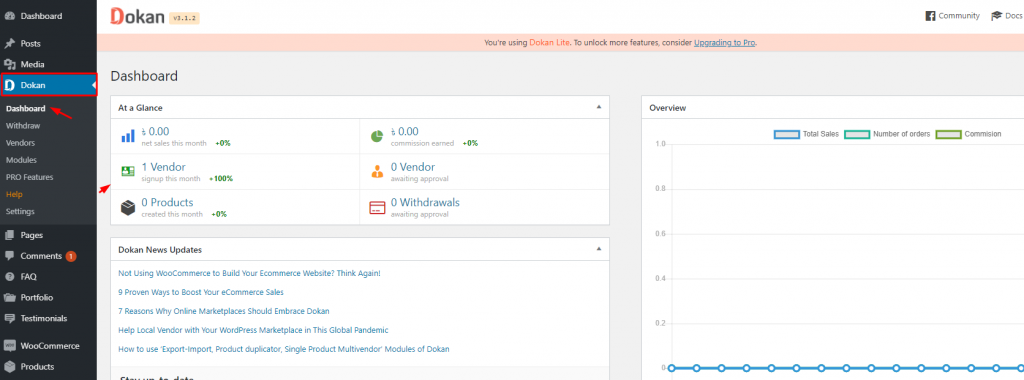
Once you are done, go to the dashboard and see the contents.
Homepage design
Developing a multivendor eCommerce website involves a ton of page customization. For this, we choose the Flozen theme. This theme is made for multivendor applications and has great compatibility with Elementor and Dokan.
Once we developed the homepage, it looked something like this-
Cool, isn’t it? This is an example of how a multivendor website should look like. It has-
- Large product category
- Various kinds of products
- Shopping cart
- Search bar
- Wishlist
- My account
These are the minimum requirements if you are looking for a multivendor ecommerce website. Now, let’s talk about how to board more vendors.
Vendor onboarding
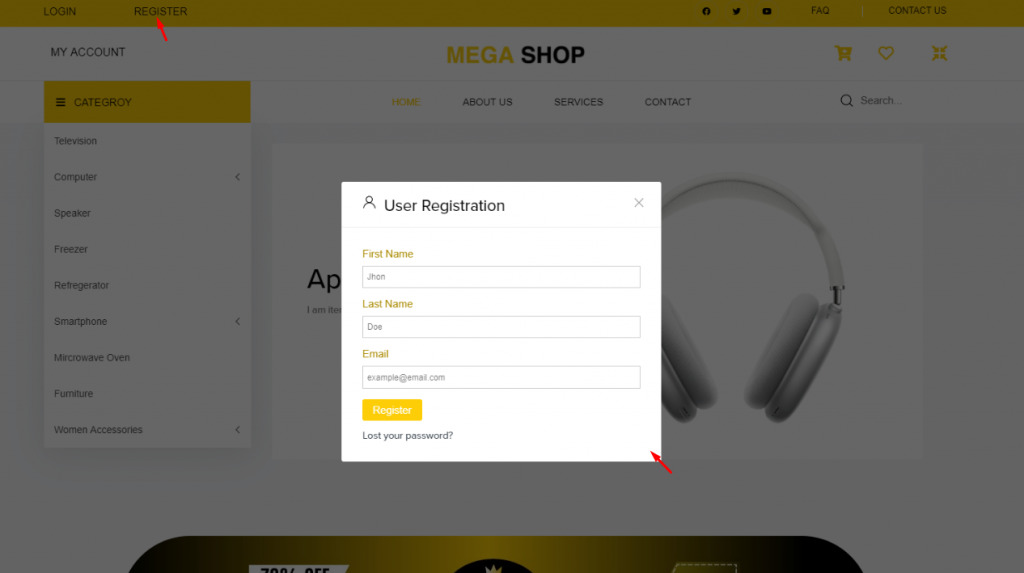
On the homepage, when you click the registration/button, you will see a form popping up on the display. Just fill it and click “Register“.
Congratulations! You became a vendor.
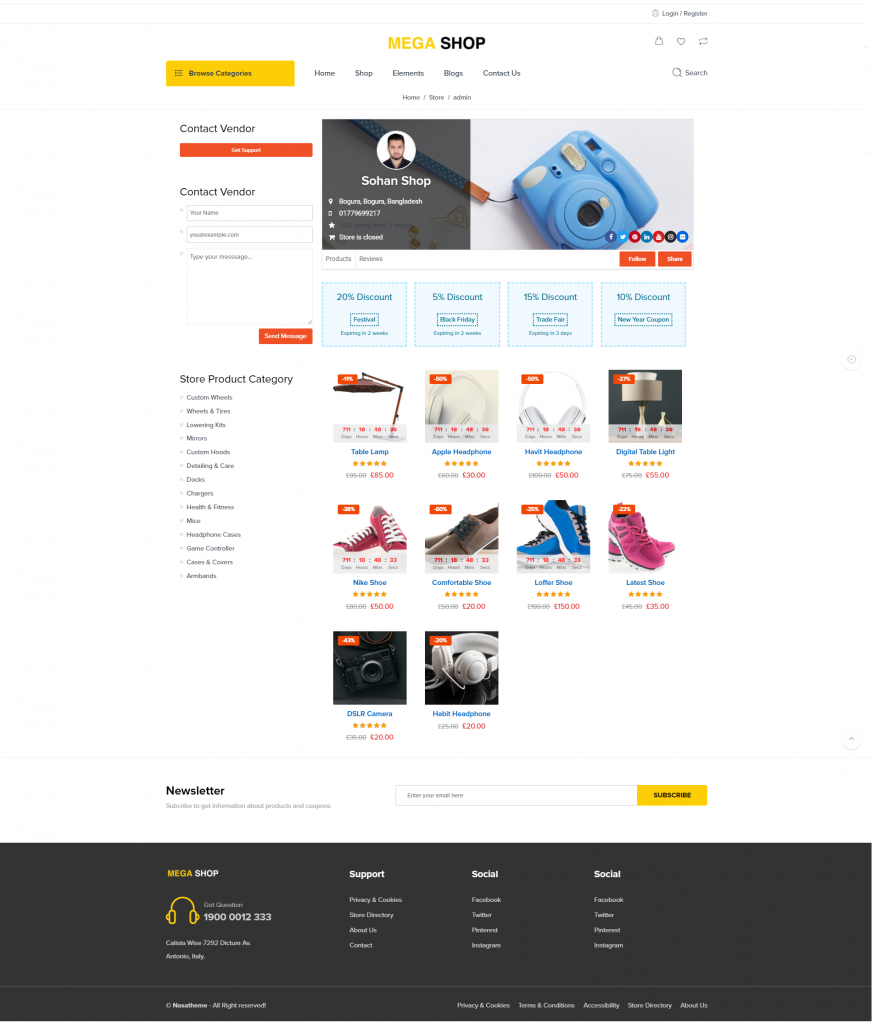
You will be redirected to your vendor dashboard page upon registration. It is a default page provided by the Dokan plugin. The vendor has to fill in the necessary information to show his shop inventory.
Note that, this page is for the vendor only. In case you want to access these information as an admin, you can-
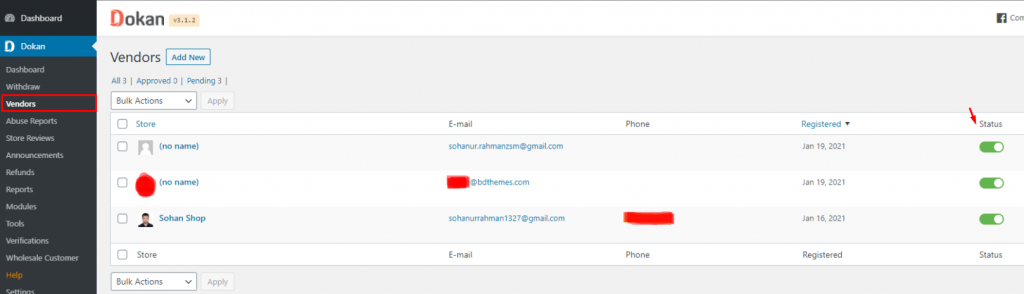
Go to your Dashboard> Dokan> Vendors
You will find a list of available vendors here. Clicking on any of them will move you to the information tab for that specific vendor.
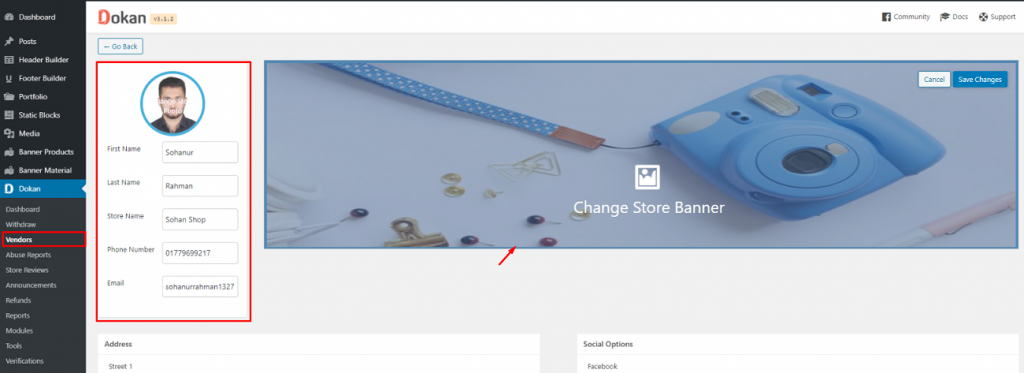
From here, you can also change vendor information by being an admin.
But this is not a violation of privacy. You can edit only the basic info such as name, location, banner, etc. It won’t reveal any private info to the admin.
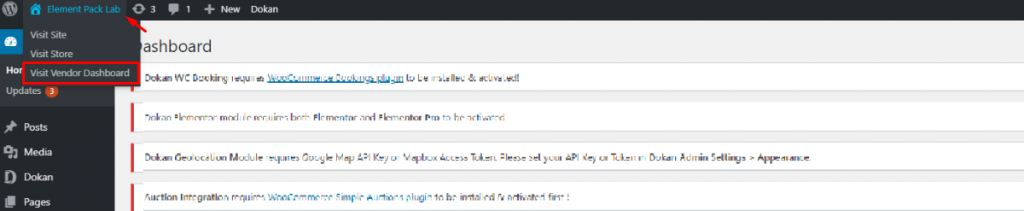
From here, you can view the Vendor Dashboard from the admin panel to get a 3rd party view.
Homepage navigation
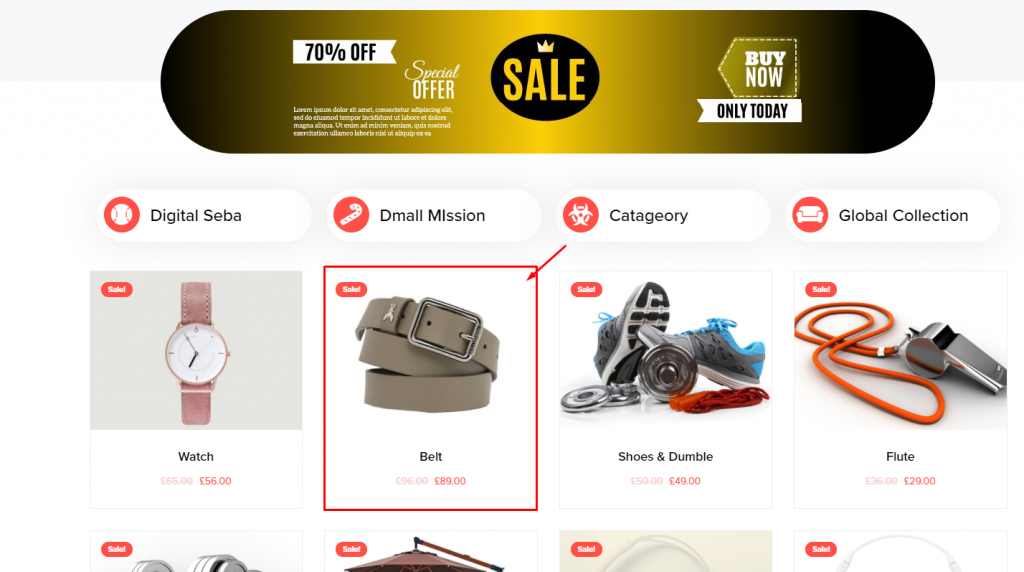
When a visitor clicks on any product-
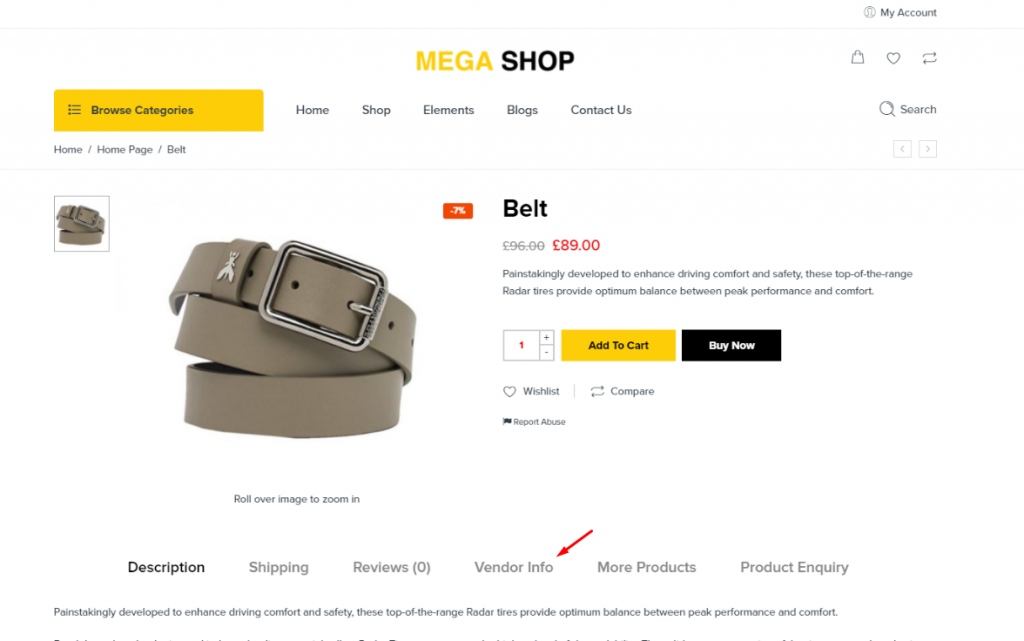
He/she will be redirected to the product detail page. From there, he can see vendor info by clicking on it. Once clicked, he will be redirected to the vendor dashboard as a viewer.
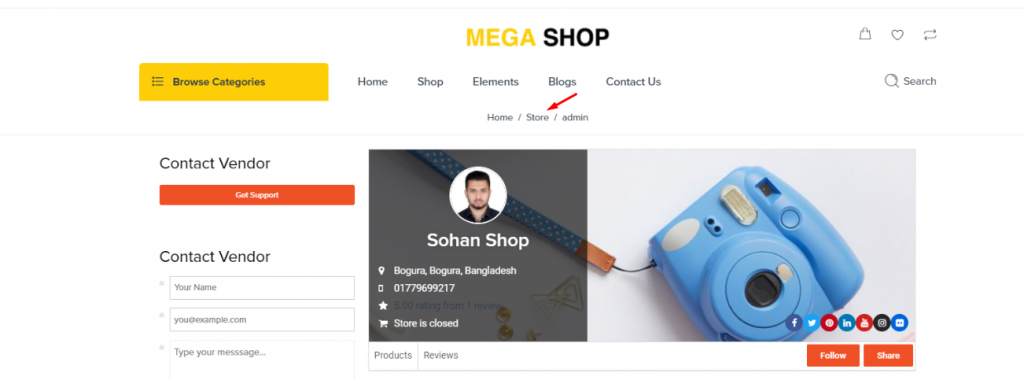
Again, by clicking on the Store, the visitor will be redirected to the vendor list inside the multivendor website.
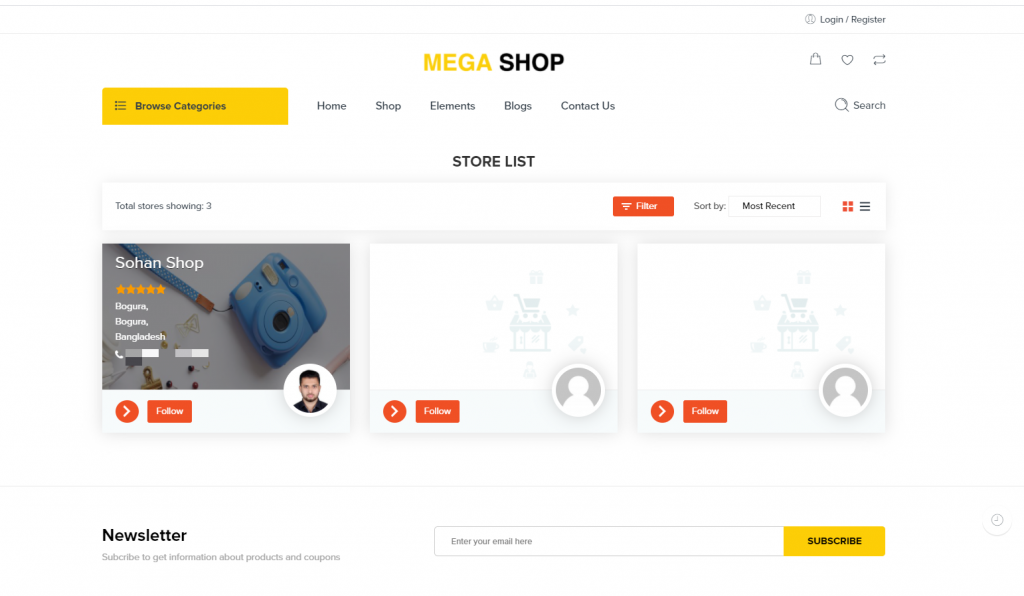
Visitors can see every available vendor shop from here. This page is also made by default by Dokan.
Finally, you have successfully developed a multivendor eCommerce website with Dokan and Elementor.
Conclusion
Following this article, you can develop a working eCommerce multivendor website within an hour on your own. Of course, that excludes the pain and suffering of the page design team.
But that can be solved as well! Grab the Element Pack plugin with 165+ essential widgets and pack your website with tons of features. It’s made for Elementor.
Finally, Dokan has a lot of amazing modules to make your multi-vendor website more enriched. You have to buy the pro version for it.
Thanks for staying up.