Build an WooCommerce Custom Product Page using Elementor plugin
Do you want to build an WooCommerce custom product page using Elementor on your own? In that case, this blog is for you.
Nowadays, WooCommerce is a fast-spreading wildfire in the internet world. Not long after 4G internet was first introduced, people rapidly converted their stores into online stores. For you to easily and successfully create your store, I will show you how in this tutorial.
Setting Up An WooCommerce Custom Product Page
In this tutorial, I’m focusing on creating the custom product page. I’m not mentioning the installation procedure of buying a domain, setting up WordPress, and Elementor. However, you can easily learn these from this blog.
Things you need first before proceeding:
- A Domain
- WordPress
- Elementor Plugin
- WooCommerce Plugin
Once you setup the plugins and signup for it, let’s begin the main tutorial on the WooCommerce custom product page. Note that, I’m using Rooten theme for this tutorial. However, you can use any themes for your page. But I’m using it because it’s fast and lightweight.
Also, I’m using Element Pack Pro combining with Elementors own widgets. Element Pack has a lot of amazing widgets and its easy to use.
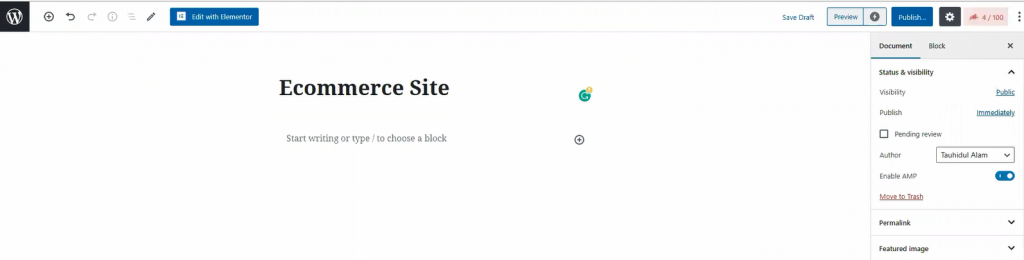
In your dashboard, click on Pages, then click on Add New to create a new page. Like the image shown above, give your page a title.
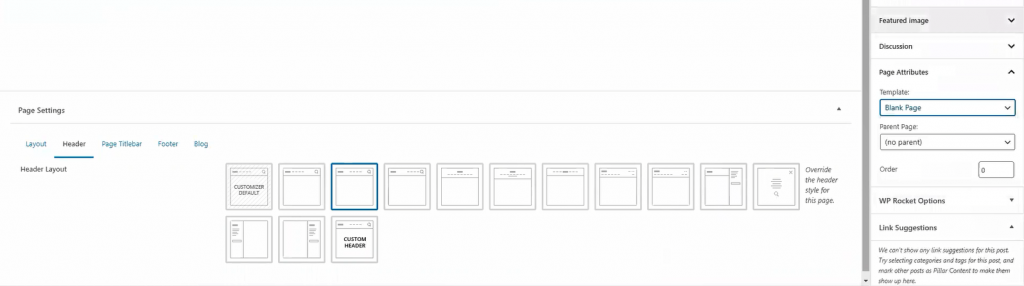
For the page layout, select Blank Page from Template. You can get this option from the Page Attributes menu on the right side. Once you are done, hit the Publish button. Now, let’s move onto the next part for creating your WooCommerce custom product page.
Crafting the Landing Page
The landing page is what you see as the first page of a website. It has most of the information you need to show your visitors. Today, we are going to create this landing page for your store.
The landing page has many sections. To make an attractive landing page, each section is necessary. Let me show you how to make WooCommerce custom product landing page.
Hero Section of Your Custom Product Page

Well, first things first. Let’s start with the hero section. I think the image above has already picked your interest. However, creating this thing is easy. Just follow the steps.
Forging the Header
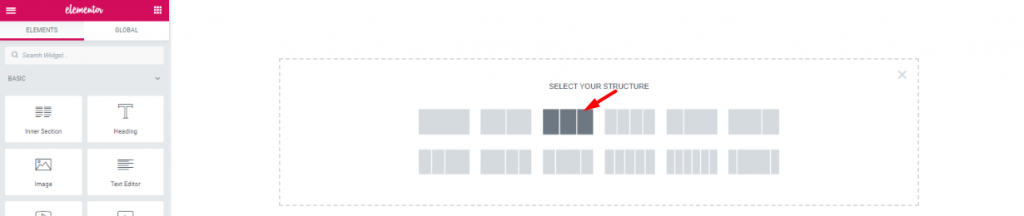
Step-1:
First, on the blank page, make a 3 section window.

Step-2:
Drag and drop the Scroll Navigation widget from Element Pack into the middle section. The widgets will make your header menu.
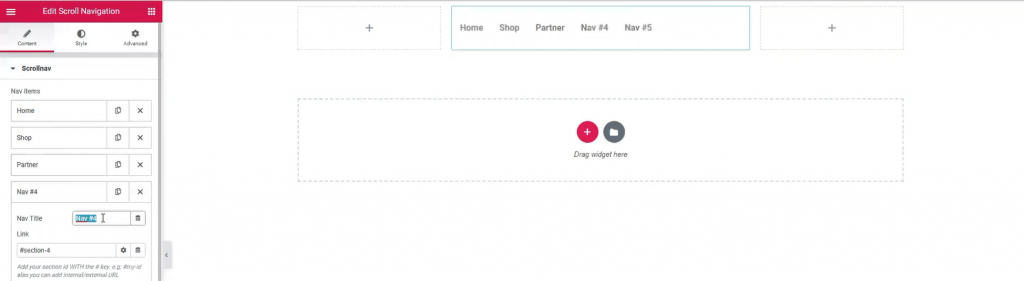
Step-3:
However, Name your menu bar as you like. The widget has a wide customization menu. You can change its appearance easily from here.
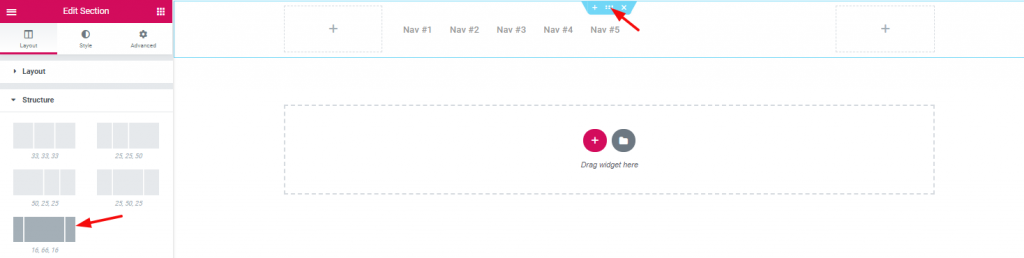
Step-4:
The section width distribution can be edited from the layout option. However, for the header area, I’ve selected a good width distribution.

Step-5:
Inserting Inner Section on the right corner beside the navigation menu.

Step-6:
Dragging and dropping WooCommerce mini-cart by Element Pack on the left inner section.

Step-7:
And, Search widget on the right inner section.

Step-8:
Also, adding Image widget on the left corner of the header area.

Step-9:
With that, the header area is now completed. It is a little tricky to create this header area for your WooCommerce custom product page. But once you get it, you can make a unique header for yourself.
Completing The Hero Section
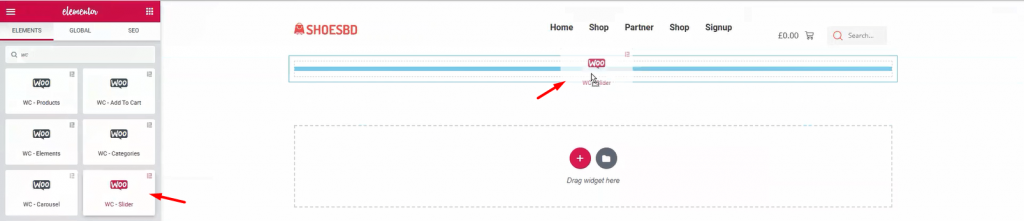
Step-1:
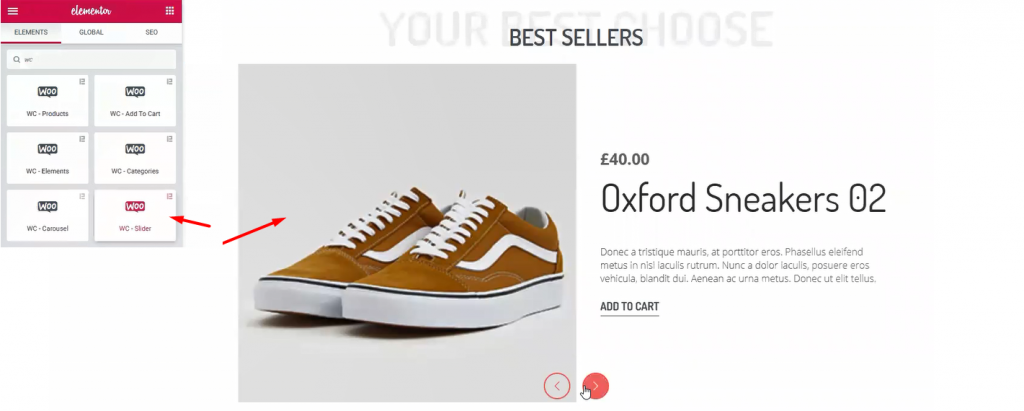
It’s time to show your visitor the first batch of products. Add WooCommerce Slider under the header.
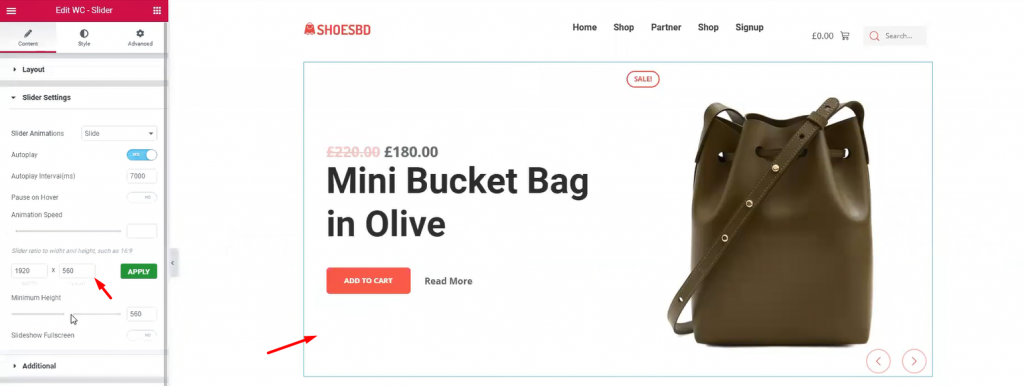
Step-2:
The slider widget is also developed by Element Pack. It brings out the charm of your product with its pixel-perfect smooth graphics. It is an essential tool for your WordPress custom product page. The widget has many uses as it has a customizable option provided by developers. You can change the slider’s dimension, animation speed, and type, minimum height, and colors. Once you are done with it, let’s see the complete hero section.
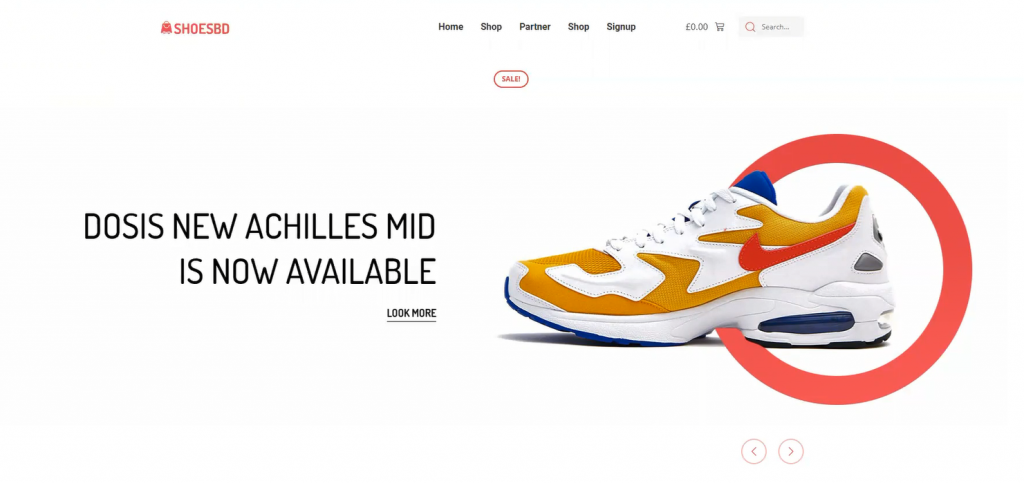
Have a good look at the finishing product. This complete hero section has a minimal but elegant design. Note that, you must create your hero banner according to your targeted audience. If the visitors aren’t caught with the first look, they won’t stay on the page. This is your first step to success on your WooCommerce custom product page.
Features Section of Your Custom Product Page
The features section is where you want to showcase your products and offers. In most cases, we create this section using 4-5 different features, giving the visitors more things to consume.
Don’t be mean when designing your features section. Because you must keep in mind, people will get bored seeing only 1 product showcase.
Let’s make a good features section for your WooCommerce custom product page.
Designing Features Section for Your Custom Product Page

Step-1:
First, make a section with 3 inner sections. From the Layout option, give a suitable background color.
Step-2:
Add padding to the section so that we have a field to work on.
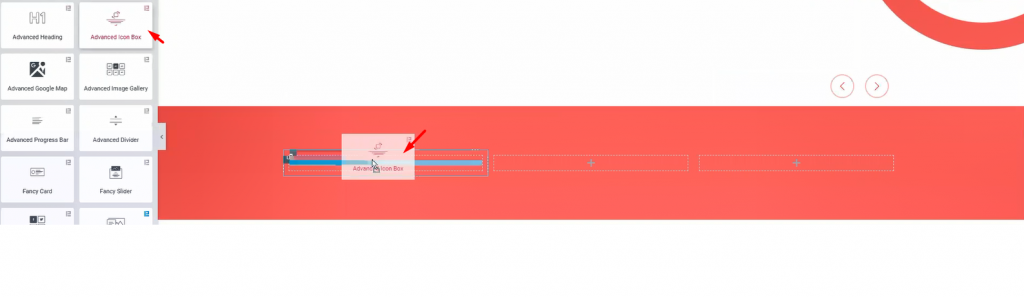
Step-3:
I’m using Advanced Icon Box in these inner sections. However, you will get a huge customization menu for this widget.
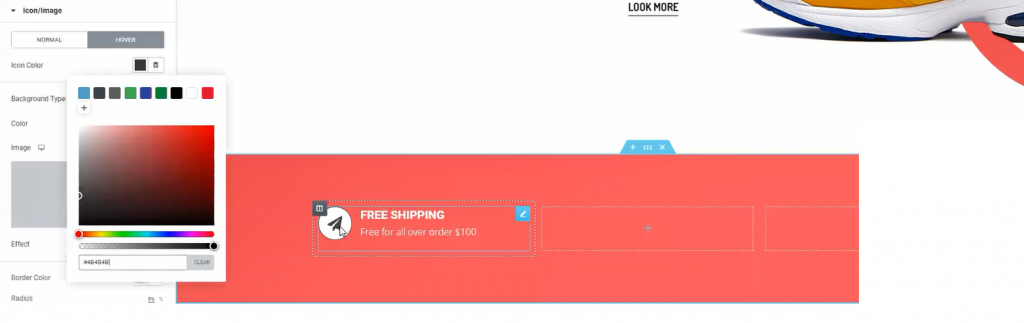
Step-4:
The fun thing is, you can design a variety of things with the advanced icon box widget. Like the image above, you can make this design with just a few edits in the customization menu.
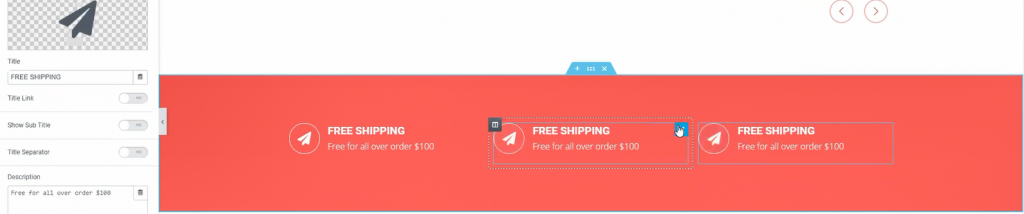
Step-5:
One more thing, for quick edits, just duplicate a widget and place them accordingly. Do this if you need more items in a similar format. This saves both time and effort.

Step-6:
Now, adding Advanced Heading widget underneath the previous part.
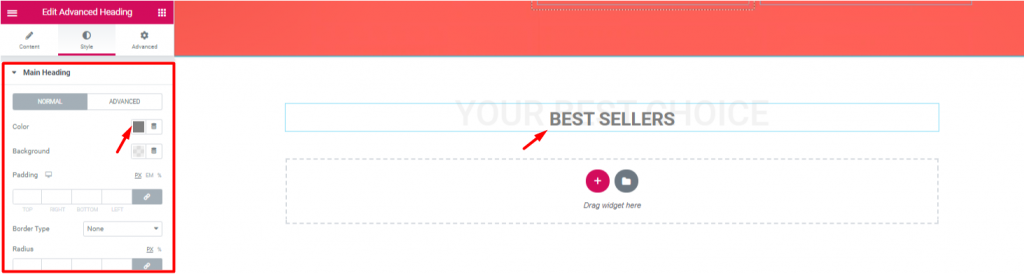
Step-7:
Let’s edit the heading to match the theme of the next section. Note that, the advanced heading widget is made by Element Pack.
Step-8:
Once again, I’m using WooCommerce Slider widget. This time, I’ve made some edits to change the appearance from before. However, checkout this tutorial about WooCommerce Slider to use it successfully.

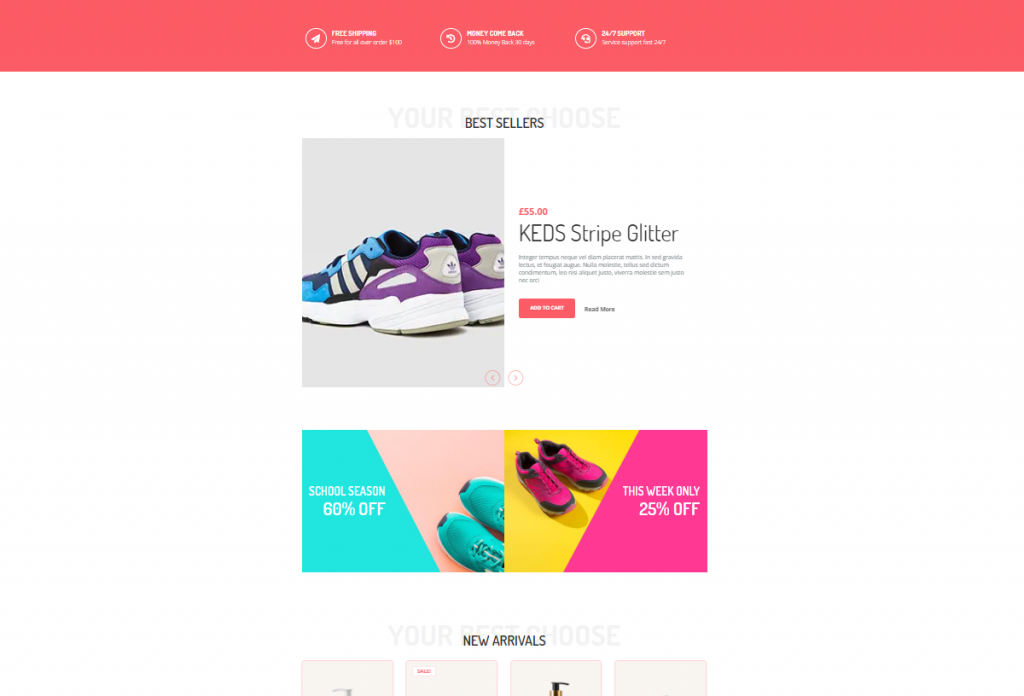
Step-9: Showing Discounts on Custom Product Page
Let’s create another double part section. For this part, I’m using Trailer Box widget. It’s a handy widget for showing advertisements easily.

Step-10:
Once again, the Trailer Box widget comes with a very unique customization menu. Not only you can change its layout but also you can change its colors and text fonts. Moreover, it has an option to add an image as a background. Stylish and unique indeed.

Step-11:
Inserting another Advanced Heading widget again.
Step-12:
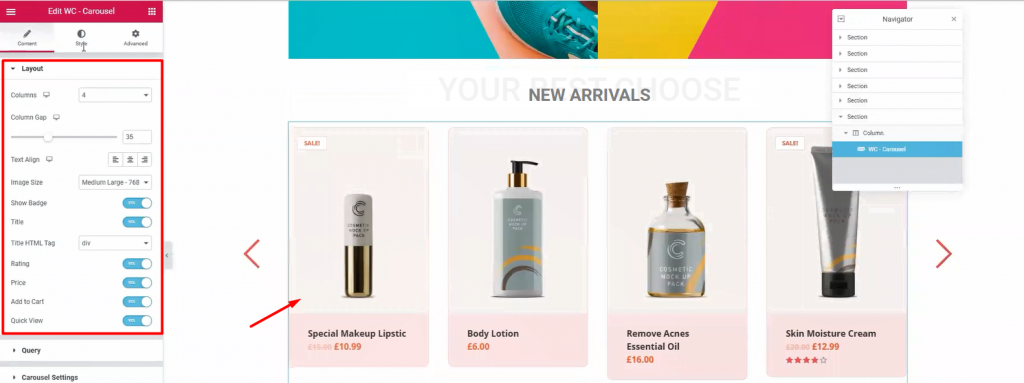
Next, drag and drop WooCommerce Carousel widget from Element Pack below the heading. With it, you can show your newly added products together. Moreover, we use WooCommerce Slider widget to highlight products with a wide view. On the other hand, using this widget, we can show all the products in 4-5 columns. It’s a handy tool for your WooCommerce custom product page.
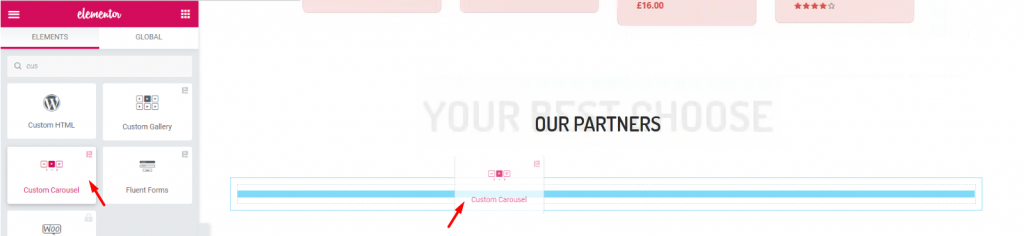
Step-13: Custom Product Page Associate Partners
Again, after adding another Advanced Heading widget, let’s add the Custom Carousel widget. It’s a widget that shows images with a carousel style.
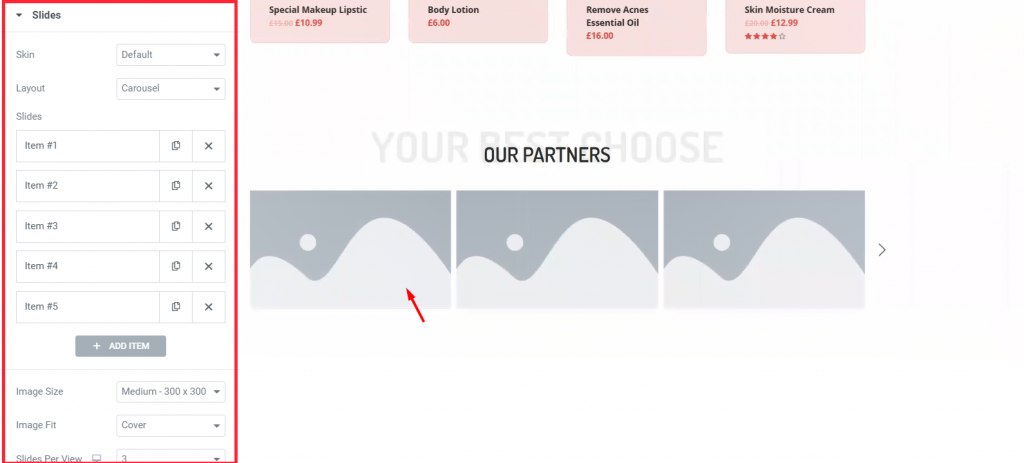
Step-14:
Each block of blank portrait holds an image inside it. You have to manually choose images for each blank portrait.
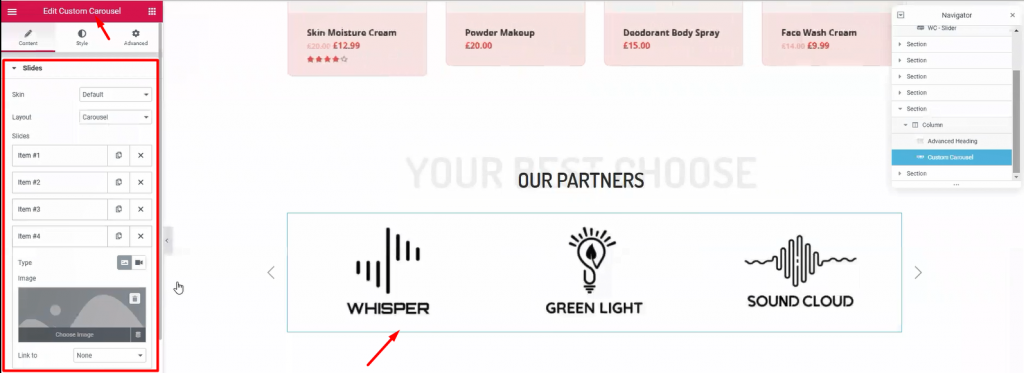
Step-15:
This part is essential to your visitors, showing your business relationship with other companies. Use this Custom Carousel widget section (made by Element Pack) to add more appeal to your WooCommerce custom product page.
Callout and Footer Section of Your Custom Product Page
Time for the finishing part. This section is very crucial for your WooCommerce custom product page. Here, you have the last chance to attract attention from your visitors. So, callout your visitors towards buying your products and give them a tour of About Us.
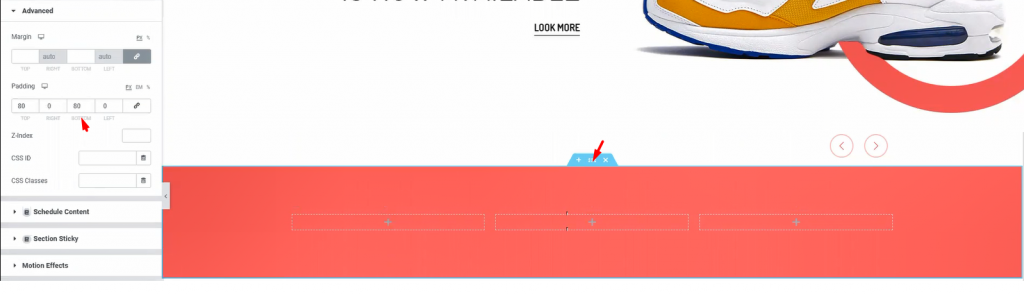
Step-1:
Once again, make another 3 columns, red background section below the custom carousel. This would be your callout section. Just copy-paste previously made section similar to this to save time.

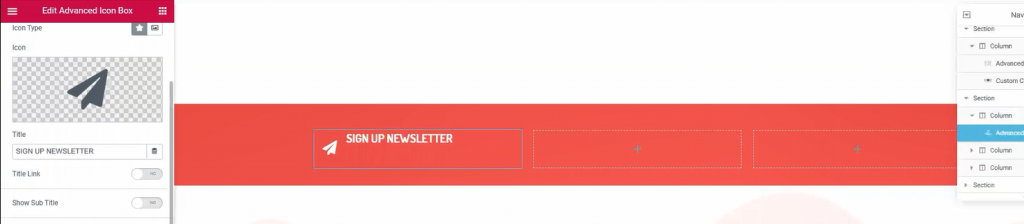
Step-2:
Place Mail Chimp widget on the 3rd right column. This widget collects your visitors’ emails and redirects them to the signup page. It’s a helpful tool made by the Element Pack team.

Step-3: Creating Custom Product Page Footer
Below the callout section, make a 3 column section. This section will be our footer. Add Heading and Text Editor widgets in the columns.
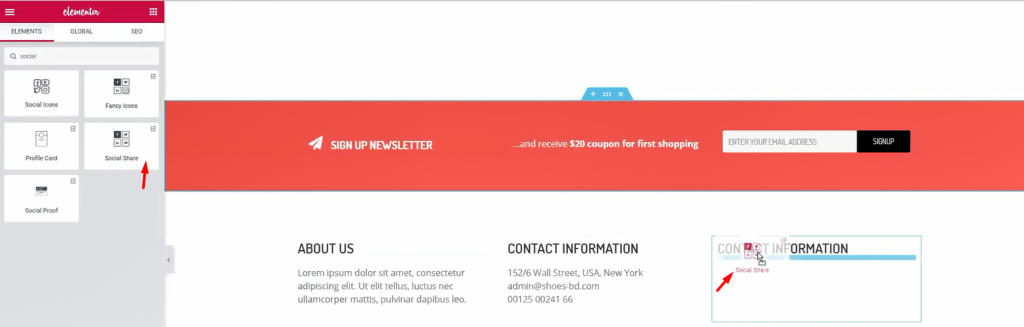
Step-4:
For the 1st and 2nd column, a title and some text are enough. Let’s move to the 3rd column. Adding a title and Social Share widget (by Element Pack) inside it.
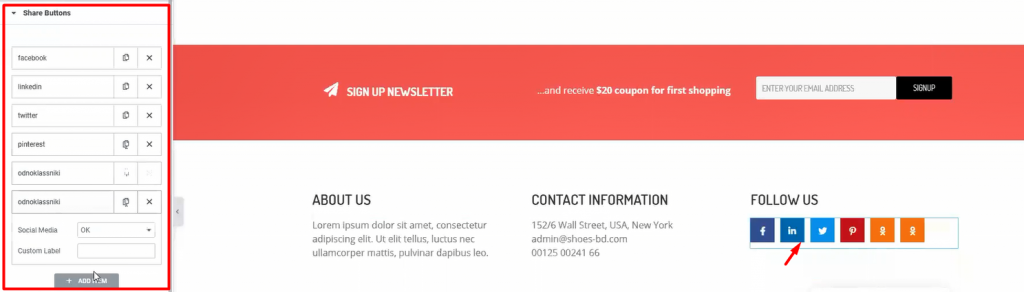
Step-5:
Add more social sites by customizing the widget. This will let your visitors easily go to your social sites. After you are done, let’s see what we have made so far.
Complete WooCommerce Custom Product Page – 100% Done by You
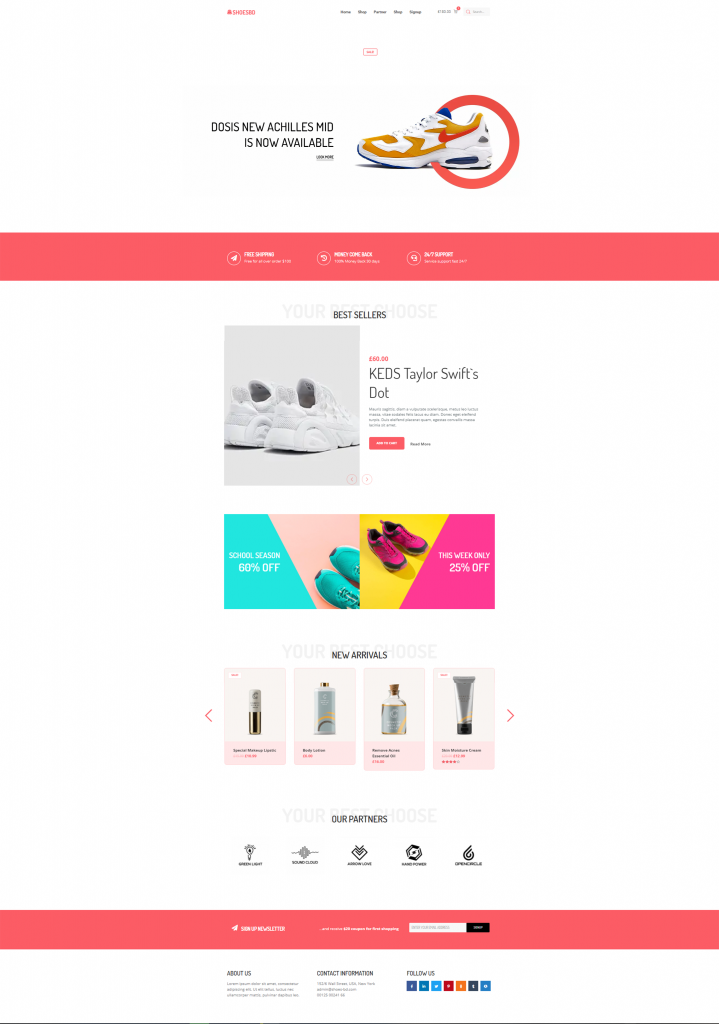
Whoa! Look at this stunning webpage you have just created! Amazing right?
Hopefully, you have learned the full procedure of creating an WooCommerce custom product page. This is not a difficult feat to achieve. But the important question is, Who will teach you? Now that you have learned it all, let’s go make your WooCommerce sites.
Bonus Content – Get Element Pack Pro & Prime Slider free by submitting your review!
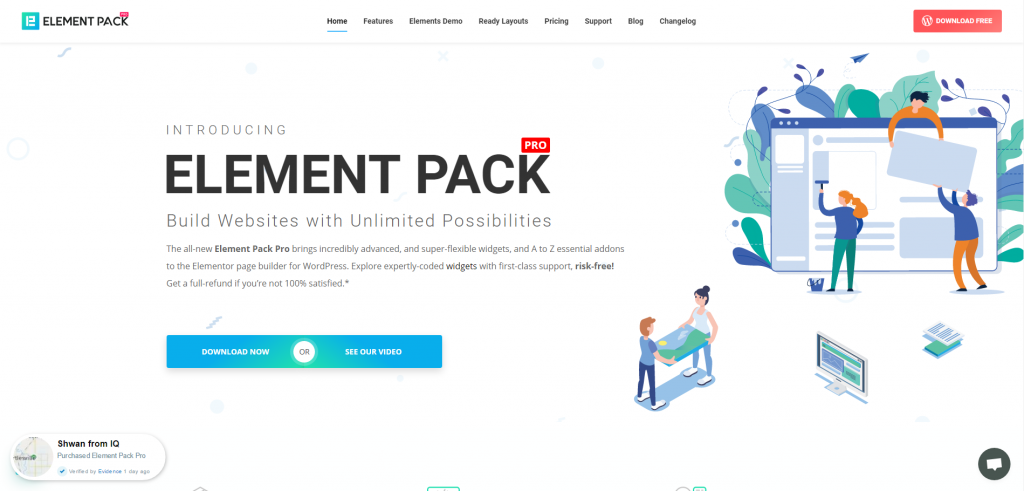
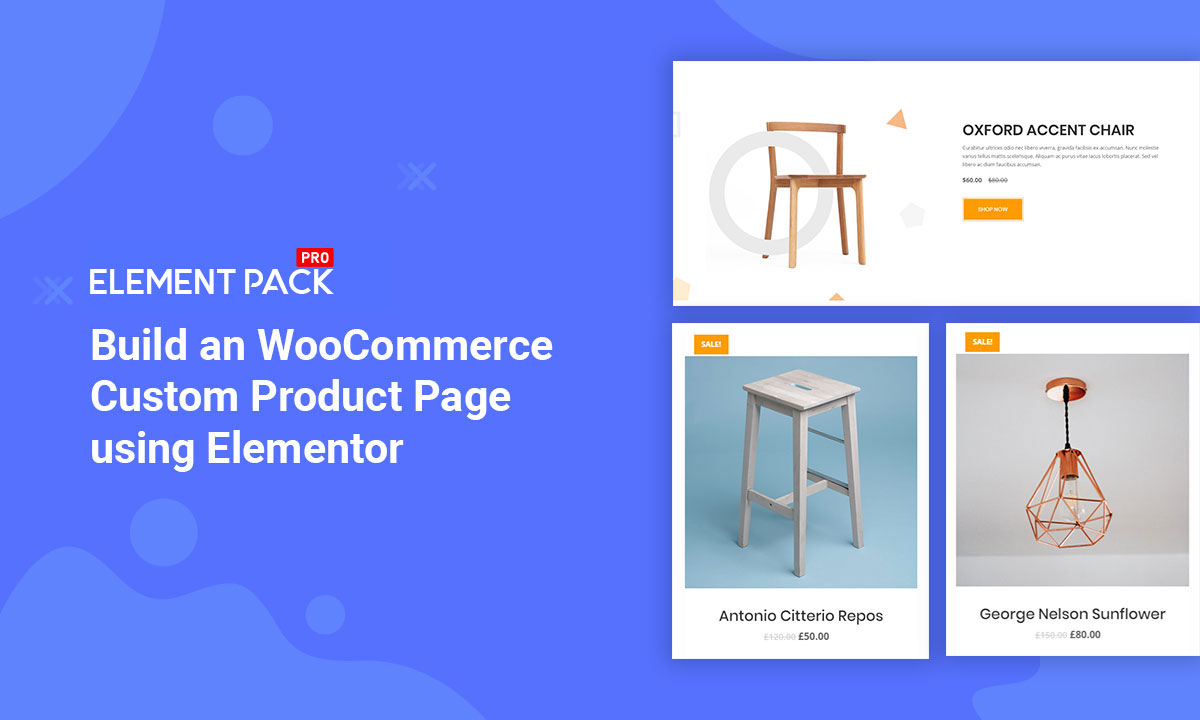
Element Pack is the most optimized add-on based on the WordPress Elementor plugin for creating your premium WooCommerce custom product page.
This plugin has a vast inventory ready to be deployed on your website. Also With 190+ plugins, 270+ ready to use pages, over 1800 ready blocks, Element Pack has made it to the position of Top 5 worldwide.