다양한 메뉴 옵션을 통한 손쉬운 탐색
시각적인 제품 선택으로 빠른 매출 증대
실시간으로 조정되는 개인화된 콘텐츠
원활한 스크롤로 UX 흐름 개선
즉각적인 콘텐츠 복제로 시간 절약
강력한 디자인 요소에 빠르게 액세스
기성 템플릿으로 디자인 속도 향상
유연한 데이터를 위한 고급 사용자 지정 필드
번거로움 없이 간편하게 사이트 복제
모든 화면에 적합한 선명하고 확장 가능한 그래픽
전문적인 룩을 위한 리브랜딩 도구
콘텐츠를 정확하게 표시하거나 숨기기
부드러운 모션으로 깊이 있는 몰입감
선명한 메모와 주석을 쉽게 추가하세요
유용한 힌트로 사용자 상호 작용 개선
세련된 감각으로 요소에 애니메이션 적용
중요한 섹션은 항상 표시되도록 유지
사용자 지정 코드 조정을 통한 완벽한 제어
파일 최적화를 통한 사이트 속도 향상
연중무휴 24시간 언제든지 문의하세요. 기꺼이 도와드리겠습니다.
모든 기능에 대한 자세한 가이드라인은 BdThemes에서 확인할 수 있습니다.
새로운 것을 배우고, 워드프레스, 웹 디자인 등에 대한 최신 정보를 확인하세요.
개발 과정의 주요 이정표는 다음과 같습니다:
동영상에서 제품 사용법, 워드프레스 팁과 요령 알아보기
프로모션에 참여하여 막대한 수수료를 받으세요.
위젯 아이디어 공유는 개선할 수 있는 유사한 위젯을 찾을 수 있는 좋은 방법입니다.
물론입니다! 문의 사항이 있으시면 언제든지 연락주세요.
시그마 폼으로 몇 분 만에 워드프레스 양식을 작성하세요.
곧 출시 예정 & 유지 관리 모드 페이지 빌더 플러그인
접근성 하나로 웹사이트에 쉽게 접근 가능
고객 추천글을 표시하여 신뢰와 공신력을 높이세요.
졸로블록은 구텐베르크 기반의 멋진 웹사이트를 제작하는 데 도움을 줍니다.
Elementor 슬라이더 시대에서 가장 우수한 슬라이더
Elementor에서 유일하게 호환되는 블로그 위젯은 모든 블로그에 사용할 수 있습니다.
비즈니스를 위한 차세대 워드프레스 전자상거래 웹사이트 구축하기
Elementor로 매번 다른 엔젤로 사진 정리하기
스핀 휠을 사용하여 참여도를 높이고 매출을 늘리세요.
ChatGPT의 강력한 워드프레스용 AI 이미지 생성기 플러그인
지금 바로 WooCommerce용 360° 증강 현실을 사용해보세요!
클릭 두 번으로 원하는 웹 디자인을 복사하여 붙여넣기하세요!
무제한 옵션으로 모든 기능을 갖춘 엘리멘터용 테마
구텐베르크를 위한 스마트하고 깔끔하며 유연한 블록 테마
다크 리더 플러그인은 눈에 편안한 웹 읽기를 보장합니다.
전환율을 높이는 WooCommerce 원페이지 결제.
Find Nearby Stores Instantly with Sigma Store Locator
The Ultimate WordPress Media Library Organizer
Hello guys. This is a step-by-step tutorial for creating a perfect portfolio using Elementor for your website. Many times, for different occasions, you may face trouble while designing a portfolio that goes along your theme. To ease your trouble, today I’m gonna show you how to create a portfolio using Elementor that fits every occasion.
Note that the Portfolio Gallery widget that I used in this tutorial is a Product of Element Pack Pro. So, I suggest that you get it before starting.
Before going further, please install Elementor 그리고 Element Pack into your dashboard. It’s an easy process as you have to install them from the Plugins menu. Just click Add New and add them by searching their names. This is the first step in creating a portfolio using Elementor page builder.
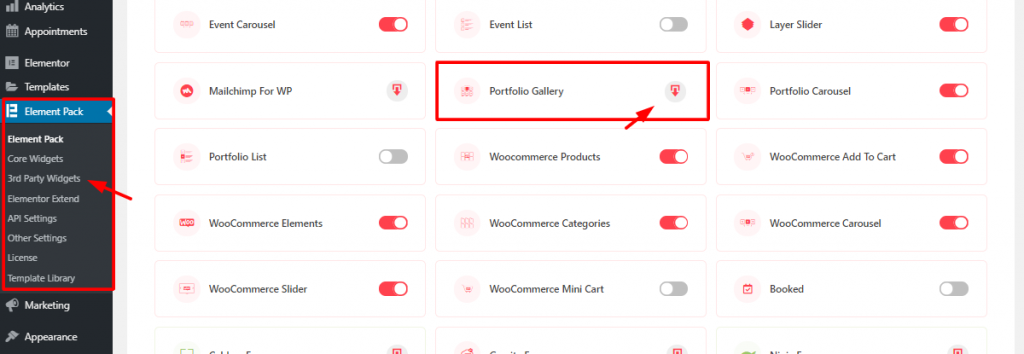
For starters, go to Element Pack plugin menu from 워드프레스 dashboard. There, from the 3rd party widgets, click on the download button to download and install 포트폴리오 갤러리 widget. Then just activate it with one click on it.
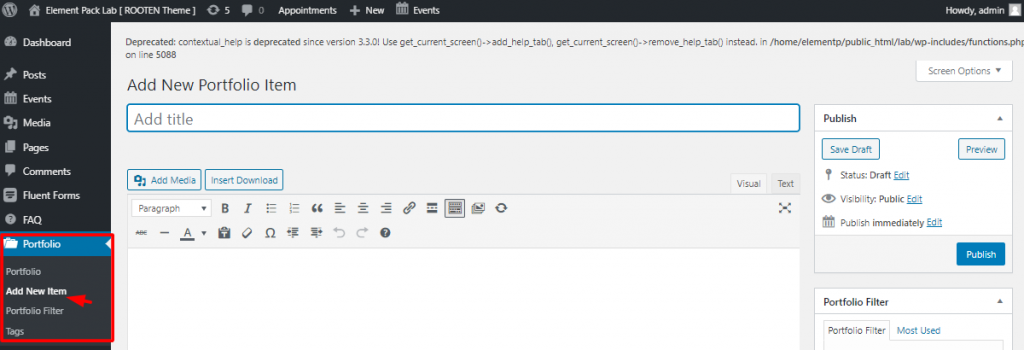
After you install the widget, it will automatically create a menu on your dashboard. To create a portfolio using Elementor and Portfolio Gallery widget, you must have portfolios inserted into your dashboard. To do that, go to Dashboard> Portfolio> Add New Item. Here, you can add your items to the portfolio. In this part, you can add a name for your item.
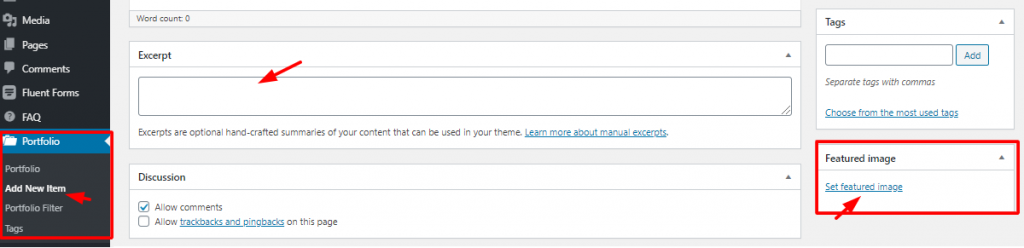
Again, you can write an 발췌 for each of your items and select a 추천 이미지. That’s it! Hit the Publish button and your items are now on the portfolio. It’s very easy to make a portfolio using Elementor.
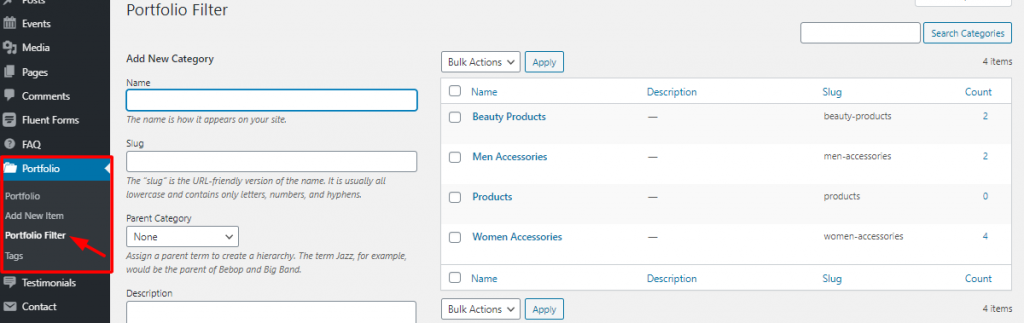
Again, make sure to categorize your items or products for the portfolio. Creating a good category not only makes the portfolio beautiful but also makes it easy to use. Then the next step, for creating a portfolio using Element, is the page editor.
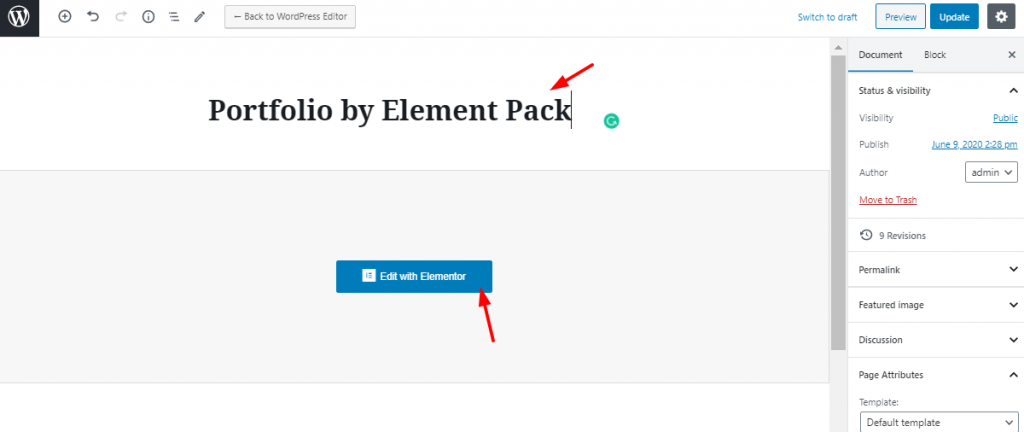
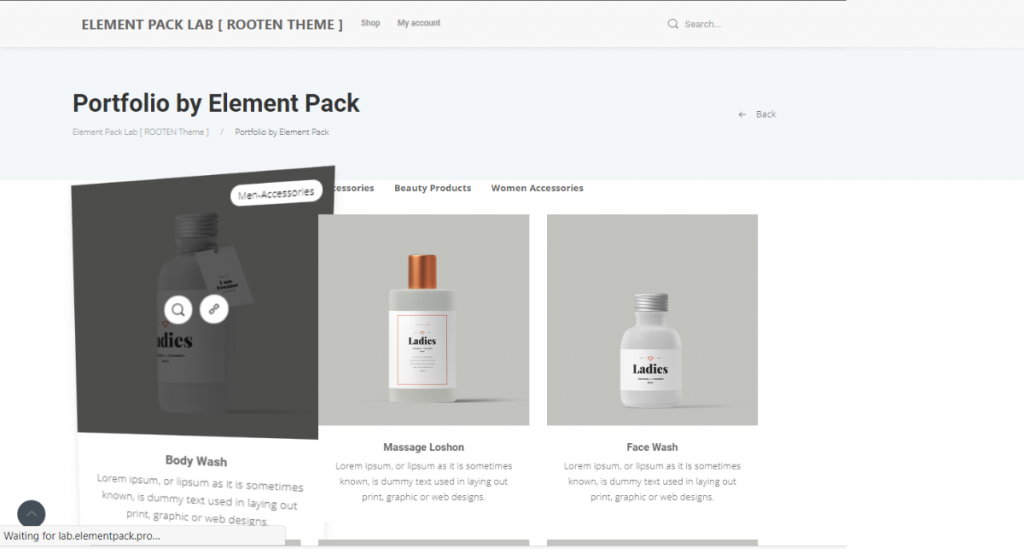
On your dashboard, go to Pages> Add New. You need to put a title for the page as the image shows. Then click on Elementor로 편집.
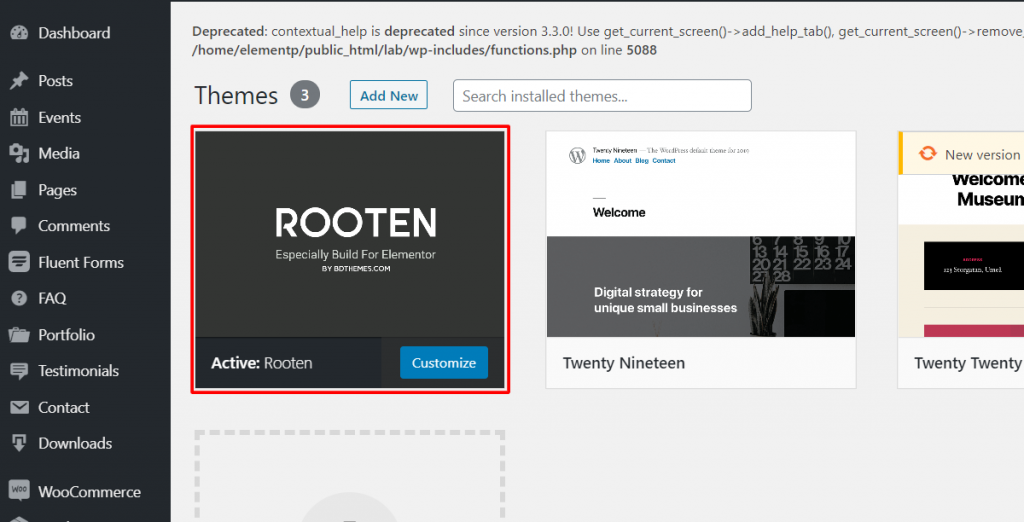
Note that, I’m using Rooten theme for this tutorial. It’s a premium product with a large potential. This is the lightest and fastest theme optimized for WordPress. Rooten theme is offering a huge range of customizable content with stylish artworks. This theme makes it easy and simple for users. It’s an easy-to-use theme for creating a portfolio using Elementor.
Creating a Portfolio Using Elementor and Portfolio Gallery Widget
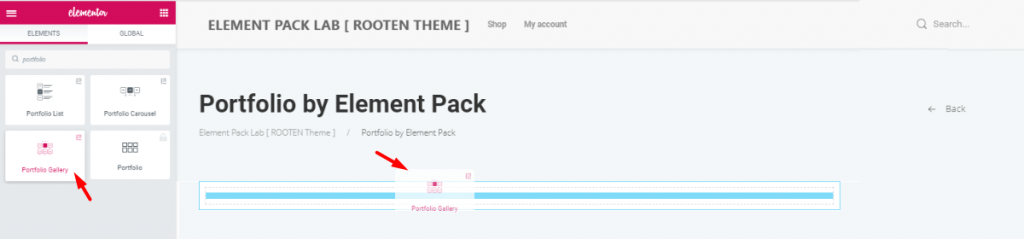
First, you have to drag and drop the widget from the widget menu. Although, this task is nothing to be mentioned. But since many are new to Elementor, this step may help them a bit.
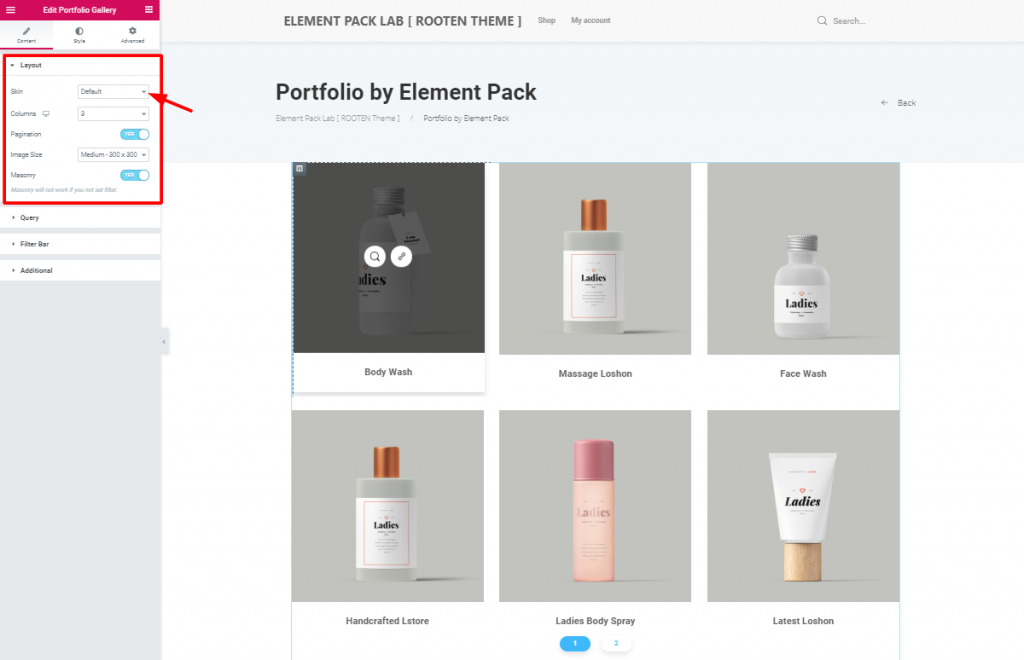
After you insert the widget, you will see the 레이아웃 section opened from the 콘텐츠 tab. This tab holds the base settings of the portfolio widget. As you can see, the 피부 is set to 기본값입니다. The first image has a bit blacken out due to mouse hovering on it.
However, you can change the image size and enable pagination or masonry from this section. The 피부 option helps you create your unique portfolio using Elementor.
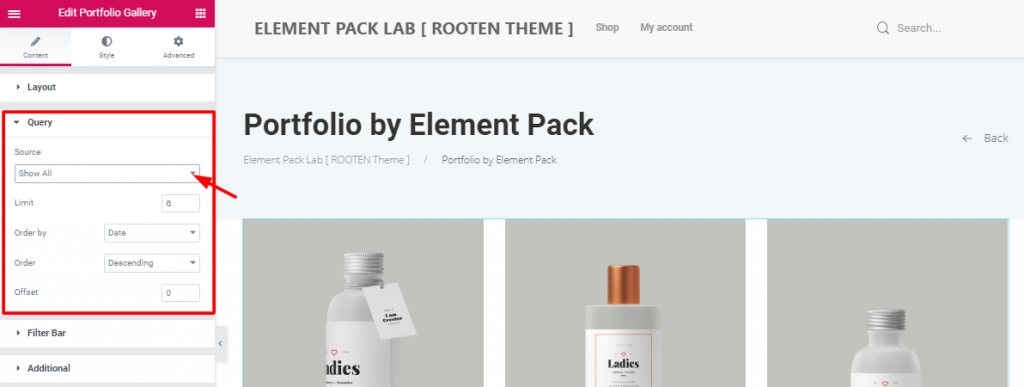
This is where you specify the category of products or items you want to show on the portfolio. If you choose Manual Selection in the 출처 option, you can select a category. It’s the category you have made in the dashboard while creating this portfolio using Elementor.
You can also determine the number of products shown on one page. Also, you can set the order and offset it. These are the basic functions of your portfolio.
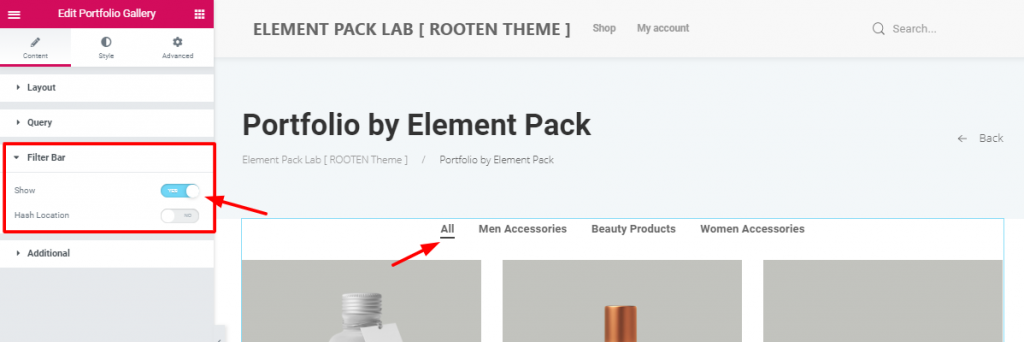
After setting the query, you can see the switcher to turn on the filter bar. It shows how many categories you have inserted in the portfolio. It’s handy and informative towards the visitors. Moreover, the filter bar option makes it easy for customers to choose their products. You need it to create a good portfolio using Elementor.
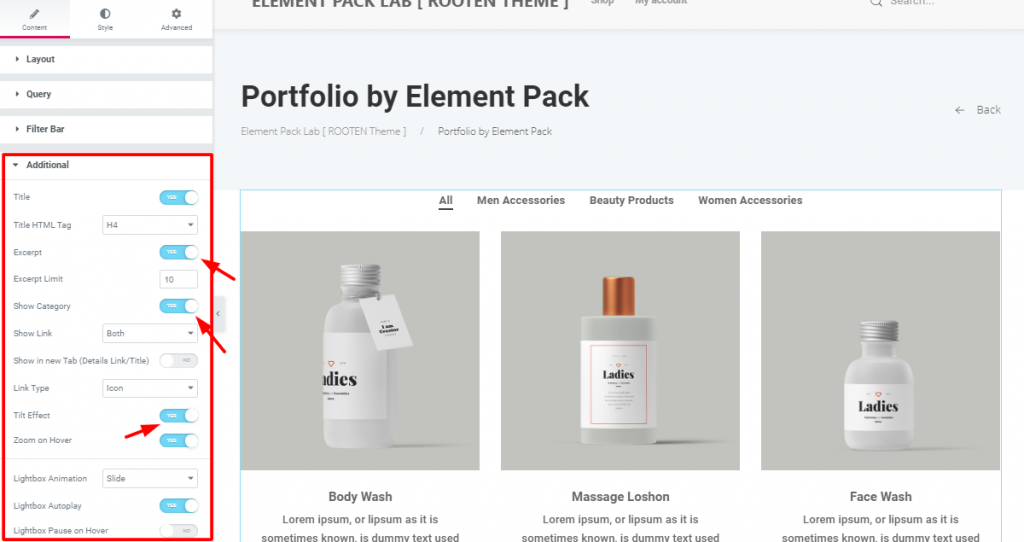
에서 추가 section, you have some more switchers and drop-down controllers. You can actually show/hide the title, excerpt, or categories. However, turning on/off these switchers will do the job. Look carefully at the 기울기 효과 그리고 Zoom on Hover switchers.
This is the 미리 보기 mode, showing the action of the two switchers. Adding these effects will not only make your portfolio rich but also make the visitors satisfied.
Now that you have completed the basics, it’s time to add some pepper on the dish. Let’s move on to the 스타일 탭을 클릭합니다.
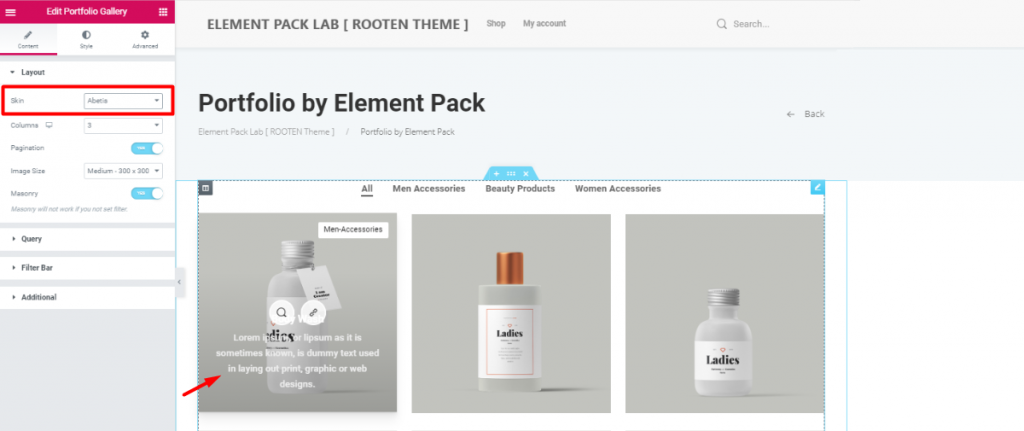
Before moving on, I’m going to change the 피부 에 Abetis. Doing this will bring the title and excerpt into the image. The reason is, it will give you more visible ground and will take less space.
However, all the previous settings still remained attached. So, make sure to give another look at the 피부 옵션을 선택합니다.
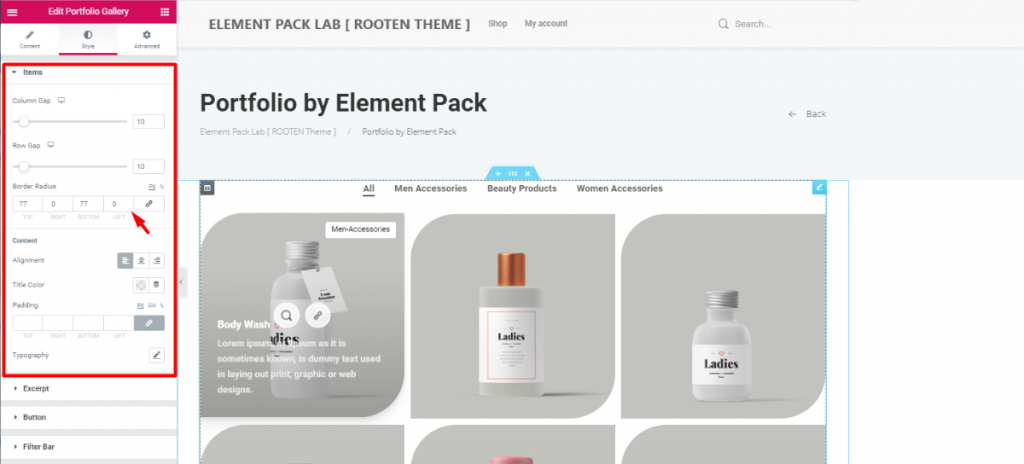
The first section Items lets you adjust the items column and row gaps. The more you increase the gaps, the more their size decreases. This happens because they are in a limited space. So, make sure to maintain the optimum gaps.
Moreover, you can adjust their border-radius from here. As the image shows, I’ve given them unique shapes with Border Radius. Just put 77 numbers in the Top 그리고 Bottom fields.
Again, you can change the color and alignment of the Titles of all the items at the same time. However, be sure to choose unique typography that represents your brand. You can also change the typography and color of the excerpt in the next section.
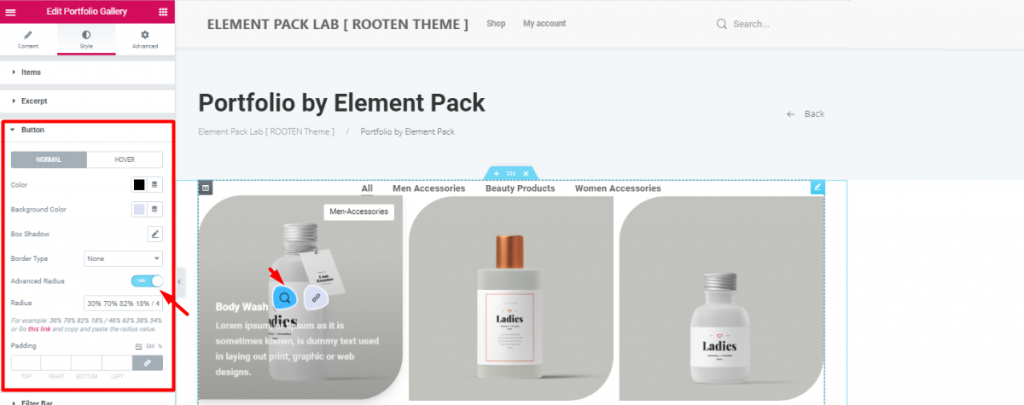
Let’s make things a bit spicier. Turn on the Advanced Radius switcher and have a look. Therefore, you will see the icons appearing in a cool weird shape. This can be done from the 버튼 section in the style tab. However, be sure to change the color as you like.
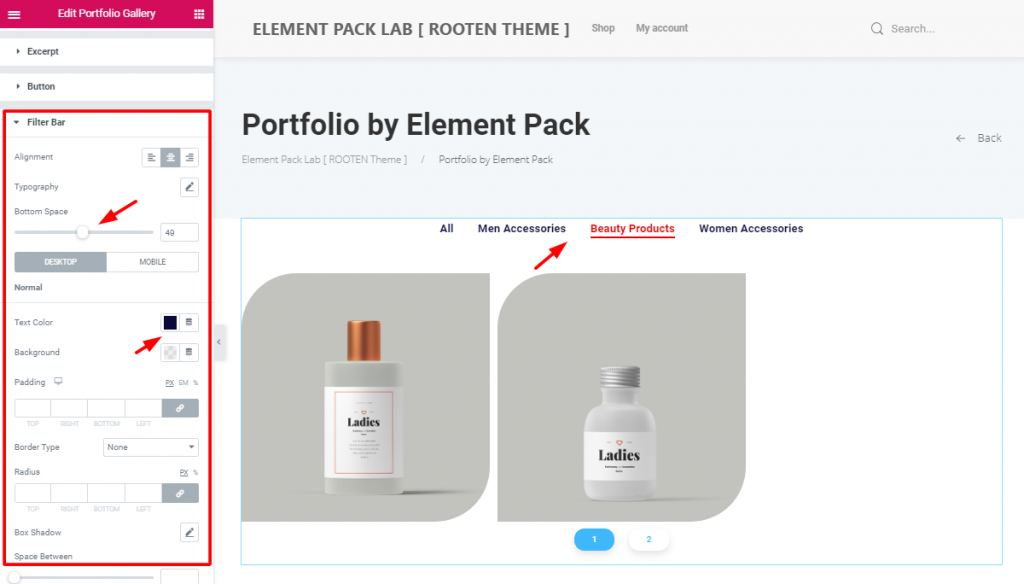
After that, change the alignment and bottom space of the filter bar to match your taste. Don’t forget to change the color and typography. The more refined look your portfolio has, the more it will attract visitors. So, keep that in mind.
Furthermore, changing the appearance of the pagination form the last section is also a good bargain.
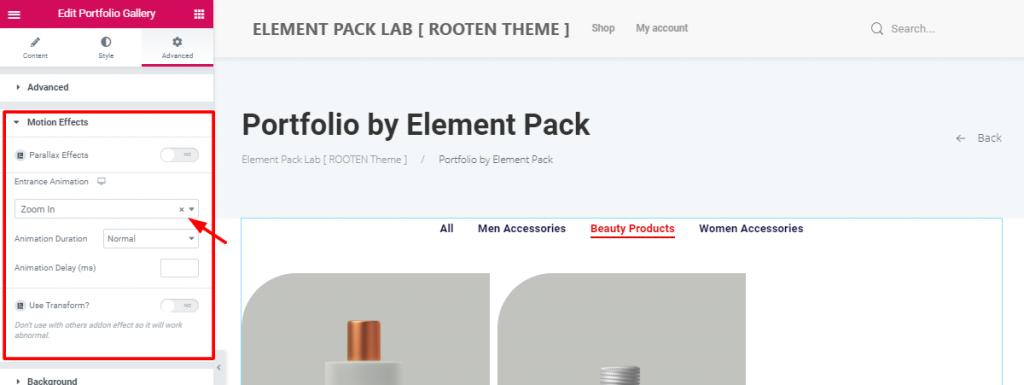
After all these customizations, there’s still something off. Let’s throw in animation and make it complete. From the 고급 tab, go to the 모션 효과 section. Just like above, choose an entrance animation to the portfolio.
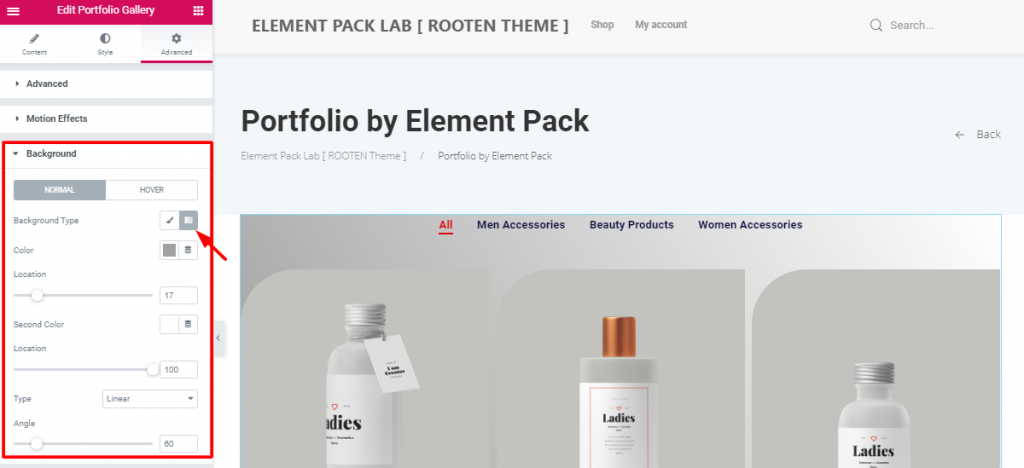
After that, put a gradient color on the background to make a light-dark shade. You can do this in the 배경 section. Simply, go to Style tab> Background.
All done! Have a look at the finished product.
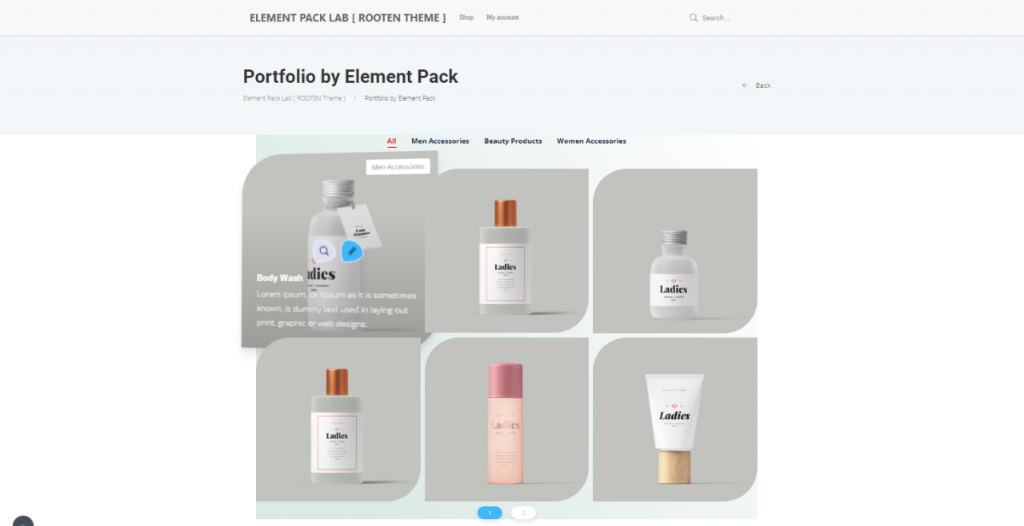
Hence, The portfolio is complete. No need to thank me. However, follow these steps carefully. Make yourself a unique and stunning portfolio using Elementor.
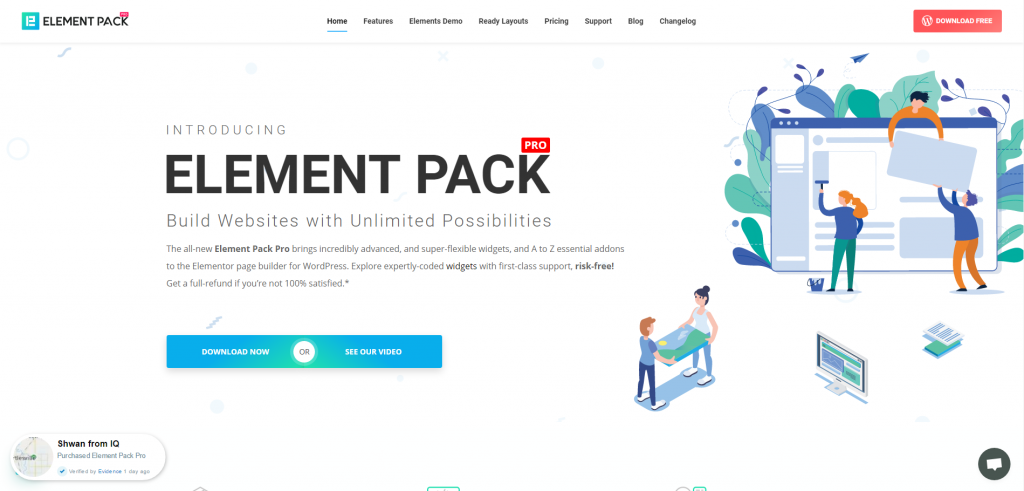
Element Pack 는 워드프레스에 가장 최적화된 애드온입니다. Elementor plugin for creating your premium website.
이 플러그인에는 웹사이트에 배포할 수 있는 방대한 인벤토리가 준비되어 있습니다. 또한 함께 사용 190개 이상의 플러그인, 270+ 페이지 사용 준비 완료, 이상 1800개의 고유 블록Element Pack는 다음과 같은 위치에 도달했습니다. 상위 5위 전 세계.
공식 웹사이트에 접속한 소비자 및 구독자를 대상으로 경품 증정 프로그램을 진행 중입니다. BDthemes.com
방문 Element Pack 또는 프라임 슬라이더 를 클릭하고 여러분의 생각을 공유해 주세요. 행운의 당첨자에게는 $100 상당의 평생 라이선스를 드립니다. 참여하는 데 1분밖에 걸리지 않습니다.
모든 성공적인 웹사이트 디자이너가 원하는 것은 최적화된 프리미엄 도구입니다. 그리고 Element Pack responds confidently to that wish. So, don’t hesitate too much and make a run for it!
이 블로그를 읽어주셔서 감사합니다. 좋은 하루 되세요!
가장 사용자 친화적인 UI를 갖춘 최대 규모의 Elementor 템플릿 팩과 300+ 유용한 Elementor 위젯. 제로에서 시작되는 웹사이트 구축 100% 완벽을 추구합니다.
이 웹사이트는 다음에 의해 구동됩니다. Element Pack Pro 그리고 루텐 테마.
Copyright © 2026 Bd테마. 모든 권리 보유.