豊富なメニューオプションによる容易なナビゲーション
視覚的な商品選択が売上を加速させる
パーソナライズされたコンテンツがリアルタイムで適応
UXフローを改善するシームレススクロール
瞬時にコンテンツを複製し、時間を節約
パワフルなデザイン要素に素早くアクセス
既製のテンプレートがデザインをスピードアップ
柔軟なデータのための高度なカスタムフィールド
手間をかけずに簡単にサイトをクローン
あらゆるスクリーンに対応する、鮮明でスケーラブルなグラフィック
ツールをリブランドしてプロフェッショナルな外観に
正確なコンテンツの表示・非表示
滑らかな動きで奥行きを魅せる
明確なメモや注釈を簡単に追加
役立つヒントがユーザーとのインタラクションを向上
スタイリッシュなアニメーション
重要なセクションは常に見えるようにしておく
カスタム・コードの微調整によるフル・コントロール
ファイルを最適化してサイトのスピードを上げる
年中無休で対応いたします。喜んでお手伝いいたします。
BdThemesで各機能の詳細なガイドラインをご覧いただけます。
ワードプレス、ウェブデザイン、その他について新しいことを学び、情報を得る。
私の成長における重要なマイルストーンをいくつか紹介しよう:
ビデオで製品の使い方、WordPressのヒントとコツを学ぶ
プロモーションに参加することで、高額なコミッションを得ることができます。
Widget Idea Shareは、あなたが改善できる類似ウィジェットを見つける素晴らしい方法です。
確かに!私たちと連絡を取る必要がある場合は、お気軽にご連絡ください。
Sigma Forms を使って WordPress のフォームを数分で作成しましょう。.
ページ・ビルダー・プラグイン
One Accessibilityでウェブサイトを簡単にアクセシブルに
信頼と信用を高めるために、顧客の声を表示する。.
Zoloblocksは、Gutenbergベースの魅力的なウェブサイトを作成するのに役立ちます。.
Elementorスライダー時代の最も優れたスライダー
Elementorで唯一互換性のあるブログ用ウィジェット
ビジネス向け次世代型WordPress eコマースサイトの構築
Elementorで毎回違うエンジェルで写真を整理する
スピンホイールを使ってエンゲージメントを高め、売上を増加させましょう。.
WordPress用AI画像生成プラグイン ChatGPT
WooCommerce用の360°拡張現実を今すぐ入手しましょう!
好きなウェブデザインを2クリックでコピー&ペースト!
無制限のオプションを備えたelementorのための完全に機能するテーマ
スマート、クリーン、フレキシブルなGutenberg用ブロックテーマ
Dark Readerプラグインは、目に優しいウェブ閲覧を保証します。.
コンバージョンを高めるWooCommerceのワンページチェックアウト。
Find Nearby Stores Instantly with Sigma Store Locator
The Ultimate WordPress Media Library Organizer
Do you want to build an WooCommerce custom product page using Elementor on your own? In that case, this blog is for you.
Nowadays, WooCommerce is a fast-spreading wildfire in the internet world. Not long after 4G internet was first introduced, people rapidly converted their stores into online stores. For you to easily and successfully create your store, I will show you how in this tutorial.
In this tutorial, I’m focusing on creating the custom product page. I’m not mentioning the installation procedure of buying a domain, setting up WordPress, and Elementor. However, you can easily learn these from this blog.
Once you setup the plugins and signup for it, let’s begin the main tutorial on the WooCommerce custom product page. Note that, I’m using Rooten theme for this tutorial. However, you can use any themes for your page. But I’m using it because it’s fast and lightweight.
Also, I’m using Element Pack Pro combining with Elementors own widgets. Element Pack has a lot of amazing widgets and its easy to use.
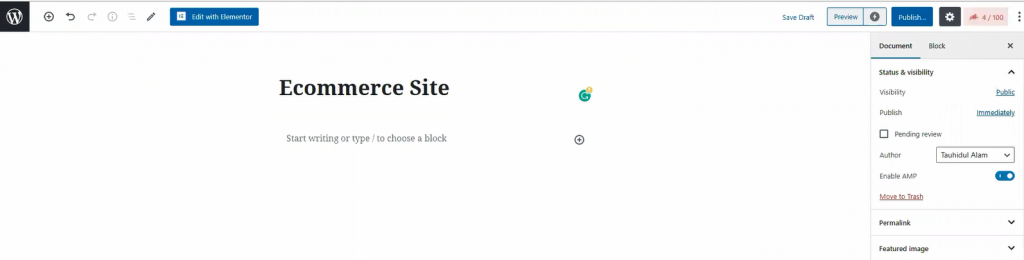
In your dashboard, click on ページ, then click on 新規追加 to create a new page. Like the image shown above, give your page a title.
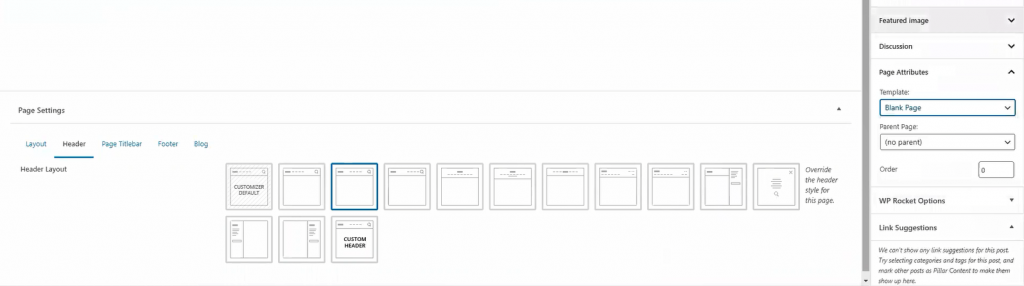
For the page layout, select Blank Page より Template. You can get this option from the Page Attributes menu on the right side. Once you are done, hit the 出版 button. Now, let’s move onto the next part for creating your WooCommerce custom product page.
The landing page is what you see as the first page of a website. It has most of the information you need to show your visitors. Today, we are going to create this landing page for your store.
The landing page has many sections. To make an attractive landing page, each section is necessary. Let me show you how to make WooCommerce custom product landing page.

Well, first things first. Let’s start with the hero section. I think the image above has already picked your interest. However, creating this thing is easy. Just follow the steps.
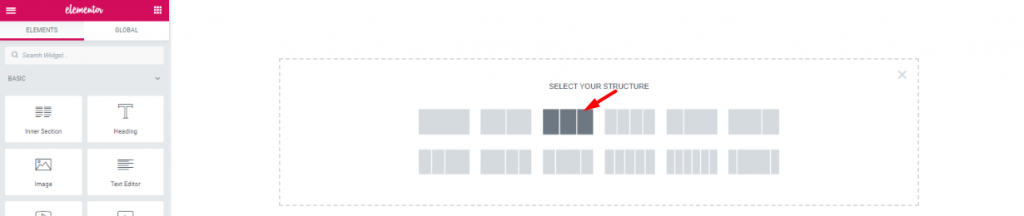
First, on the blank page, make a 3 section window.

をドラッグ&ドロップする。 Scroll Navigation ウィジェット Element Pack into the middle section. The widgets will make your header menu.
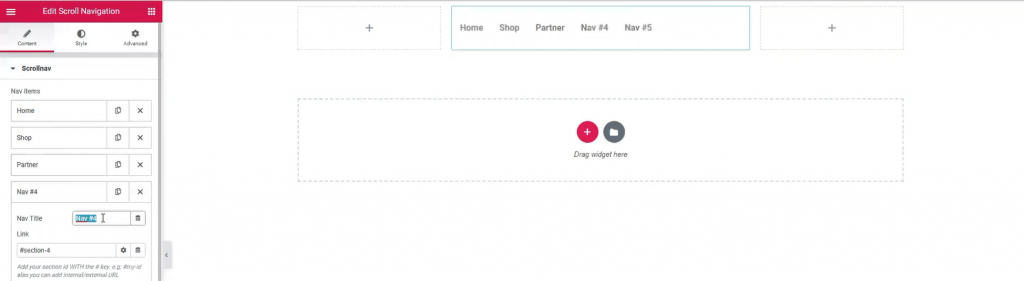
However, Name your menu bar as you like. The widget has a wide customization menu. You can change its appearance easily from here.
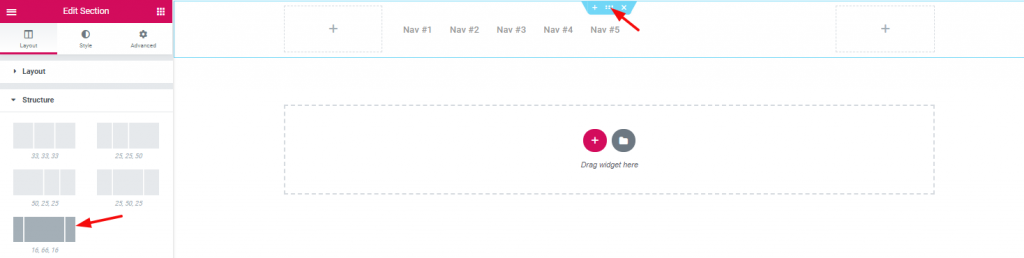
The section width distribution can be edited from the layout option. However, for the header area, I’ve selected a good width distribution.

Inserting Inner Section on the right corner beside the navigation menu.

Dragging and dropping WooCommerce mini-cart by Element Pack on the left inner section.

And, 検索 widget on the right inner section.

Also, adding 画像 widget on the left corner of the header area.

With that, the header area is now completed. It is a little tricky to create this header area for your WooCommerce custom product page. But once you get it, you can make a unique header for yourself.
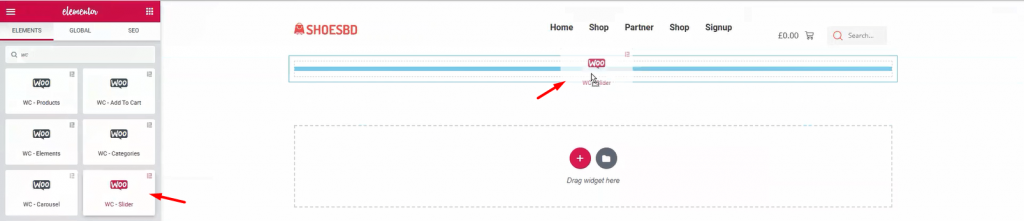
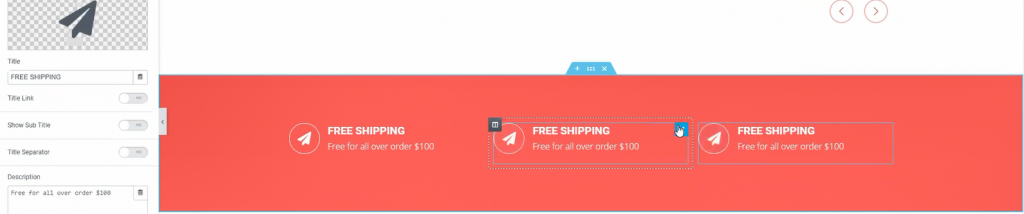
It’s time to show your visitor the first batch of products. Add WooCommerceスライダー under the header.
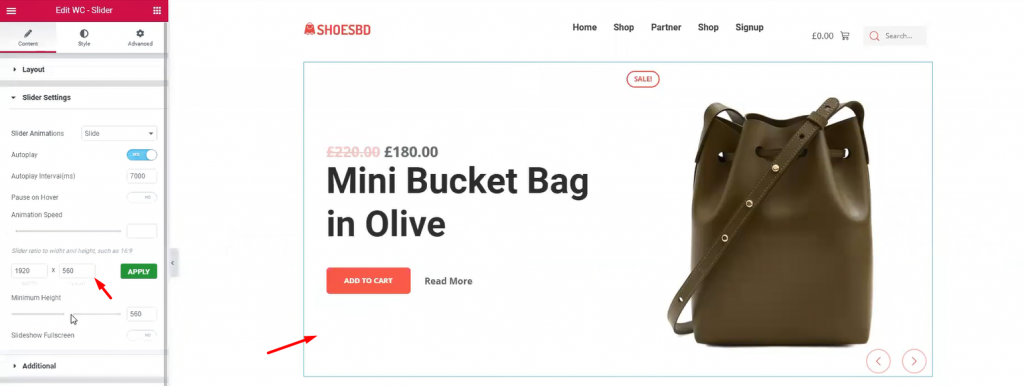
The slider widget is also developed by Element Pack. It brings out the charm of your product with its pixel-perfect smooth graphics. It is an essential tool for your WordPress custom product page. The widget has many uses as it has a customizable option provided by developers. You can change the slider’s dimension, animation speed, and type, minimum height, and colors. Once you are done with it, let’s see the complete hero section.
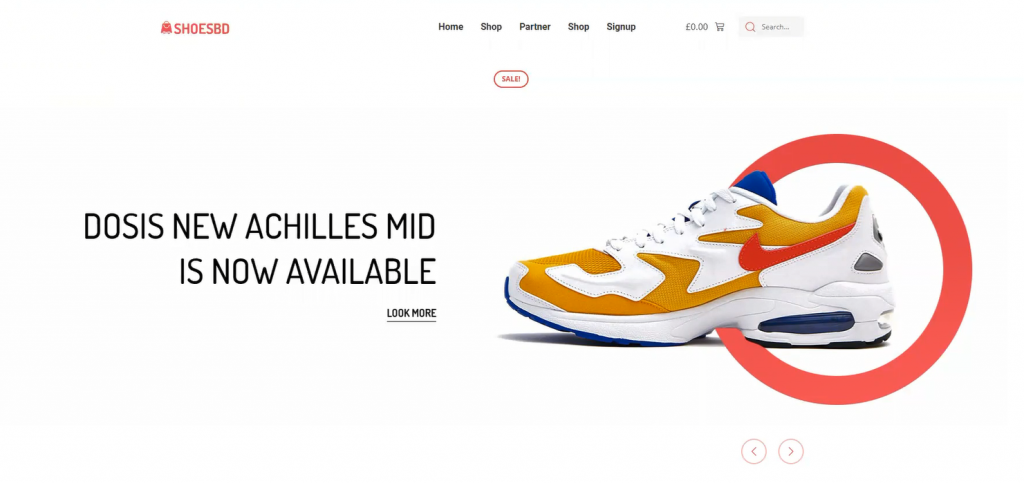
Have a good look at the finishing product. This complete hero section has a minimal but elegant design. Note that, you must create your hero banner according to your targeted audience. If the visitors aren’t caught with the first look, they won’t stay on the page. This is your first step to success on your WooCommerce custom product page.
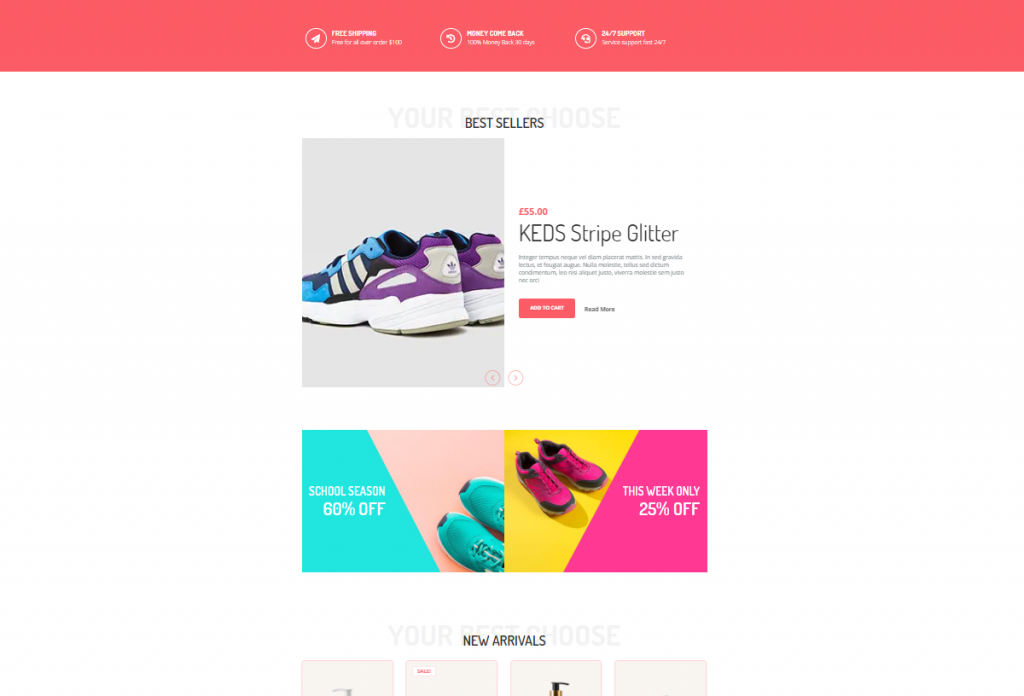
The features section is where you want to showcase your products and offers. In most cases, we create this section using 4-5 different features, giving the visitors more things to consume.
Don’t be mean when designing your features section. Because you must keep in mind, people will get bored seeing only 1 product showcase.
Let’s make a good features section for your WooCommerce custom product page.

First, make a section with 3 inner sections. From the Layout option, give a suitable background color.
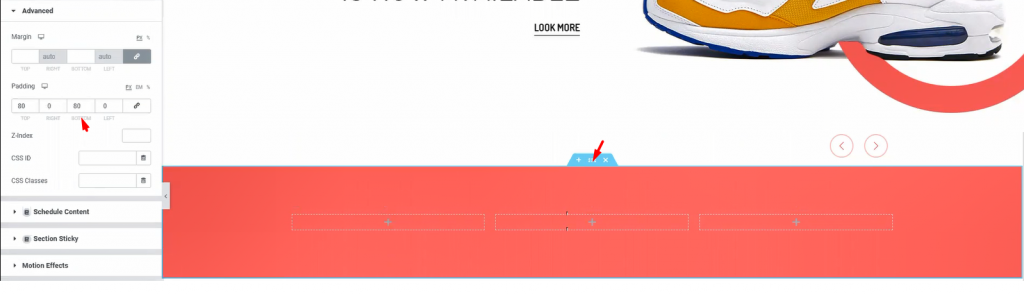
Add padding to the section so that we have a field to work on.
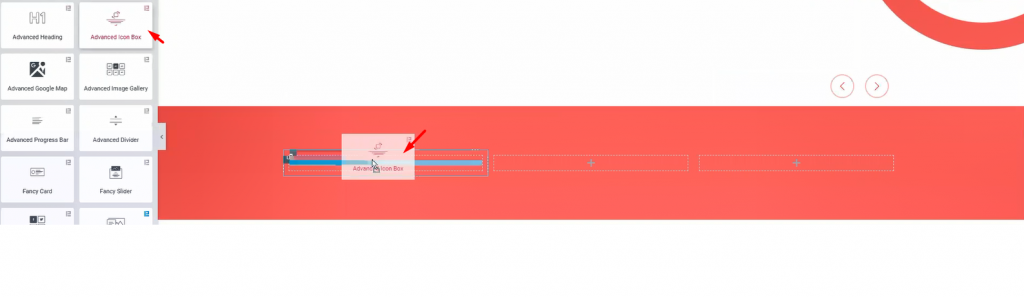
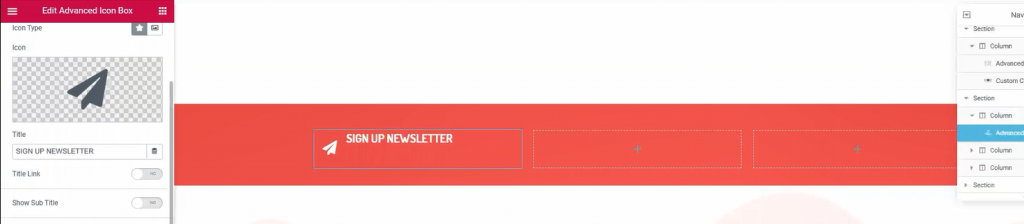
I’m using 高度なアイコンボックス in these inner sections. However, you will get a huge customization menu for this widget.
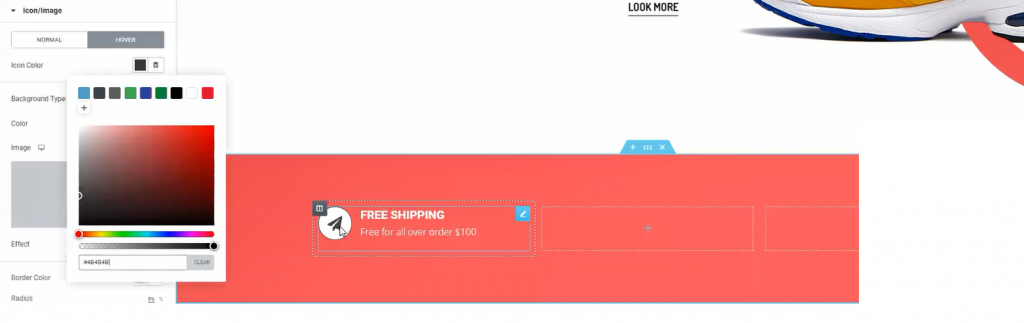
The fun thing is, you can design a variety of things with the advanced icon box widget. Like the image above, you can make this design with just a few edits in the customization menu.
One more thing, for quick edits, just duplicate a widget and place them accordingly. Do this if you need more items in a similar format. This saves both time and effort.

Now, adding 高度な見出し widget underneath the previous part.
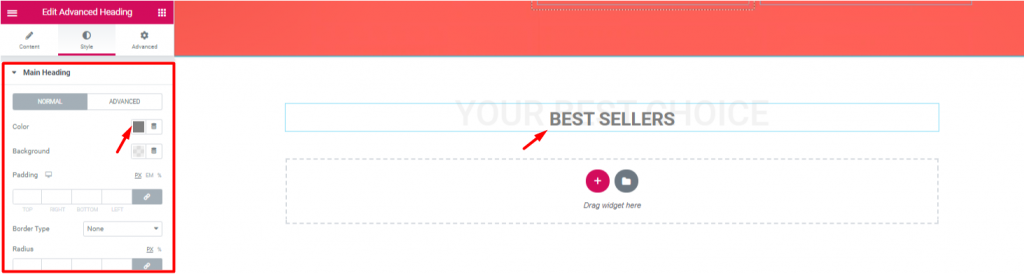
Let’s edit the heading to match the theme of the next section. Note that, the advanced heading widget is made by Element Pack.
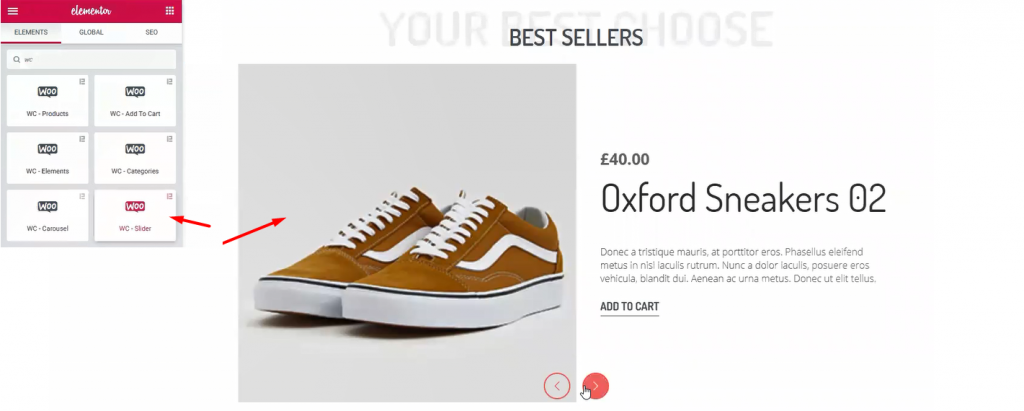
Once again, I’m using WooCommerceスライダー widget. This time, I’ve made some edits to change the appearance from before. However, checkout this tutorial about WooCommerce Slider to use it successfully.

Let’s create another double part section. For this part, I’m using トレーラーボックス widget. It’s a handy widget for showing advertisements easily.

Once again, the Trailer Box widget comes with a very unique customization menu. Not only you can change its layout but also you can change its colors and text fonts. Moreover, it has an option to add an image as a background. Stylish and unique indeed.

Inserting another 高度な見出し widget again.
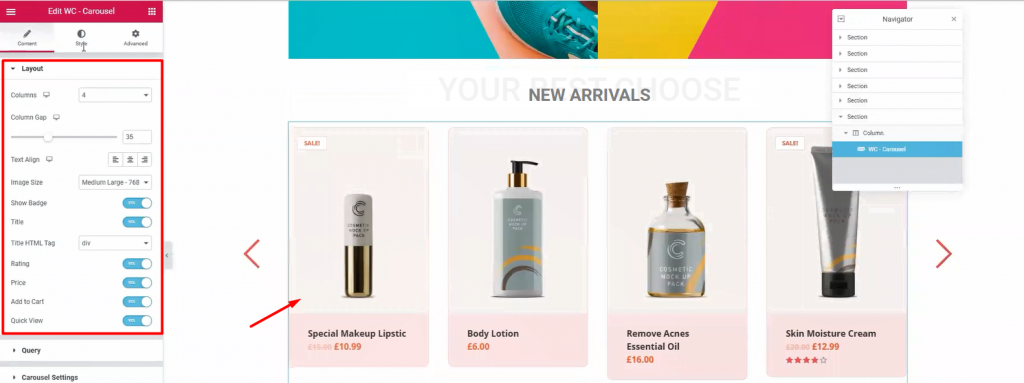
Next, drag and drop WooCommerceカルーセル widget from Element Pack below the heading. With it, you can show your newly added products together. Moreover, we use WooCommerce Slider widget to highlight products with a wide view. On the other hand, using this widget, we can show all the products in 4-5 columns. It’s a handy tool for your WooCommerce custom product page.
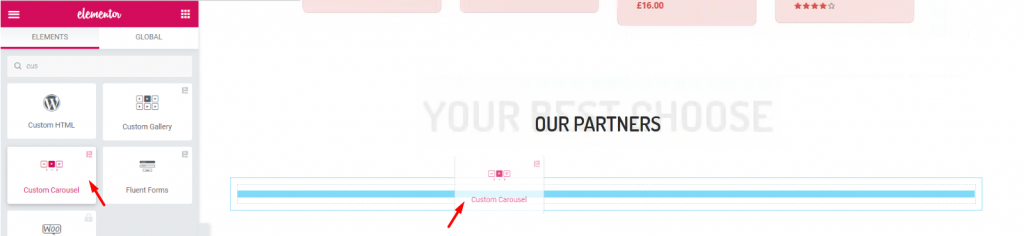
Again, after adding another 高度な見出し widget, let’s add the カスタムカルーセル widget. It’s a widget that shows images with a carousel style.
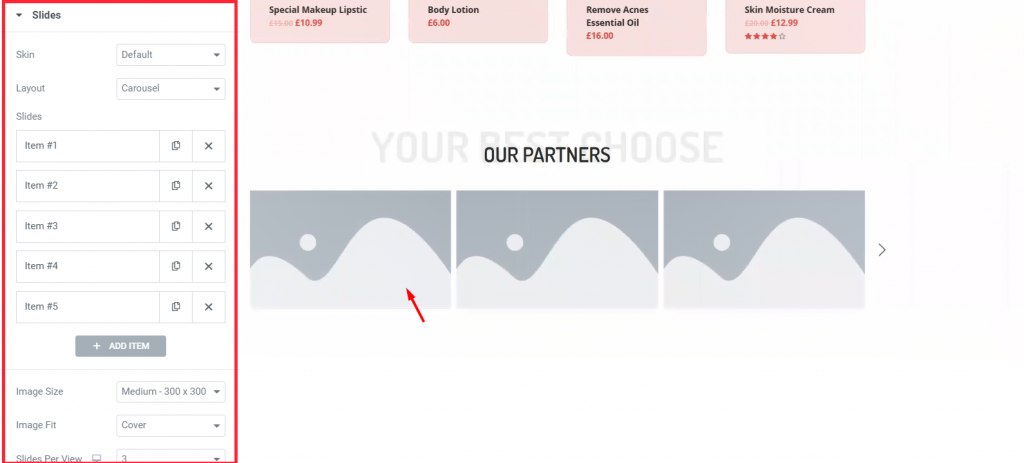
Each block of blank portrait holds an image inside it. You have to manually choose images for each blank portrait.
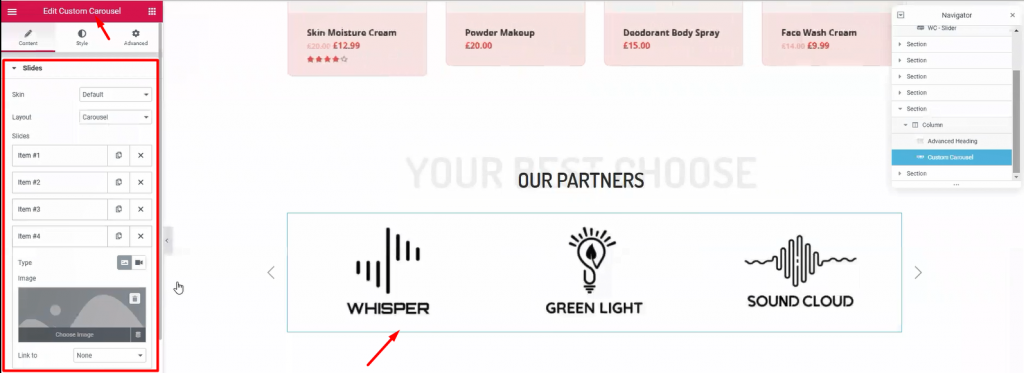
This part is essential to your visitors, showing your business relationship with other companies. Use this カスタムカルーセル widget section (made by Element Pack) to add more appeal to your WooCommerce custom product page.
Time for the finishing part. This section is very crucial for your WooCommerce custom product page. Here, you have the last chance to attract attention from your visitors. So, callout your visitors towards buying your products and give them a tour of About Us.
Once again, make another 3 columns, red background section below the custom carousel. This would be your callout section. Just copy-paste previously made section similar to this to save time.

Place Mail Chimp widget on the 3rd right column. This widget collects your visitors’ emails and redirects them to the signup page. It’s a helpful tool made by the Element Pack team.

Below the callout section, make a 3 column section. This section will be our footer. Add Heading そして テキストエディタ widgets in the columns.
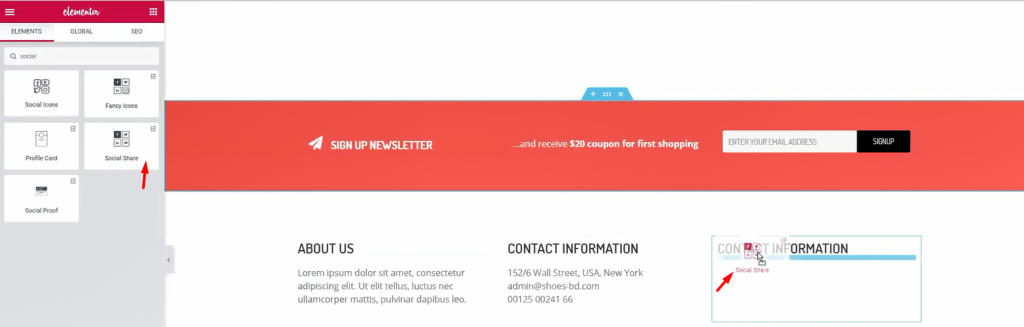
For the 1st and 2nd column, a title and some text are enough. Let’s move to the 3rd column. Adding a title and ソーシャルシェア widget (by Element Pack) inside it.
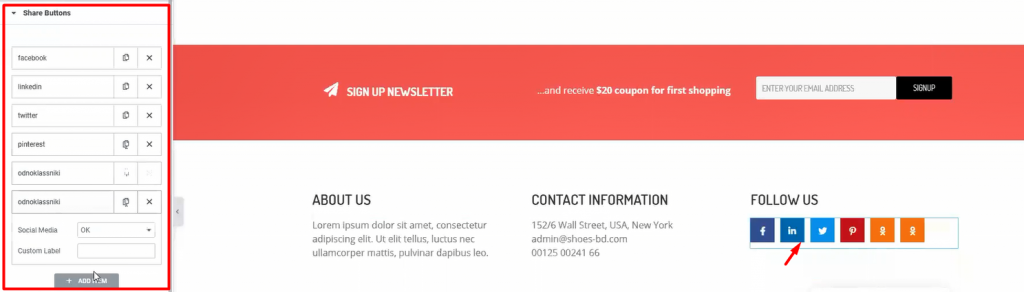
Add more social sites by customizing the widget. This will let your visitors easily go to your social sites. After you are done, let’s see what we have made so far.
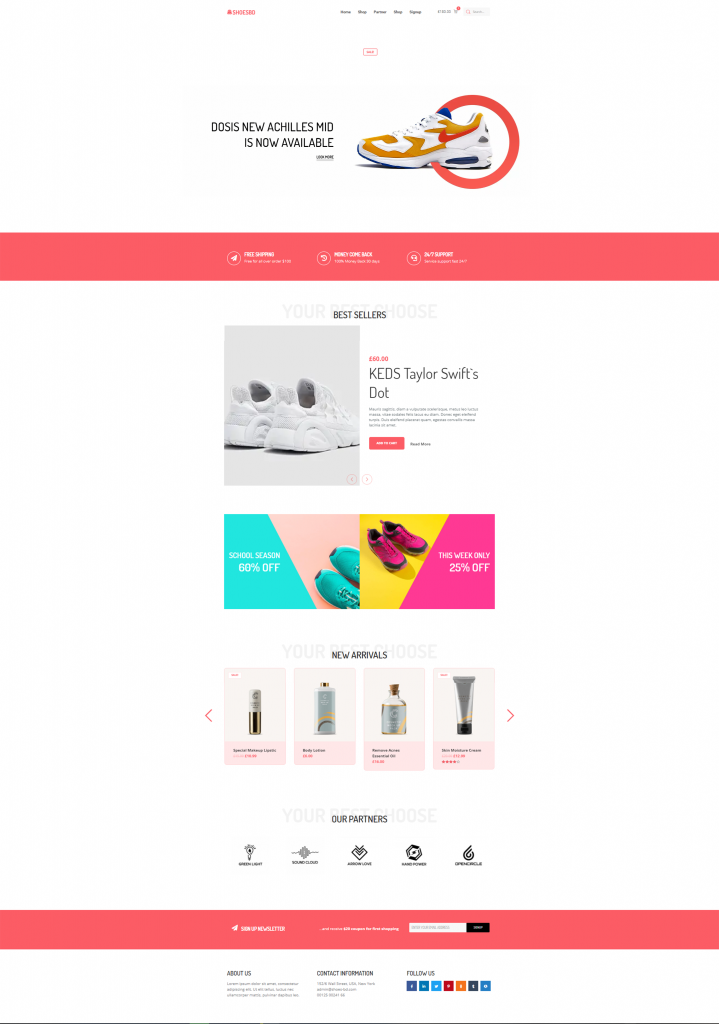
Whoa! Look at this stunning webpage you have just created! Amazing right?
Hopefully, you have learned the full procedure of creating an WooCommerce custom product page. This is not a difficult feat to achieve. But the important question is, Who will teach you? Now that you have learned it all, let’s go make your WooCommerce sites.
Element Pack is the most optimized add-on based on the WordPress Elementor plugin for creating your premium WooCommerce custom product page.
This plugin has a vast inventory ready to be deployed on your website. Also With 190+ plugins, 270+ すぐに使えるページ 1800 ready blocks, Element Pack has made it to the position of トップ5 ワールドワイドで。
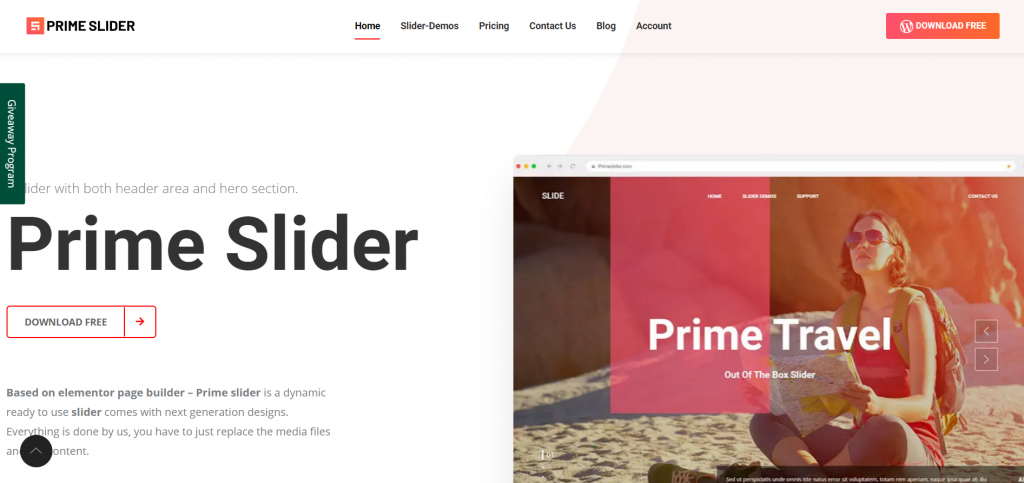
について プライムスライダー plugin gives you the best slider widgets that have ever happened in Elementor. It has pre-designed sliders which are fully customizable.
You can get more than 27 slider layouts while having the infinite customization module enabled. Make your website fast, charming, and improved by using sliders of Prime Slider.
オフィシャルサイトにご登録いただいている皆様を対象に、プレゼント企画を実施いたします。 BDthemes.com
訪問 Element Pack または プライムスライダー あなたの感想をお聞かせください。ラッキーな当選者には、$100相当の生涯ライセンスを差し上げます。参加にかかる時間はわずか1分です。
What every successful website designer wishes for is premium and optimized tools. And Element Pack & プライムスライダー respond confidently to that wish. So, don’t hesitate too much and make a run for it!
Thank you for reading this blog. Have a great day!
最大のElementorテンプレートパックは、最もユーザーフレンドリーなUIと 300+ 便利なElementorウィジェット。ゼロからウェブサイトを構築 100% あっという間に完璧になる。
このウェブサイトは Element Pack Pro そして ルーテンのテーマ
Copyright © 2026 Bdテーマ. 無断複写・転載を禁じます。