Effortless navigation with rich menu options
Visual product choices boost sales fast
Personalized content adapts in real-time
Seamless scrolling for better UX flow
Instant content duplication saves time
Quick access to powerful design elements
Ready-made templates speed up design
Advanced custom fields for flexible data
Clone sites easily without hassle
Crisp, scalable graphics for all screens
Rebrand tools for a professional look
Show or hide content with precision
Engaging depth with smooth motion
Add clear notes and annotations easily
Helpful hints improve user interaction
Animate elements with stylish flair
Keep important sections always visible
Full control with custom code tweaks
Optimize files to boost site speed
Crafted page templates to help you get started with your landing page just by dropping a starter design
Ready Blocks comes with a variety of layouts and design elements, such as headers, footers, and widgets etc.
Pre-designed headers with lucrative styles that are suitable for various niche websites and design tastes
A helpful collection of footer designs to help you create an instant attractive footer on your landing page
Find us 24/7 at your service. We are glad to help.
Detailed guidelines available for every features at BdThemes
Learn something new, stay informed about WordPress, Web Design and more
Here are some of the key milestones in my development:
Learn product usage, WordPress tips & tricks from our videos
Earn hefty commissions by joining us in the promotion
Widget Idea Share is a great way to find similar widgets that you can improve.
Certainly! If you need to get in touch with us feel free to reach out
Build any WordPress form in minutes with Sigma Forms.
Coming Soon & Maintenance Mode Page Builder Plugin
Easily make websites accessible with One Accessibility
Display client testimonials to enhance trust and credibility.
Zoloblocks helps craft stunning Gutenberg-based websites.
Most superior Slider in the Era of Elementor Slider
The only Compatible blogging widgets in Elementor for any Blog
Build a next-gen WordPress eCommerce website for business
Organize your photos in a different angel every time with Elementor
Boost engagement and increase sales using Spin Wheel.
Powerful AI Image Generator Plugin for WordPress by ChatGPT
Get 360° Augmented Reality for WooCommerce today!
Copy & Paste any web design you like just with 2 clicks!
A fully functioning theme for elementor with unlimited options
Smart, Clean & Flexible Block Theme for Gutenberg
Dark Reader plugin ensures eye-friendly web reading.
WooCommerce one-page checkout to boost conversions.
Find Nearby Stores Instantly with Sigma Store Locator
The Ultimate WordPress Media Library Organizer
Access 100+ premium WordPress plugins with lifetime updates and dedicated support.
Designing a Pet Shop website is super fun. As a lover of the mother nature, we love pets as much as you do. And love should be shared.
That’s why we designed a page just for making it into an online pet shop anytime. But, we won’t keep it to ourselves.
Be ready, cause this blog will be about a step-by-step construction of our ideal pet shop website. Let’s begin!
Designing any website using Elementor is easy. As you don’t have to deal with codes, you can stay relaxed.
But the thing is, the more feature you want to add to your page, the more complicated things become. Elementor doesn’t offer a variety of widgets. That’s why you might want to take a 3rd party widget pack.
Anyway, we are going to use the free version of Elementor and Element Pack to design our pet shop. Now, the cause of using the Element Pack plugin is:
Unlike bloated costly plugin with limited features, Element Pack is cheap and full of features. Get it from here.
A website consists of several segments that you can consider as sections. The homepage contains the maximum number of sections to display the whole purpose of the website.
To keep your visitors engaged with your content, you have to design a decent information flow on your pet shop website.
An ideal website has these sections on their homepage:
So, if you design a Pet Shop website in this manner, you will hit the perfect score. Now, let us begin.
First of all, make sure you have Elementor and Element Pack plugin installed on your dashboard.
Then, access your WordPress Dashboard> Pages> Add New and create a new page. We named our website ‘Pet Store‘.
We are running a give-away program to our beloved consumers & subscribers who are connected to our official website BDthemes.com
Visit Element Pack or Prime Slider and share with us your thoughts. Lucky winners will receive a lifetime license worth $100. It will only take a minute to take part in.
The hero section has two parts, the header and the body.
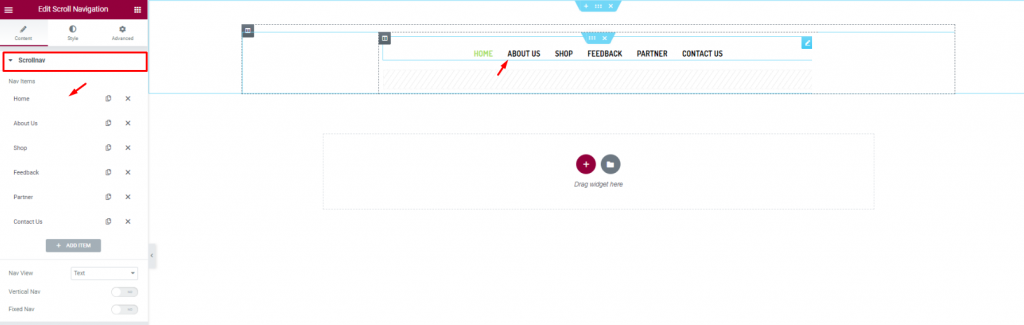
Let’s first insert the Scroll Navigation widget by Element Pack on our page. This will be the front navigation system for our website. Change the name of the menu items as you prefer from the content tab.
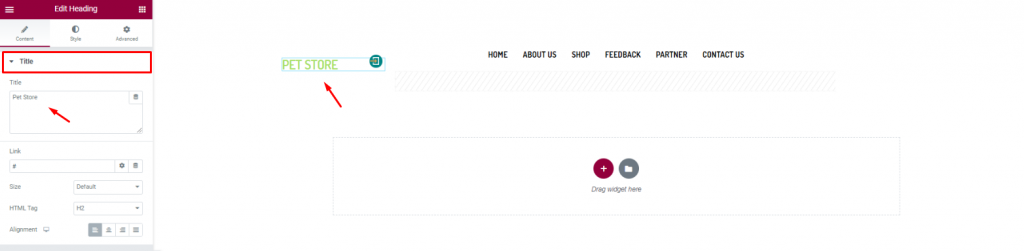
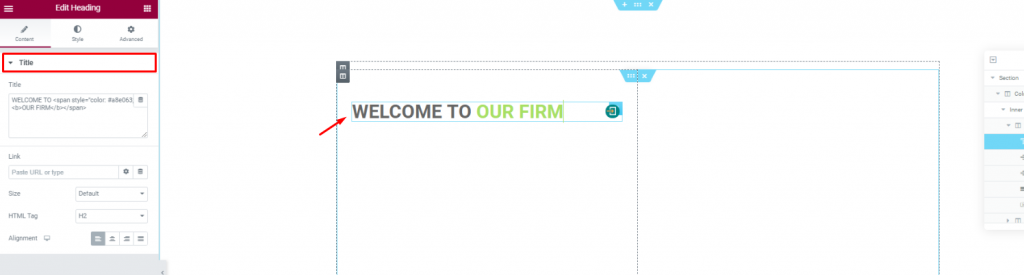
Insert the shop name/logo on the top left corner of the header. We inserted the Heading widget by Elementor and put the shop name in texts.
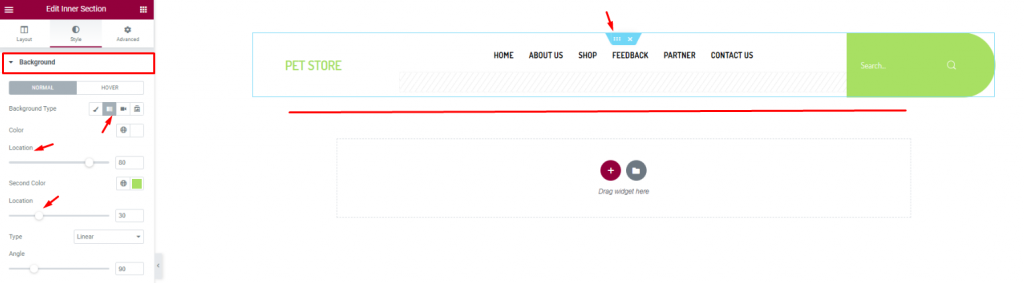
Finish the header design of the pet shop website by using a gradient background color from the section settings. Don’t forget to put a Search widget on the top-right corner.
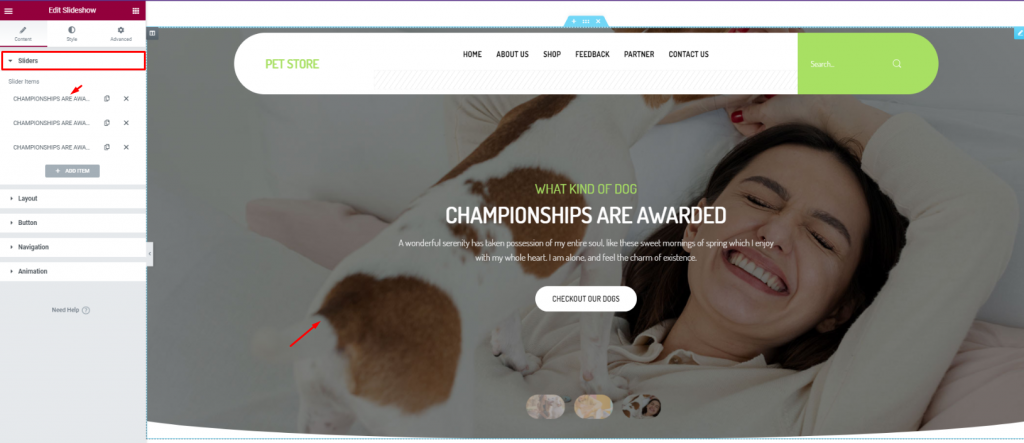
For the body of the hero section, simply insert the Slideshow widget. The widget lets you combine stunning background images, texts, and a CTA.
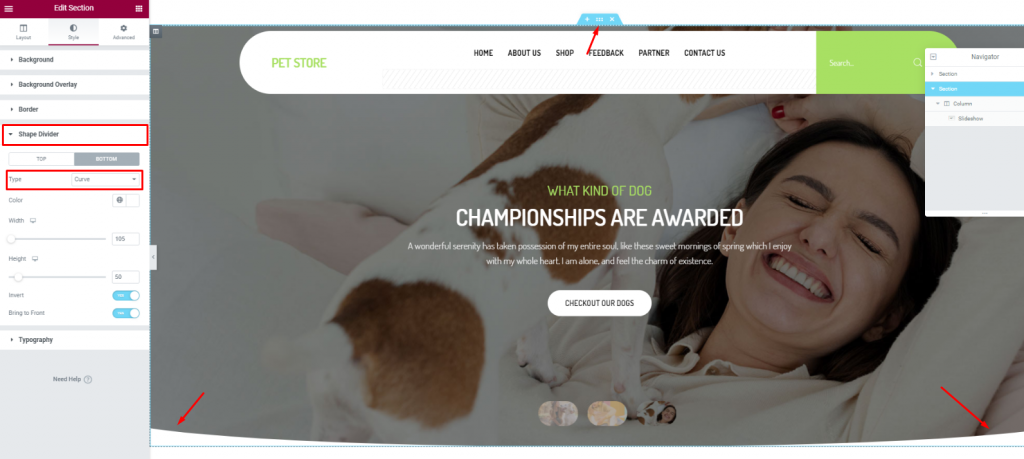
To add more style to the slider image, you can try to curl up the edges. To do that, you need to go to the section settings> Shape divider> and choose Curve from the Option Type.
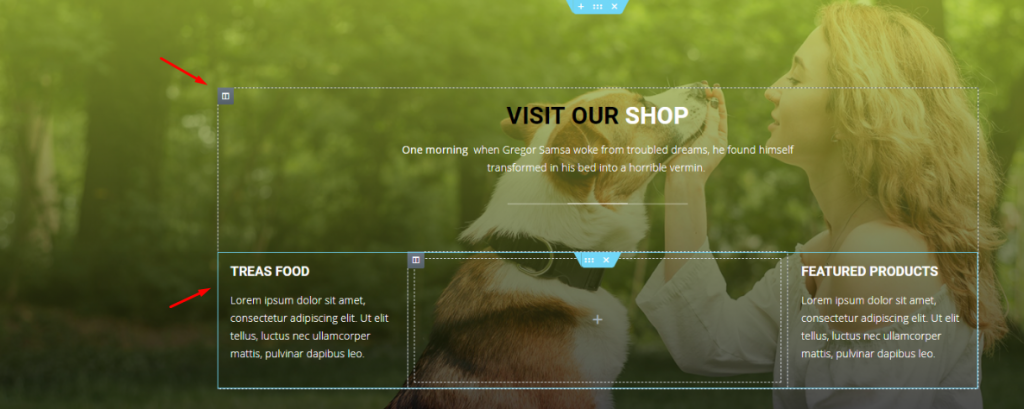
After the hero section, we need to design the features section. This part will highlight our service capabilities and deliver deeper info about our pet shop website.
Now, more features will bring out more info spontaneously. But no need to overdo it. So, we will stick to 2 sections for displaying features.
Create a double-column section. Insert the Heading widget on the left column.
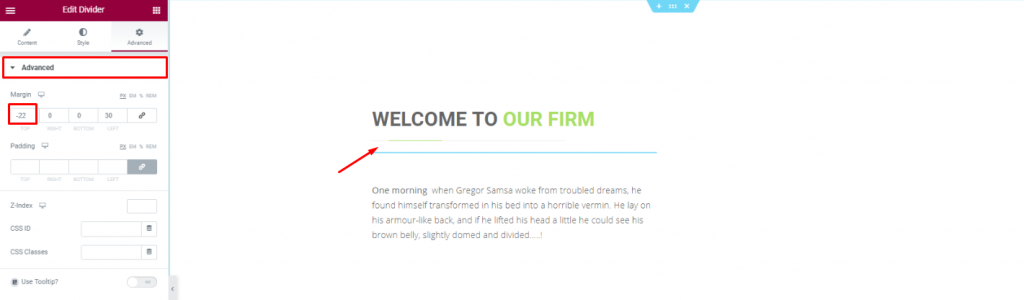
Put a Divider widget under the title to boost its look. Place a short description of the company below.
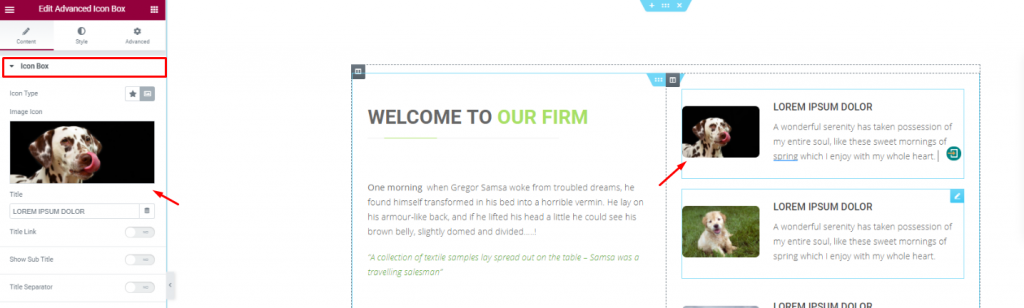
Placing the Advanced Icon Box widget on the right side of the column for pet descriptions.
With a decent background image, create a multi-column section and fill it with more shop related details. You can do that much simply using a Header widget and the Text Editor widget.
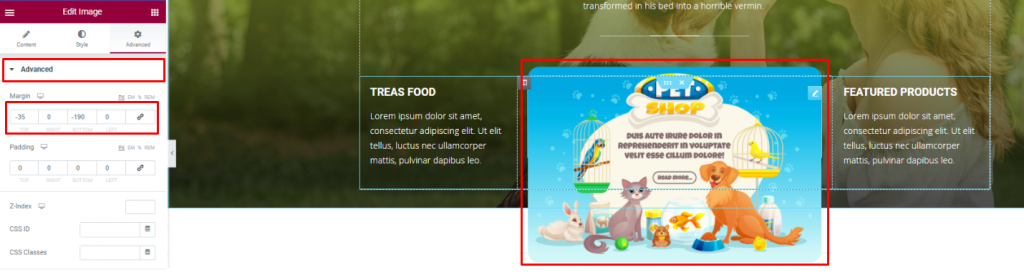
Insert an Image widget and displace its position using the Advanced tab.
You can not design a pet shop website without a pet gallery, right? To make it look decent, you can cover an entire section with an image gallery or merge it with the features.
We did the later but in a more creative way.
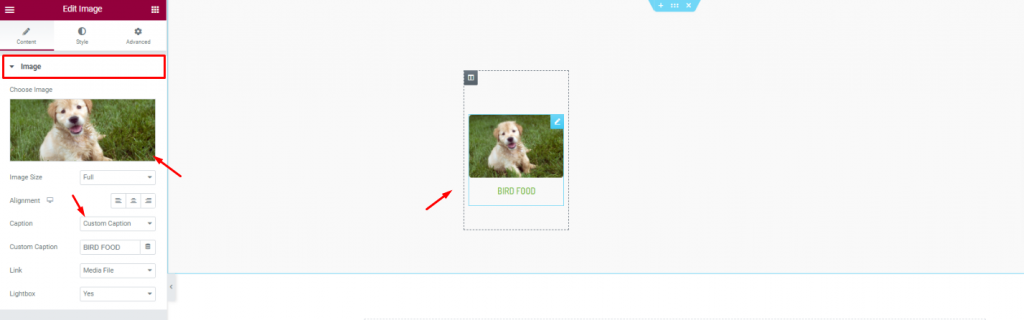
First, create a 6 column section and insert the Image widget in them.
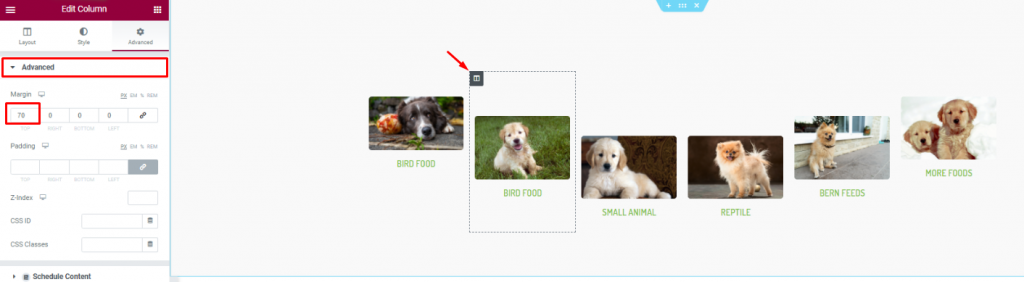
Second, go to column settings and in the Advanced tab, consecutively adjust their margin. Just then, you will get a nice curved pet image gallery.
Positive reviews from customers is always a good addition to your website. A pet website is not different. As your customer will put more trust upon seeing those good reviews, it’s best to put a testimonial section on your website.
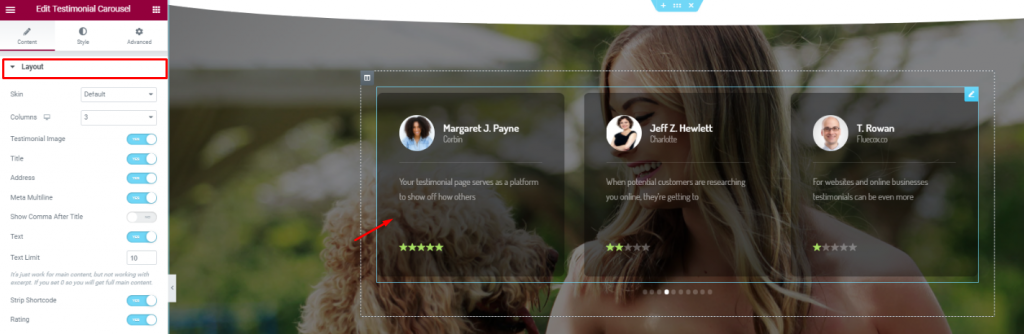
On a new section, insert the Testimonial Carousel widget in the middle of the section. Make the color a bit transparent from the Style tab.
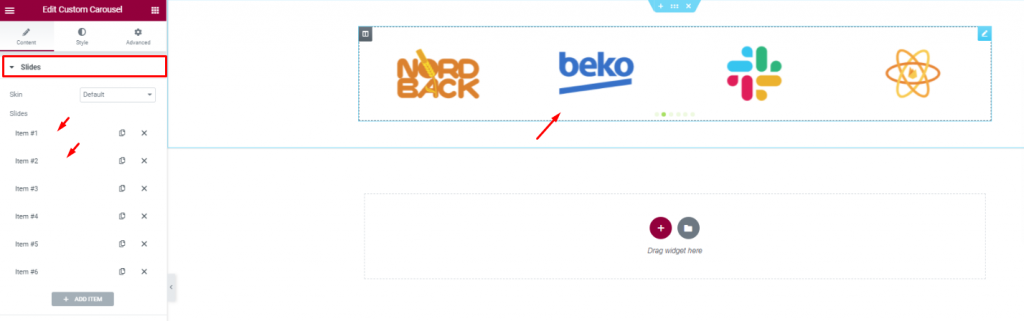
Insert all affiliate websites, partners, sponsors through the Custom Carousel widget. And, that covers up for the testimonials.
In this part, we will create a section to display events/offers related to our pet shop.
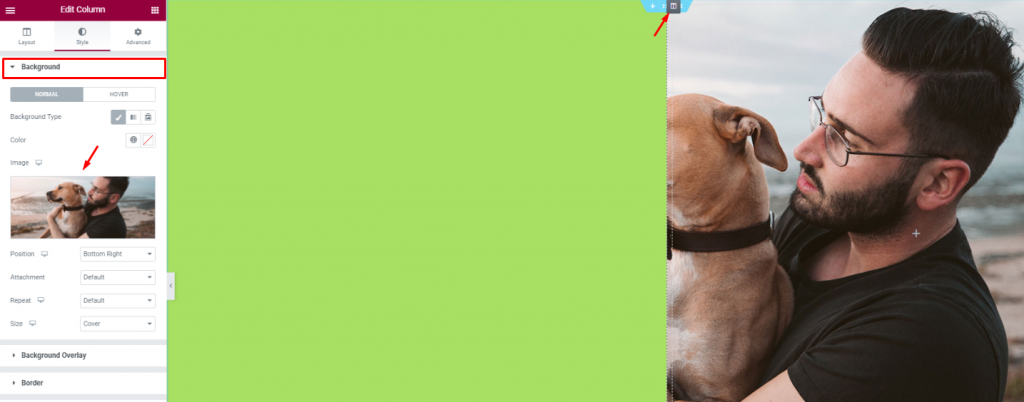
Create 2 column section and add a decent image as a background on the right column. Put a light-green color on the left column.
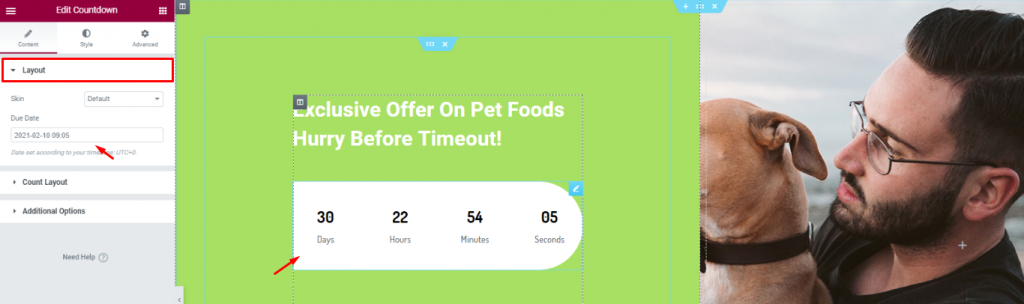
Add a title and the Countdown widget to show remaining time for your offer.
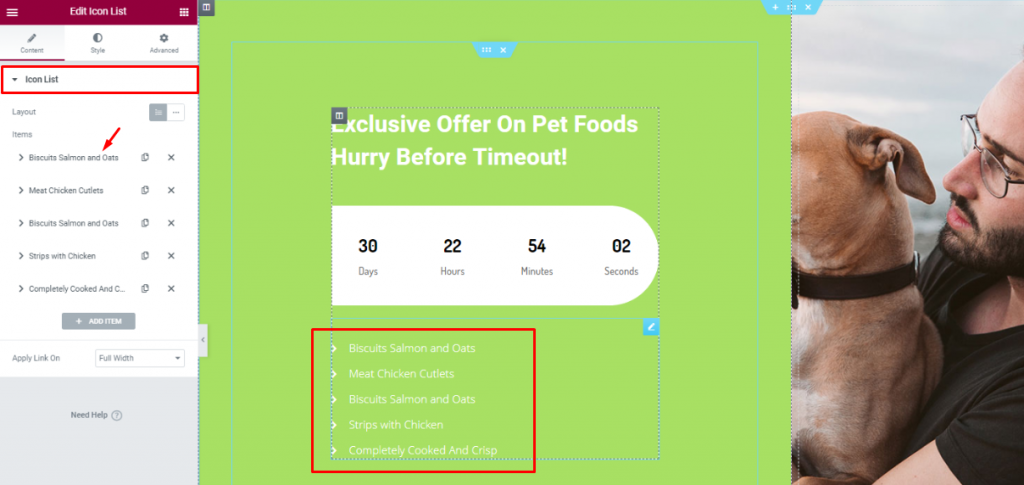
Insert the Icon List widget below the counter to show the offer contents.
Lastly, you need to design a footer part containing contact info, locations, social media links, etc.
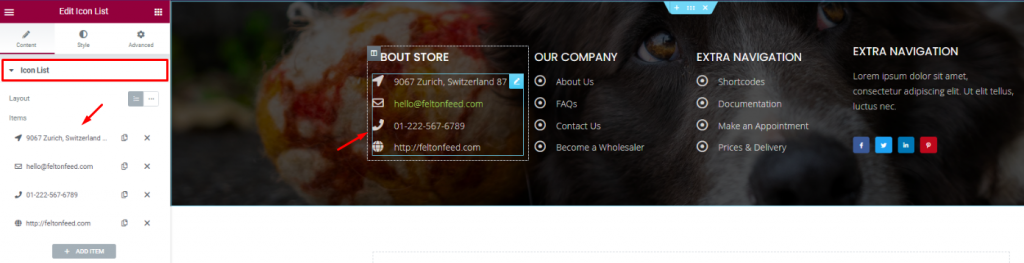
For the footer, make a section with a decent background and divide it into 3 or 4 columns. You can use the Header and the Icon List widgets for the footer.
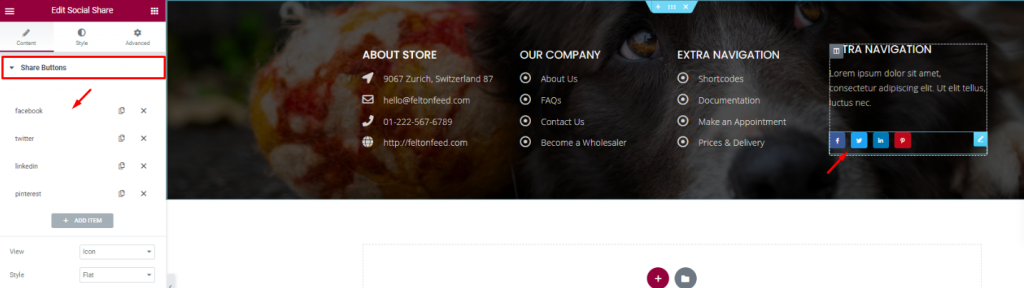
Put your social media links using the Social Share widget at the end of the footer. That’s it!
Like that, you can design a unique pet shop website and start your new business today.
Thank you for staying with us.
Largest Elementor Templates pack with the most user-friendly UI and 300+ useful Elementor widgets. Build websites from zero to 100% perfection in no time.
This website is powered by Element Pack Pro and Rooten Theme.
Copyright © 2026 BdThemes. All Rights Reserved.