
Iframe is mainly a part of the same HTML structure that runs a website. It lets you add or embed content from other websites into your website.
For a lot of reasons, you may need to create an iframe widget on your webpage. It includes images, videos, another webpage, etc.
Generally, the idea is to speed load the target item from an external source and reduce the load on your site.
As for how to embed it, you have two ways to create iframe widget in Elementor:
- Use raw shortcode
- Use an Elelemntor Iframe plugin
In this blog, we will tell you exactly how you can create an iframe widget in Elementor.
Method 1: Create Elementor iframe Widget with Shortcode
Being a part of an open-source software WordPress, Elementor has a lot of integrations. One of them is Shortcode. Even for operations like an iframe, there are shortcodes available.
To put it simply, you can open any page using WordPress Gutenberg editor or Elementor editor, insert shortcodes and summon an iframe. Easy as pie!
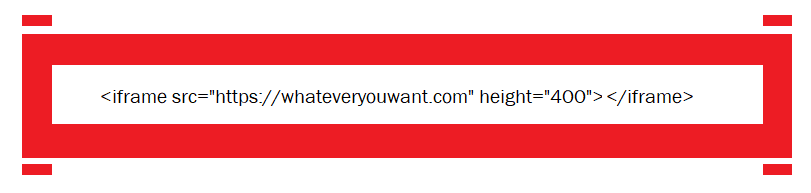
Just get an HTML editor block on your page and add the above code. This will simply summon the desired content/website in a box with 400px height.
Creating an iframe widget has some attributes that you can use to customize the appearance of the content.
- Src – Source link. (https://) may be necessary to avoid blocking from site security protocol.
- Width/Height – Pixel values that define the content size area.
- Align – Defines the iframe alignment within the page.
- Frameborder – Adds border around the iframe if the value is greater/equal to 1. Shows no border upon value 0.
- Scrolling – Allow content scroll option on the iframe by defining ‘yes’, ‘no’, and ‘auto’.
Except for the HTML code, iframe does support CSS attributes as well. So, you can add more features to it.
One thing you need to remember is, not every website is iframe supported. That means your website might refuse a website iframe or vice-versa.
Methos 2: Create iframe widget in Elementor with plugins
If you’re looking for a iFrame widget for creating iframe, then the best option will be Elementor addon-Element pack. This plugin comes with dedicated widget for Elementor iframe.
The Iframe Widget from Element Pack allows you to embed any external website, Google Maps, crypto statistics, or app directly inside your Elementor design. Follow these simple steps to set it up.
Step 1: Insert the Iframe Widget in Elementor
- Open your page in Elementor Editor.
- In the widget search bar, type “Iframe”.
- Select the widget with the Element Pack Pro logo.
- Drag and drop it into your page section.
- By default, you’ll see a placeholder until you add a URL.

Step 2: Add a URL and Configure iframe Layout
- Go to Content → Layout.
- In the Content Source URL field, paste the link you want to embed.
- Example:
- Google Maps link → Displays location.
- Crypto stats URL → Shows live crypto data.
- Website URL → Displays the full website.
- Example:
- Adjust layout options:
- Auto Height → Automatically adjusts the iframe height.
- Iframe Height → Set a custom fixed height.
- Iframe Container Width → Adjust the width of the container.
- Responsive Ratio → Maintain width × height proportions.
- Alignment → Position the iframe (Left, Center, Right).
Note: If the Iframe Widget is taking over the entire screen in Elementor, the issue is usually with its height/width or responsive ratio settings. To fix this, disable Auto Height and set a custom Iframe Height (e.g., 400–600px) and adjust the Iframe Container Width instead of leaving it at 100%. Also check if Responsive Ratio is enabled, as it can force the iframe to stretch. So, disable it or set a proper ratio like 16:9.
4. Configure Lazyload Settings and Additional Settings for better performance and fullscreen/scroll bar options. And, must enable Lazy Load when using multiple iframes for faster loading.

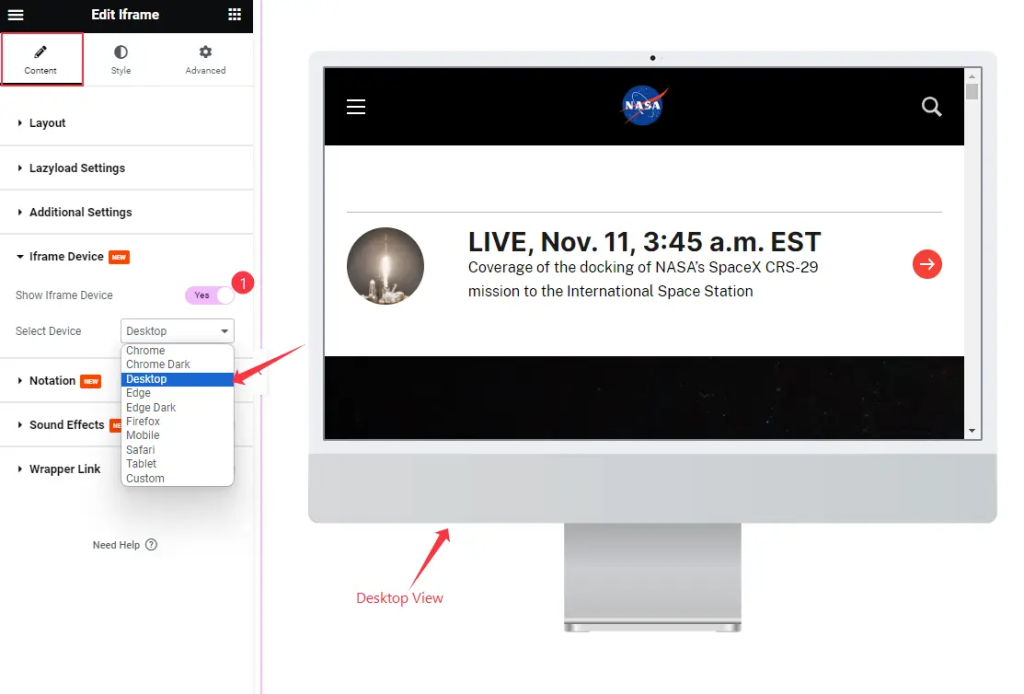
Step 3: Display Iframe in Device Mockups
- Go to Content → Iframe Devices.
- Enable Show Iframe Device.
- Choose from prebuilt device frames: Chrome, Firefox, Safari, Edge, Tablet, Mobile, or Custom.
- If you select Custom, you can set a custom Width × Height, apply a Notch, add Buttons, or adjust the Bezel.
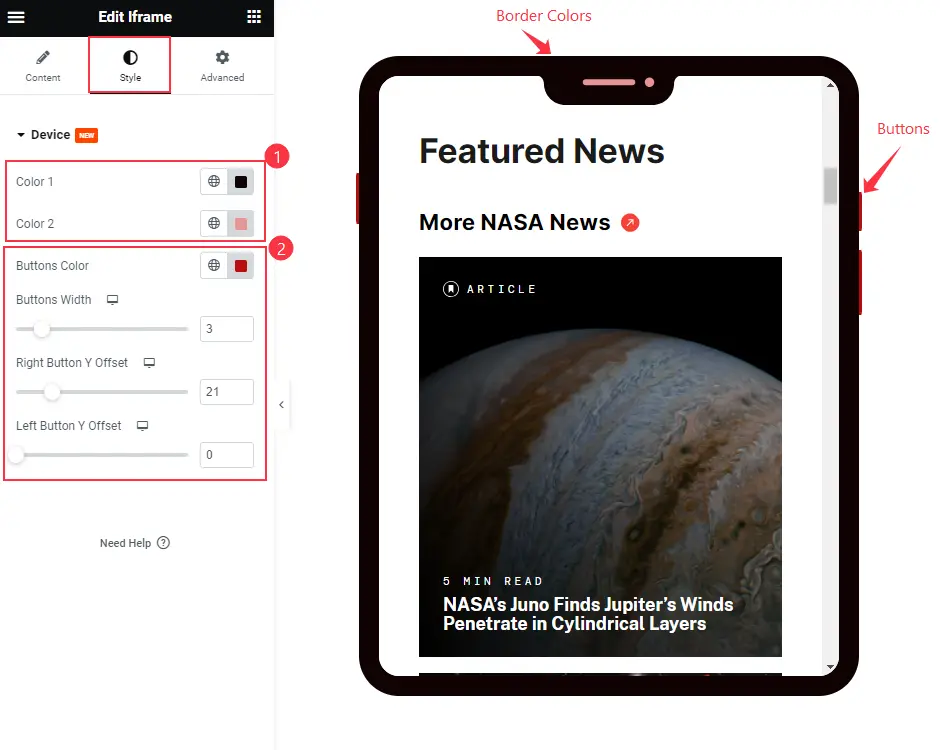
Step 4: Customize and Style the iframe
- Go to Style → Device.
- Customize the iframe appearance:
- Bezel Color (Color1) → Adjust the outer frame color.
- Notch Color (Color2) → Change the notch style color.
- Button Styling → Customize button colors, width, and offsets.
- Apply rounded edges or adjust frame thickness for a polished look.
Step 5: Preview and Publish
- Use Elementor’s Responsive Mode to check iframe appearance across devices.
- Fine-tune height, width, or lazy load for performance.
- Once everything looks perfect, click Update / Publish.
Tip: Some websites block iframe embedding. In that case, use their official embed code or share link.
You can add various types of content, be it video, audio, text, image, websites, using this widget.
Watch this video to know how to use iframe widget properly in Elementor.
Note that the iframe widget by Element Pack gives you an integrated Lazyload feature. So, you will be improving your website performance using this tool. Check this Element pack demo page for examples.
Conclusion
IFrame being a broadly used function has been made into a widget to make it more dynamic and easy to use.
Websites having strict security policies may not allow an iframe to embed content. But the number of supporting websites are greater. So, it is a quick solution for adding multi-layered content to your website.That’s it. Hope you have learned the method to create iframe widget today.
Thanks for staying up!