Mühelose Navigation mit umfangreichen Menüoptionen
Visuelle Produktauswahl steigert schnell den Umsatz
Personalisierte Inhalte passen sich in Echtzeit an
Nahtloser Bildlauf für besseren UX-Flow
Sofortige Vervielfältigung von Inhalten spart Zeit
Schneller Zugriff auf leistungsstarke Designelemente
Vorgefertigte Vorlagen beschleunigen die Gestaltung
Erweiterte benutzerdefinierte Felder für flexible Daten
Websites einfach und problemlos klonen
Gestochen scharfe, skalierbare Grafiken für alle Bildschirme
Rebranding von Werkzeugen für ein professionelles Aussehen
Inhalte präzise ein- und ausblenden
Fesselnde Tiefe mit sanfter Bewegung
Einfaches Hinzufügen von Notizen und Kommentaren
Hilfreiche Hinweise verbessern die Benutzerinteraktion
Elemente mit stilvollem Flair animieren
Wichtige Abschnitte immer sichtbar halten
Vollständige Kontrolle mit benutzerdefinierten Code-Optimierungen
Optimieren Sie Dateien, um die Geschwindigkeit der Website zu erhöhen
Ausgearbeitete Seitenvorlagen, die Ihnen den Einstieg in Ihre Landing Page erleichtern, indem Sie einfach ein Einstiegsdesign einfügen
Ready Blocks enthält eine Vielzahl von Layouts und Designelementen, wie Kopf- und Fußzeilen, Widgets usw.
Vorgefertigte Kopfzeilen mit lukrativen Stilen, die für verschiedene Nischenwebsites und Designvorlieben geeignet sind
Eine hilfreiche Sammlung von Fußzeilendesigns, mit denen Sie sofort eine attraktive Fußzeile für Ihre Landing Page erstellen können
Wir sind 24/7 für Sie da. Wir helfen Ihnen gerne.
Detaillierte Anleitungen für jede Funktion bei BdThemes verfügbar
Lernen Sie etwas Neues, bleiben Sie informiert über WordPress, Webdesign und mehr
Hier sind einige der wichtigsten Meilensteine in meiner Entwicklung:
Lernen Sie in unseren Videos die Verwendung von Produkten sowie Tipps und Tricks zu WordPress
Verdienen Sie saftige Provisionen, indem Sie sich an der Aktion beteiligen
Widget Idea Share ist eine gute Möglichkeit, ähnliche Widgets zu finden, die Sie verbessern können.
Gewiss! Wenn Sie sich mit uns in Verbindung setzen möchten, können Sie sich gerne an uns wenden
Erstellen Sie jedes WordPress-Formular in wenigen Minuten mit Sigma Forms.
Coming Soon & Wartungsmodus Page Builder Plugin
Websites mit One Accessibility leicht zugänglich machen
Zeigen Sie Erfahrungsberichte von Kunden an, um das Vertrauen und die Glaubwürdigkeit zu erhöhen.
Zoloblocks hilft bei der Erstellung beeindruckender Gutenberg-basierter Websites.
Der beste Slider in der Ära der Elementor Slider
Die einzigen kompatiblen Blogging-Widgets in Elementor für jeden Blog
Erstellen Sie eine WordPress-eCommerce-Website der nächsten Generation für Unternehmen
Organisieren Sie Ihre Fotos jedes Mal in einem anderen Engel mit Elementor
Steigern Sie das Engagement und den Umsatz mit Spin Wheel.
Leistungsstarkes AI Image Generator Plugin für WordPress von ChatGPT
Holen Sie sich 360° Augmented Reality für WooCommerce noch heute!
Kopieren und Einfügen eines beliebigen Webdesigns mit nur 2 Klicks!
Ein voll funktionsfähiges Theme für elementor mit unbegrenzten Optionen
Intelligentes, sauberes und flexibles Block-Theme für Gutenberg
Das Dark Reader Plugin sorgt für augenfreundliches Lesen im Internet.
WooCommerce einseitige Kasse zur Steigerung der Konversionen.
Find Nearby Stores Instantly with Sigma Store Locator
The Ultimate WordPress Media Library Organizer
Zugang zu über 100 Premium-WordPress-Plugins mit lebenslangen Updates und speziellem Support.
Designing a Pet Shop website is super fun. As a lover of the mother nature, we love pets as much as you do. And love should be shared.
That’s why we designed a page just for making it into an online pet shop anytime. But, we won’t keep it to ourselves.
Be ready, cause this blog will be about a step-by-step construction of our ideal pet shop website. Let’s begin!
Designing any website using Elementor is easy. As you don’t have to deal with codes, you can stay relaxed.
But the thing is, the more feature you want to add to your page, the more complicated things become. Elementor doesn’t offer a variety of widgets. That’s why you might want to take a 3rd party widget pack.
Anyway, we are going to use the free version of Elementor und Element Pack to design our pet shop. Now, the cause of using the Element Pack plugin is:
Unlike bloated costly plugin with limited features, Element Pack is cheap and full of features. Get it from here.
A website consists of several segments that you can consider as sections. The homepage contains the maximum number of sections to display the whole purpose of the website.
To keep your visitors engaged with your content, you have to design a decent information flow on your pet shop website.
An ideal website has these sections on their homepage:
So, if you design a Pet Shop website in this manner, you will hit the perfect score. Now, let us begin.
First of all, make sure you have Elementor und Element Pack plugin installed on your dashboard.
Then, access your WordPress Dashboard> Seiten> Neu hinzufügen and create a new page. We named our website ‘Tierhandlung‘.
Wir veranstalten ein Werbegeschenkprogramm für unsere geliebten Kunden und Abonnenten, die mit unserer offiziellen Website verbunden sind BDthemes.com
Besuchen Sie Element Pack oder Prime Slider und teilen Sie uns Ihre Meinung mit. Die glücklichen Gewinner erhalten eine lebenslange Lizenz im Wert von $100. Es dauert nur eine Minute, um mitzumachen.
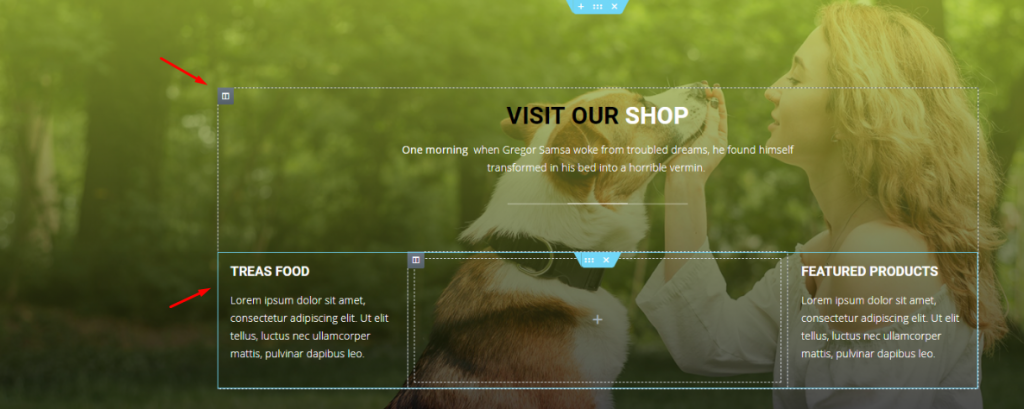
The hero section has two parts, the header and the body.
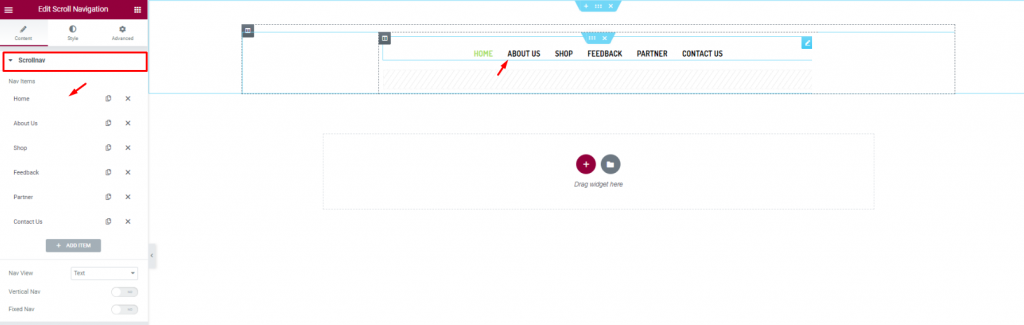
Let’s first insert the Scroll Navigation Widget von Element Pack on our page. This will be the front navigation system for our website. Change the name of the menu items as you prefer from the content tab.
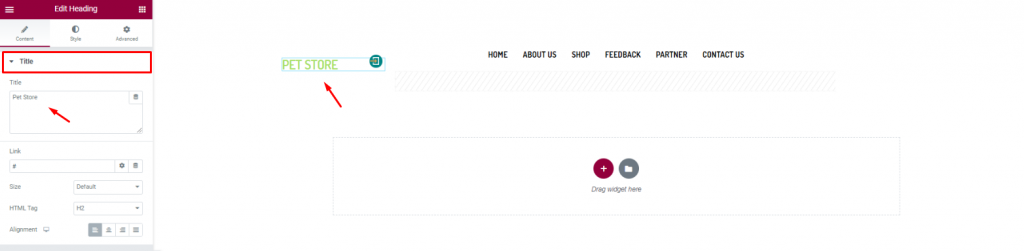
Insert the shop name/logo on the top left corner of the header. We inserted the Überschrift Widget von Elementor and put the shop name in texts.
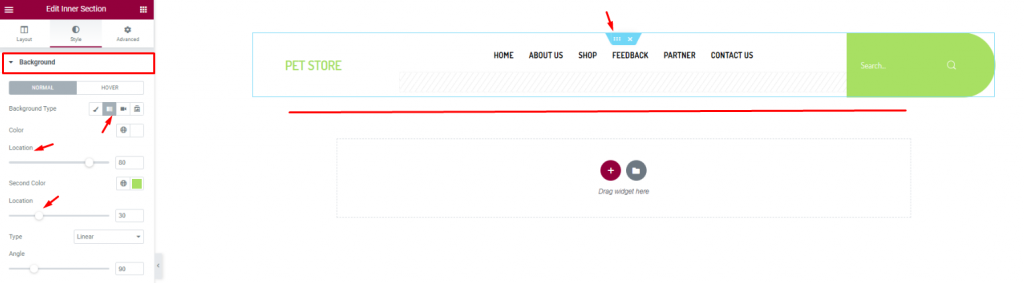
Finish the header design of the pet shop website by using a gradient background color from the section settings. Don’t forget to put a Suche widget on the top-right corner.
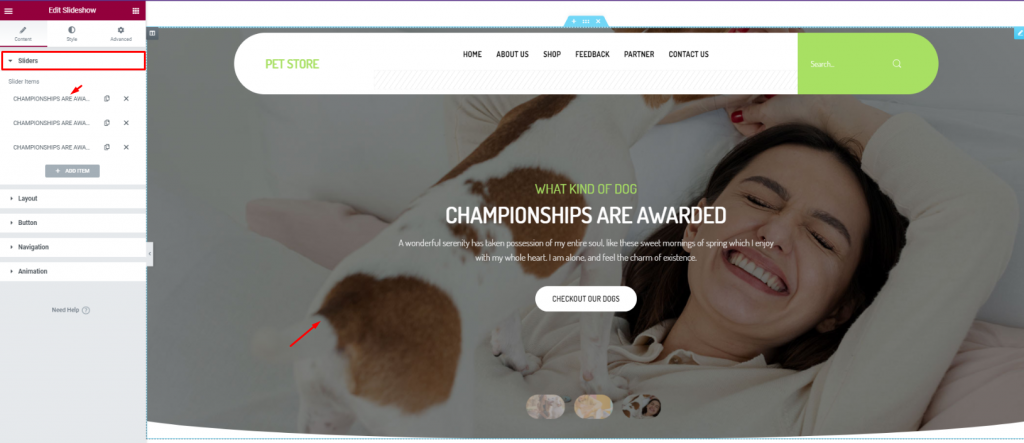
For the body of the hero section, simply insert the Diashow widget. The widget lets you combine stunning background images, texts, and a CTA.
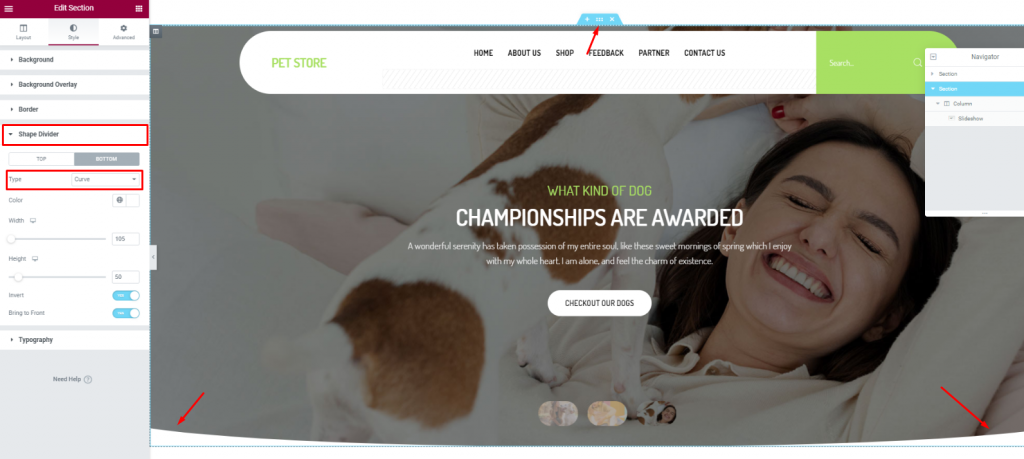
To add more style to the slider image, you can try to curl up the edges. To do that, you need to go to the section settings> Shape divider> and choose Curve from the Option Typ.
After the hero section, we need to design the features section. This part will highlight our service capabilities and deliver deeper info about our pet shop website.
Now, more features will bring out more info spontaneously. But no need to overdo it. So, we will stick to 2 sections for displaying features.
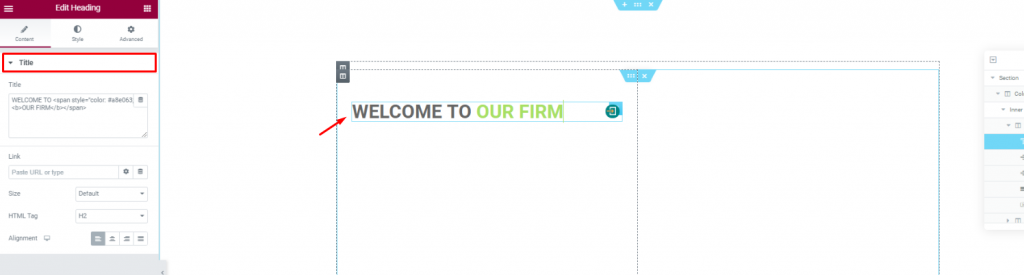
Create a double-column section. Insert the Überschrift widget on the left column.
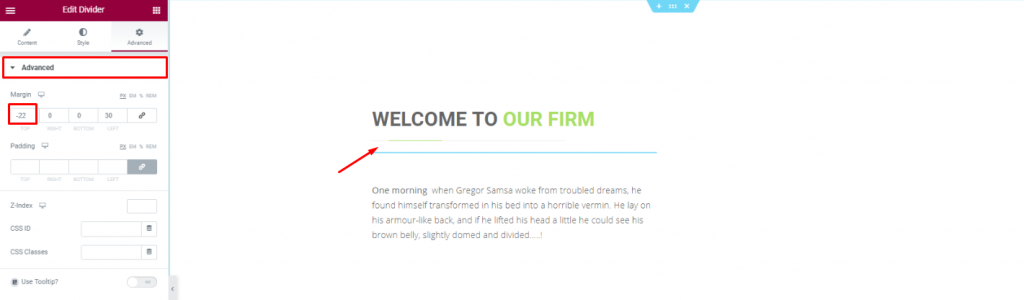
Put a Divider widget under the title to boost its look. Place a short description of the company below.
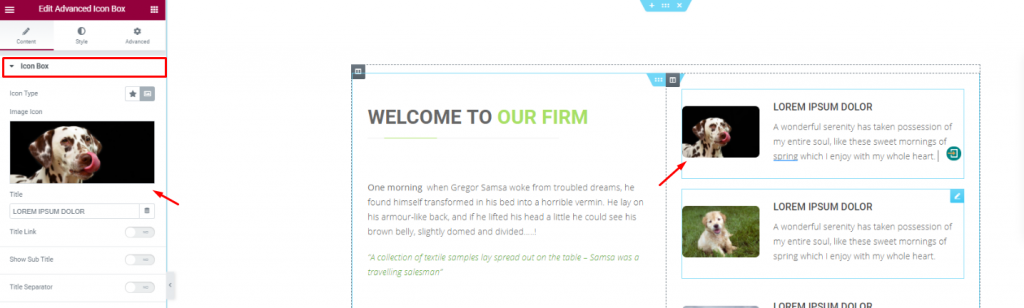
Placing the Erweiterte Icon-Box widget on the right side of the column for pet descriptions.
With a decent background image, create a multi-column section and fill it with more shop related details. You can do that much simply using a Kopfzeile widget and the Text-Editor Widget.
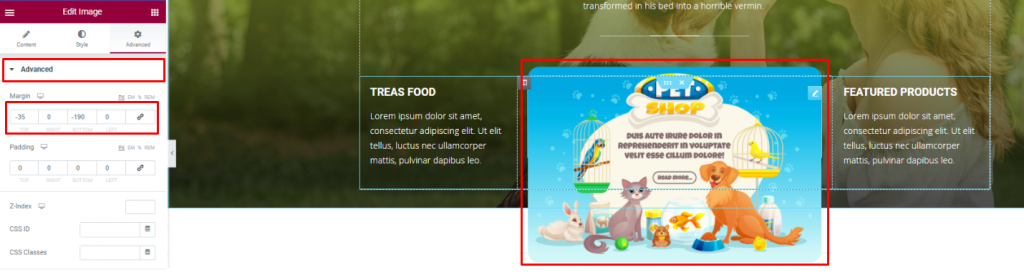
Insert an Bild widget and displace its position using the Fortgeschrittene tab.
You can not design a pet shop website without a pet gallery, right? To make it look decent, you can cover an entire section with an image gallery or merge it with the features.
We did the later but in a more creative way.
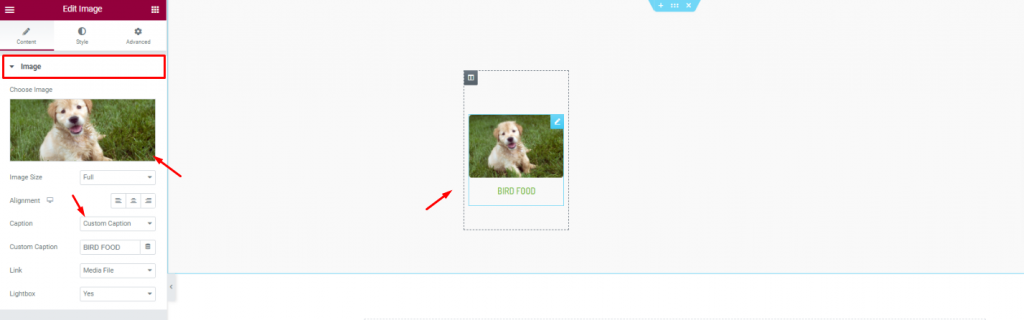
First, create a 6 column section and insert the Bild widget in them.
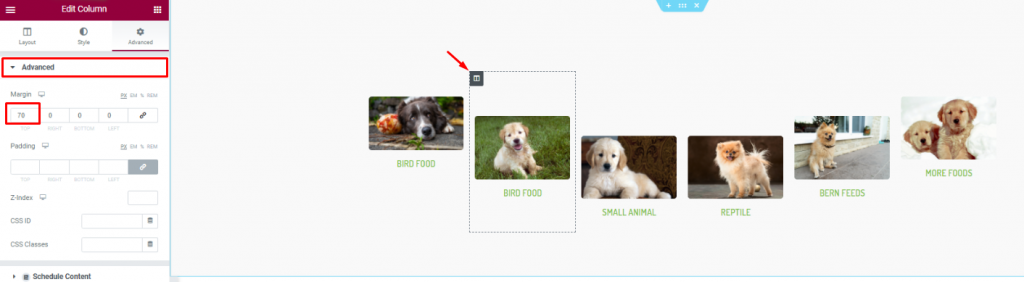
Second, go to column settings and in the Fortgeschrittene tab, consecutively adjust their margin. Just then, you will get a nice curved pet image gallery.
Positive reviews from customers is always a good addition to your website. A pet website is not different. As your customer will put more trust upon seeing those good reviews, it’s best to put a testimonial section on your website.
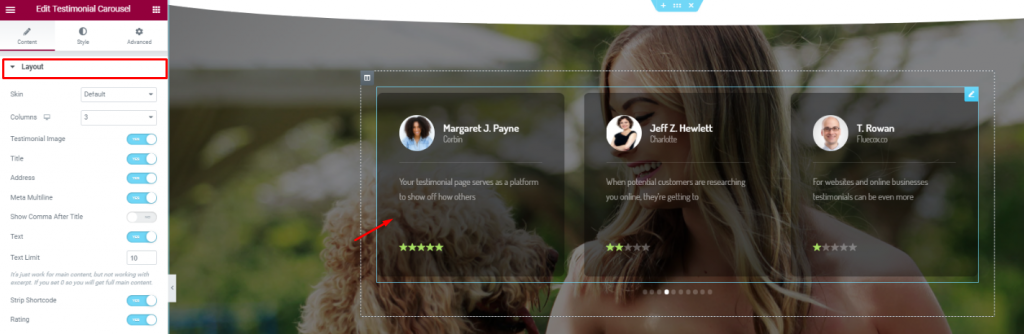
On a new section, insert the Testimonial-Karussell widget in the middle of the section. Make the color a bit transparent from the Style tab.
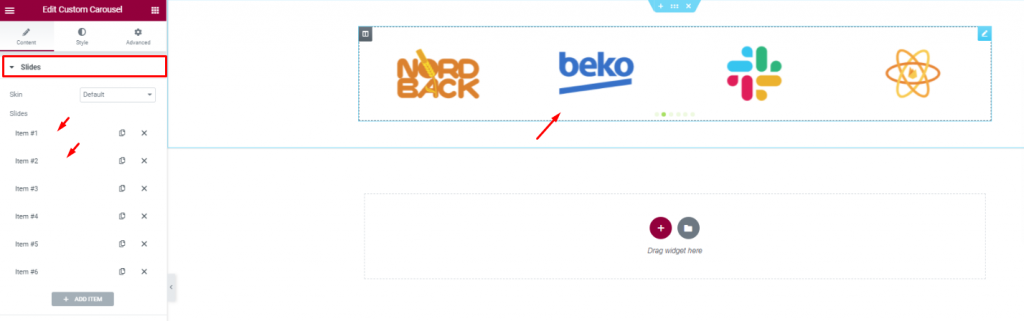
Insert all affiliate websites, partners, sponsors through the Benutzerdefiniertes Karussell widget. And, that covers up for the testimonials.
In this part, we will create a section to display events/offers related to our pet shop.
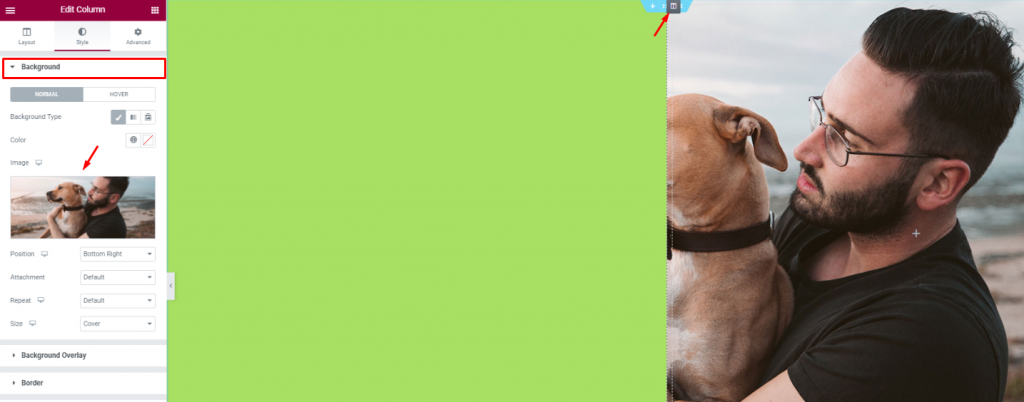
Create 2 column section and add a decent image as a background on the right column. Put a light-green color on the left column.
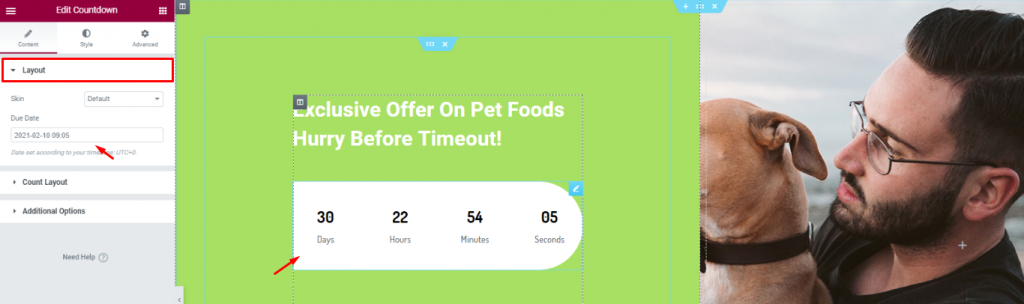
Add a title and the Countdown widget to show remaining time for your offer.
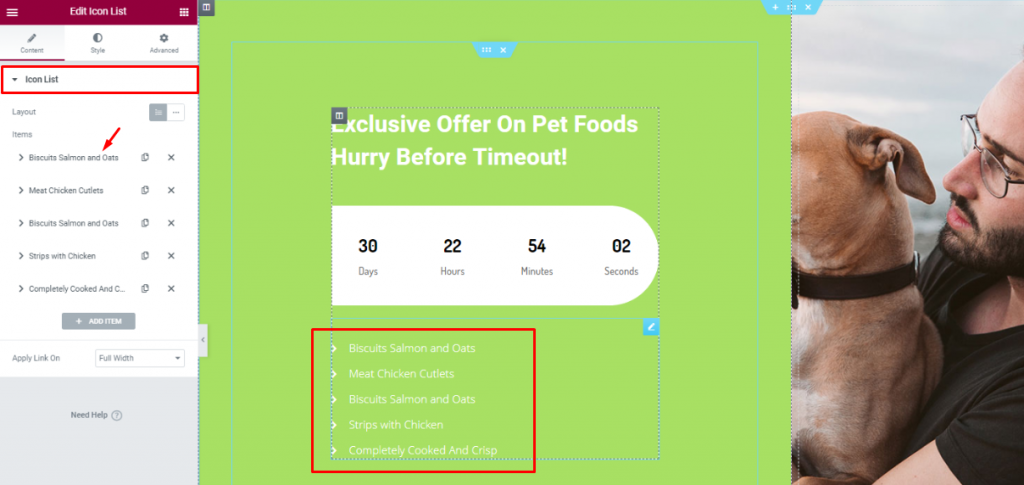
Legen Sie die Icon-Liste widget below the counter to show the offer contents.
Lastly, you need to design a footer part containing contact info, locations, social media links, etc.
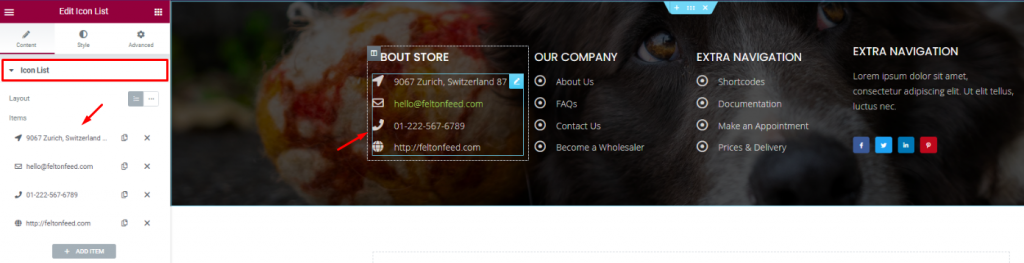
For the footer, make a section with a decent background and divide it into 3 or 4 columns. You can use the Kopfzeile and the Icon-Liste widgets for the footer.
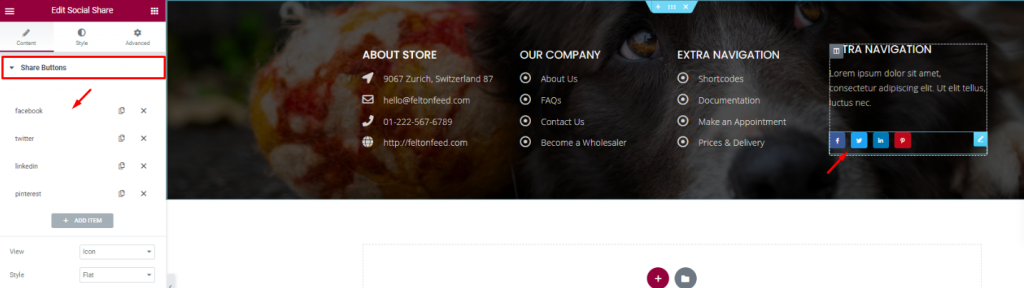
Put your social media links using the Sozialer Anteil widget at the end of the footer. That’s it!
Like that, you can design a unique pet shop website and start your new business today.
Thank you for staying with us.
Größtes Elementor-Vorlagenpaket mit der benutzerfreundlichsten UI und 300+ nützliche Elementor-Widgets. Erstellen Sie Websites von Null auf 100% Perfektion im Handumdrehen.
Diese Website wird betrieben von Element Pack Pro und Rooten Thema.
Copyright © 2026 BdThemes. Alle Rechte vorbehalten.