Ubesværet navigation med rige menupunkter
Visuelle produktvalg øger salget hurtigt
Personligt indhold tilpasser sig i realtid
Sømløs scrolling for bedre UX-flow
Øjeblikkelig duplikering af indhold sparer tid
Hurtig adgang til kraftfulde designelementer
Færdige skabeloner gør designet hurtigere
Avancerede brugerdefinerede felter til fleksible data
Klon sites nemt uden besvær
Skarp, skalerbar grafik til alle skærme
Rebrand værktøjer til et professionelt look
Vis eller skjul indhold med præcision
Engagerende dybde med jævn bevægelse
Tilføj nemt tydelige noter og anmærkninger
Nyttige hints forbedrer brugernes interaktion
Animer elementer med stilfuld flair
Hold vigtige sektioner altid synlige
Fuld kontrol med brugerdefinerede kodejusteringer
Optimer filer for at øge sidens hastighed
Udarbejdede sideskabeloner, der hjælper dig med at komme i gang med din landingsside bare ved at droppe et startdesign
Ready Blocks leveres med en række forskellige layouts og designelementer, f.eks. overskrifter, sidefødder og widgets osv.
Foruddesignede overskrifter med lukrative stilarter, der passer til forskellige nichewebsteder og designsmag
En nyttig samling af footer-designs, der hjælper dig med at skabe en attraktiv footer på din landingsside.
Find os 24/7 til din rådighed. Vi er glade for at kunne hjælpe.
Detaljerede retningslinjer tilgængelige for alle funktioner på BdThemes
Lær noget nyt, bliv informeret om WordPress, webdesign og meget mere
Her er nogle af de vigtigste milepæle i min udvikling:
Lær produktbrug, WordPress-tips og -tricks fra vores videoer
Tjen store provisioner ved at deltage i kampagnen.
Widget Idea Share er en god måde at finde lignende widgets på, som du kan forbedre.
Helt sikkert! Hvis du har brug for at komme i kontakt med os, er du velkommen til at kontakte os
Byg enhver WordPress-formular på få minutter med Sigma Forms.
Coming Soon & Maintenance Mode Page Builder Plugin
Gør nemt hjemmesider tilgængelige med One Accessibility
Vis kundeudtalelser for at øge tilliden og troværdigheden.
Zoloblocks hjælper med at skabe fantastiske Gutenberg-baserede hjemmesider.
Den mest overlegne slider i Elementor-sliderens æra
De eneste kompatible blogging-widgets i Elementor til enhver blog
Byg et next-gen WordPress eCommerce-website til virksomheder
Organiser dine fotos i en ny engel hver gang med Elementor
Styrk engagementet og øg salget ved hjælp af Spin Wheel.
Kraftfuld AI-billedgenerator-plugin til WordPress af ChatGPT
Få 360° Augmented Reality til WooCommerce i dag!
Kopier og indsæt ethvert webdesign, du kan lide, bare med 2 klik!
Et fuldt fungerende tema til elementor med ubegrænsede muligheder
Smart, rent og fleksibelt bloktema til Gutenberg
Dark Reader-plugin sikrer øjenvenlig weblæsning.
WooCommerce one-page checkout for at øge konverteringer.
Find Nearby Stores Instantly with Sigma Store Locator
The Ultimate WordPress Media Library Organizer
Få adgang til 100+ premium WordPress-plugins med livstidsopdateringer og dedikeret support.
Designing a Pet Shop website is super fun. As a lover of the mother nature, we love pets as much as you do. And love should be shared.
That’s why we designed a page just for making it into an online pet shop anytime. But, we won’t keep it to ourselves.
Be ready, cause this blog will be about a step-by-step construction of our ideal pet shop website. Let’s begin!
Designing any website using Elementor is easy. As you don’t have to deal with codes, you can stay relaxed.
But the thing is, the more feature you want to add to your page, the more complicated things become. Elementor doesn’t offer a variety of widgets. That’s why you might want to take a 3rd party widget pack.
Anyway, we are going to use the free version of Elementor og Element Pack to design our pet shop. Now, the cause of using the Element Pack plugin is:
Unlike bloated costly plugin with limited features, Element Pack is cheap and full of features. Get it from here.
A website consists of several segments that you can consider as sections. The homepage contains the maximum number of sections to display the whole purpose of the website.
To keep your visitors engaged with your content, you have to design a decent information flow on your pet shop website.
An ideal website has these sections on their homepage:
So, if you design a Pet Shop website in this manner, you will hit the perfect score. Now, let us begin.
First of all, make sure you have Elementor og Element Pack plugin installed on your dashboard.
Then, access your WordPress Dashboard> Sider> Tilføj ny and create a new page. We named our website ‘Dyrehandel‘.
Vi kører et give-away-program til vores elskede forbrugere og abonnenter, der er forbundet med vores officielle hjemmeside BDthemes.com
Besøg Element Pack eller Prime Slider og del dine tanker med os. De heldige vindere får en livstidslicens til en værdi af $100. Det tager kun et minut at deltage.
The hero section has two parts, the header and the body.
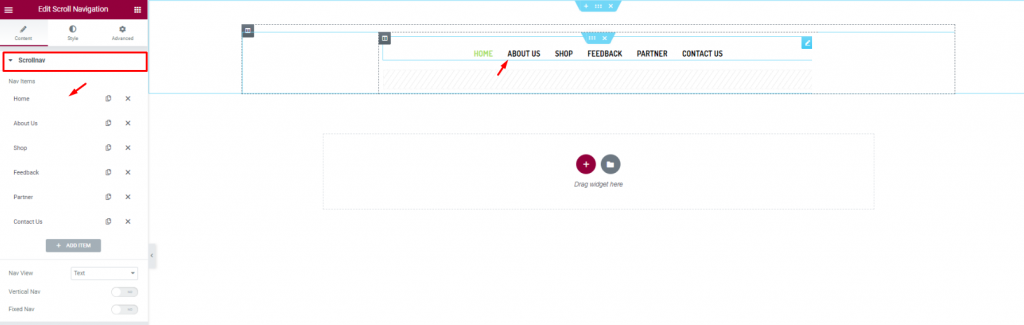
Let’s first insert the Scroll Navigation widget af Element Pack on our page. This will be the front navigation system for our website. Change the name of the menu items as you prefer from the content tab.
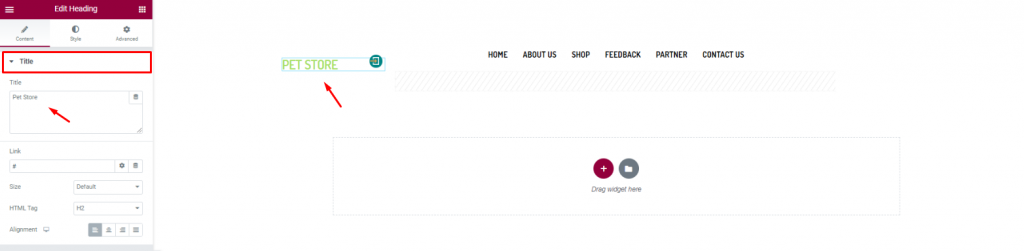
Insert the shop name/logo on the top left corner of the header. We inserted the Overskrift widget af Elementor and put the shop name in texts.
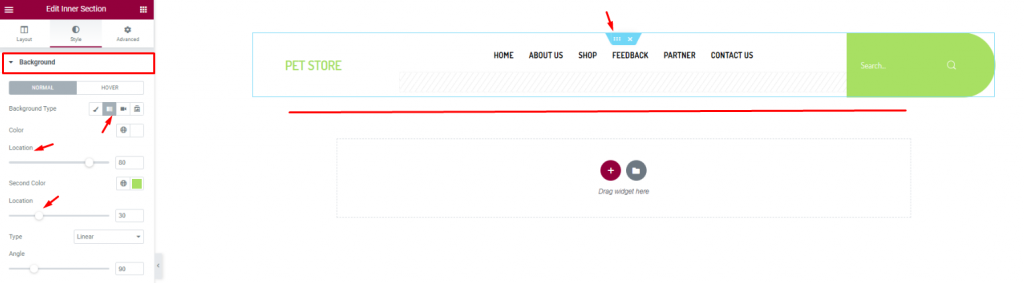
Finish the header design of the pet shop website by using a gradient background color from the section settings. Don’t forget to put a Søg efter widget on the top-right corner.
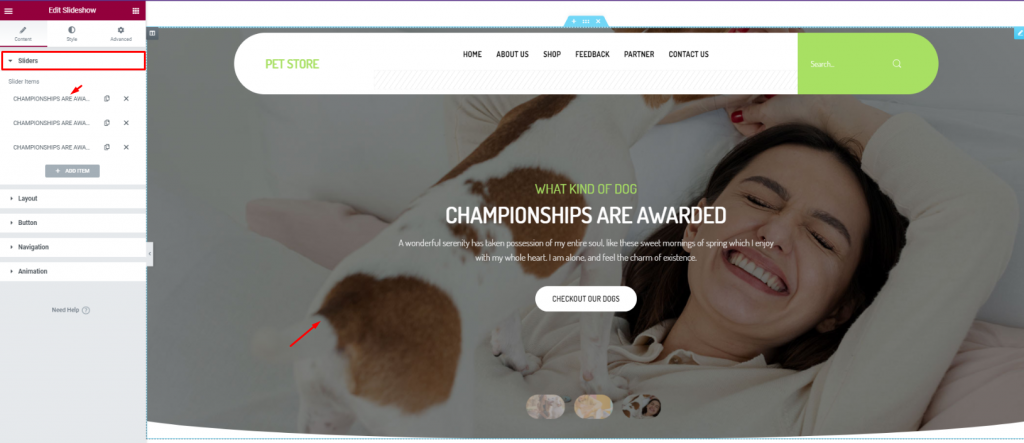
For the body of the hero section, simply insert the Diasshow widget. The widget lets you combine stunning background images, texts, and a CTA.
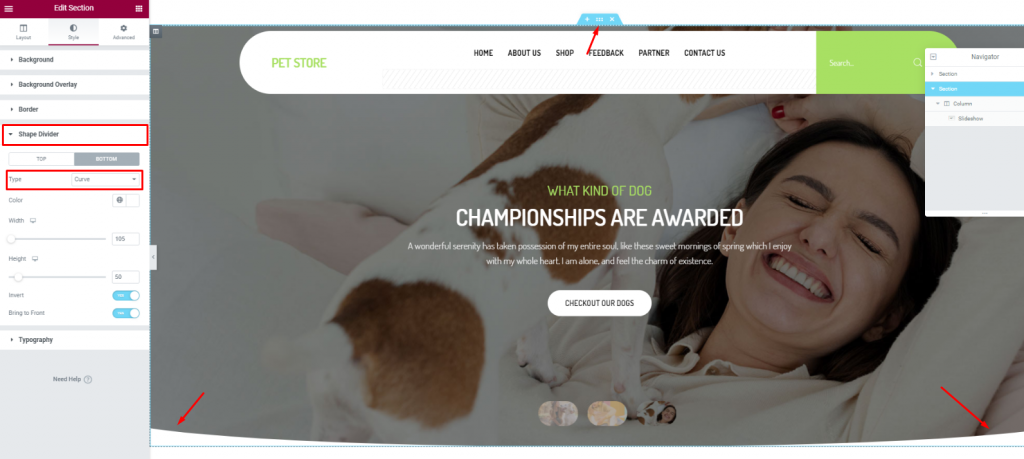
To add more style to the slider image, you can try to curl up the edges. To do that, you need to go to the section settings> Shape divider> and choose Curve from the Option Type.
After the hero section, we need to design the features section. This part will highlight our service capabilities and deliver deeper info about our pet shop website.
Now, more features will bring out more info spontaneously. But no need to overdo it. So, we will stick to 2 sections for displaying features.
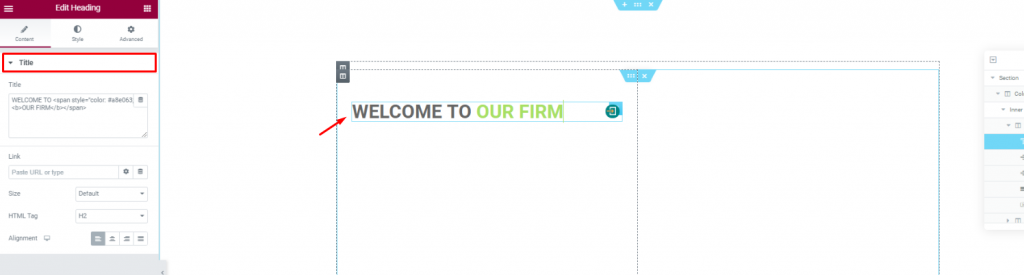
Create a double-column section. Insert the Overskrift widget on the left column.
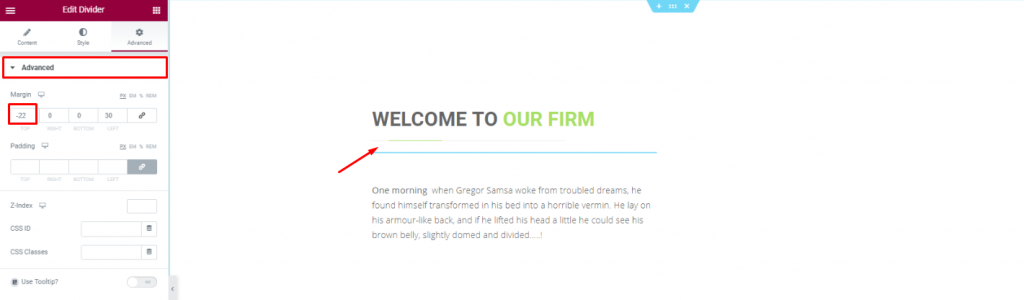
Put a Divider widget under the title to boost its look. Place a short description of the company below.
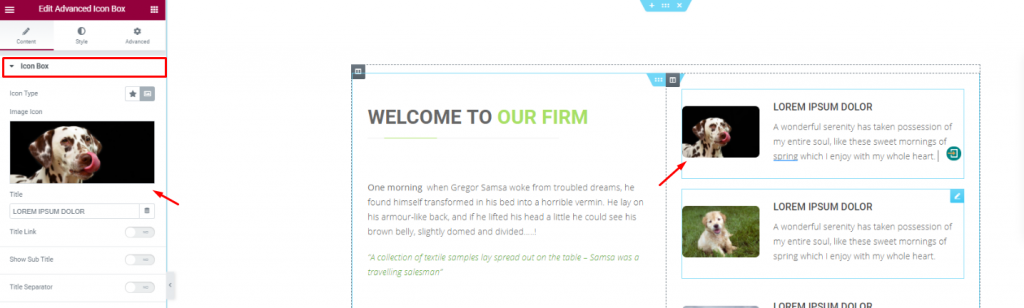
Placing the Avanceret ikonboks widget on the right side of the column for pet descriptions.
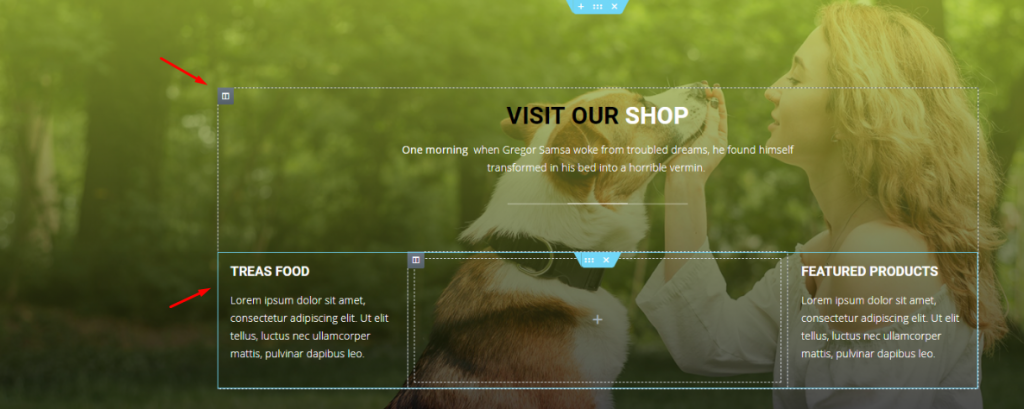
With a decent background image, create a multi-column section and fill it with more shop related details. You can do that much simply using a Overskrift widget and the Teksteditor widget.
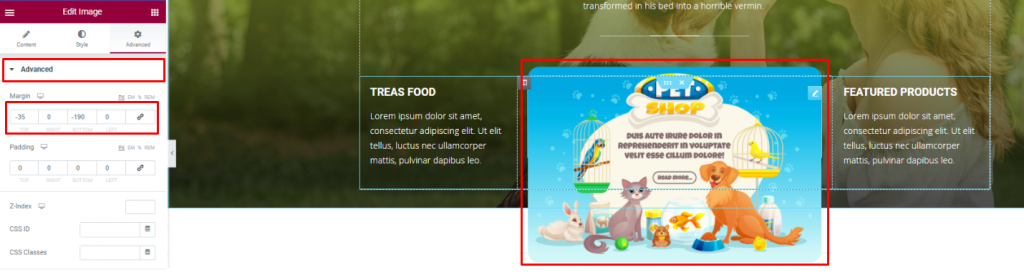
Insert an Billede widget and displace its position using the Avanceret tab.
You can not design a pet shop website without a pet gallery, right? To make it look decent, you can cover an entire section with an image gallery or merge it with the features.
We did the later but in a more creative way.
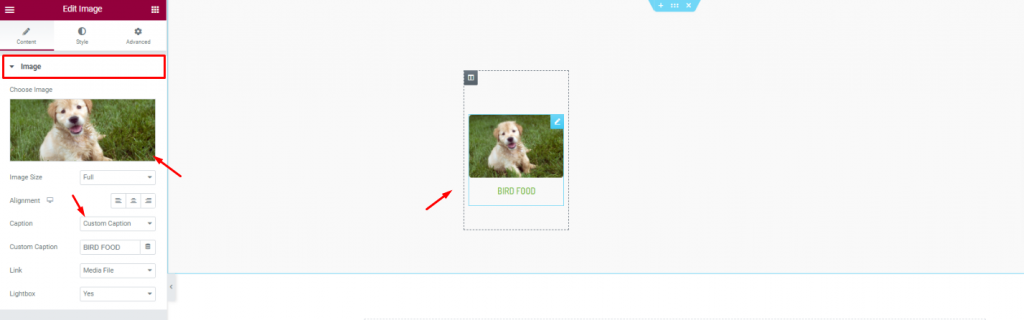
First, create a 6 column section and insert the Billede widget in them.
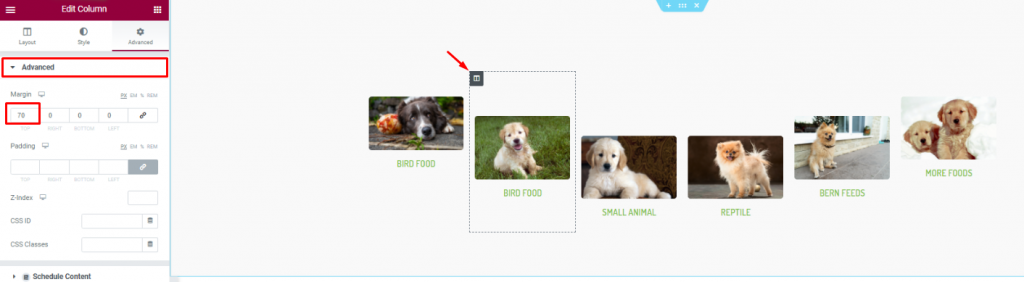
Second, go to column settings and in the Avanceret tab, consecutively adjust their margin. Just then, you will get a nice curved pet image gallery.
Positive reviews from customers is always a good addition to your website. A pet website is not different. As your customer will put more trust upon seeing those good reviews, it’s best to put a testimonial section on your website.
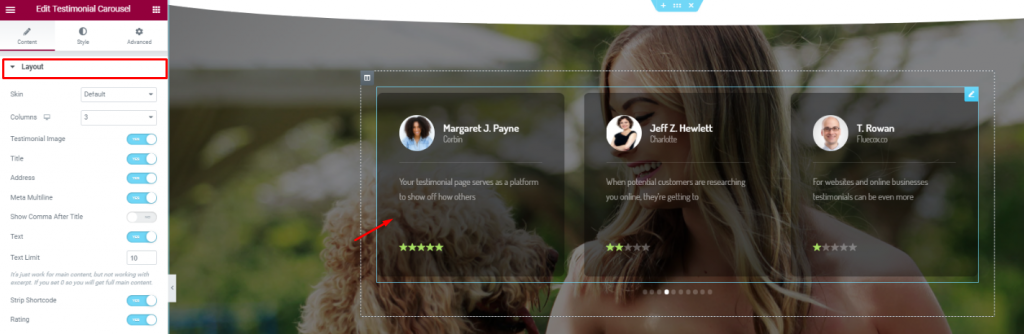
On a new section, insert the Karrusel af udtalelser widget in the middle of the section. Make the color a bit transparent from the Style tab.
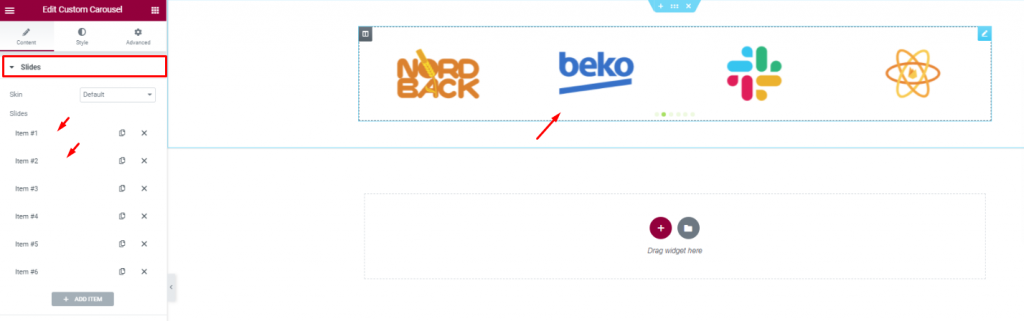
Insert all affiliate websites, partners, sponsors through the Brugerdefineret karrusel widget. And, that covers up for the testimonials.
In this part, we will create a section to display events/offers related to our pet shop.
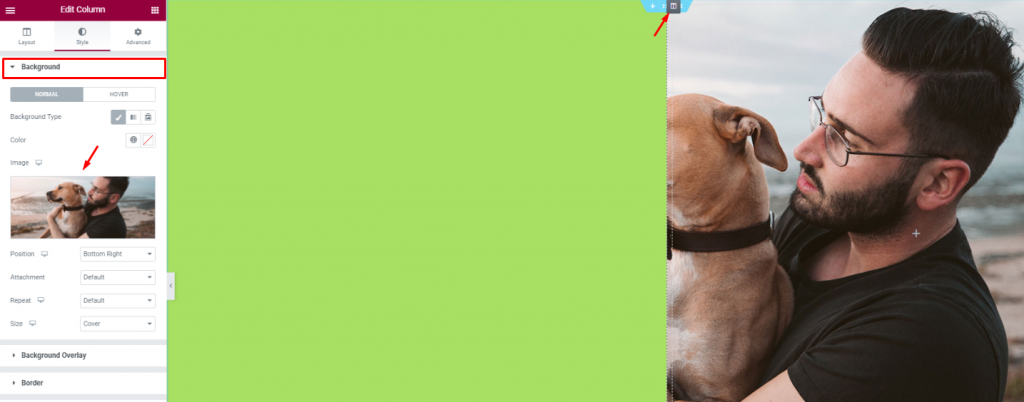
Create 2 column section and add a decent image as a background on the right column. Put a light-green color on the left column.
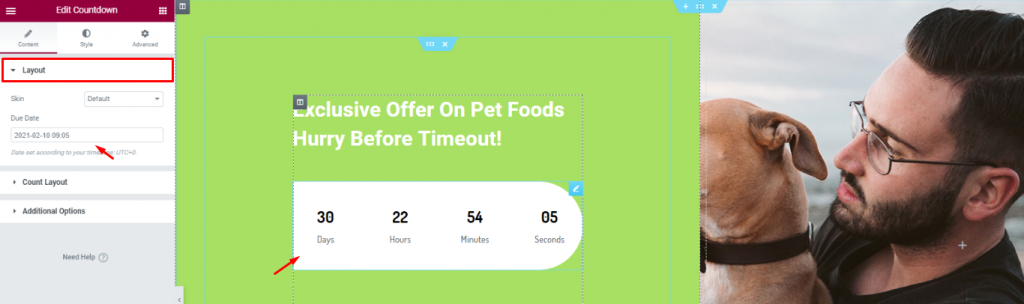
Add a title and the Nedtælling widget to show remaining time for your offer.
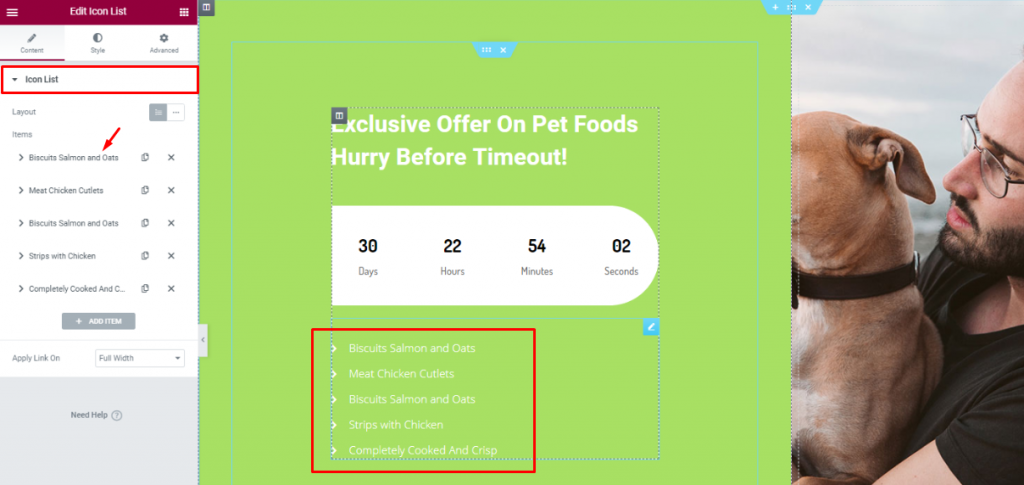
Indsæt den Ikonliste widget below the counter to show the offer contents.
Lastly, you need to design a footer part containing contact info, locations, social media links, etc.
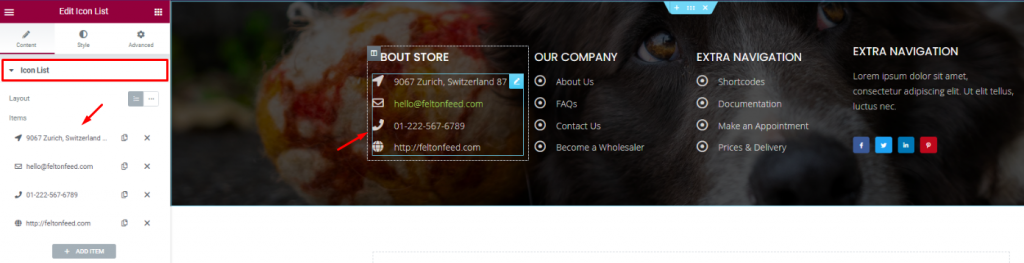
For the footer, make a section with a decent background and divide it into 3 or 4 columns. You can use the Overskrift and the Ikonliste widgets for the footer.
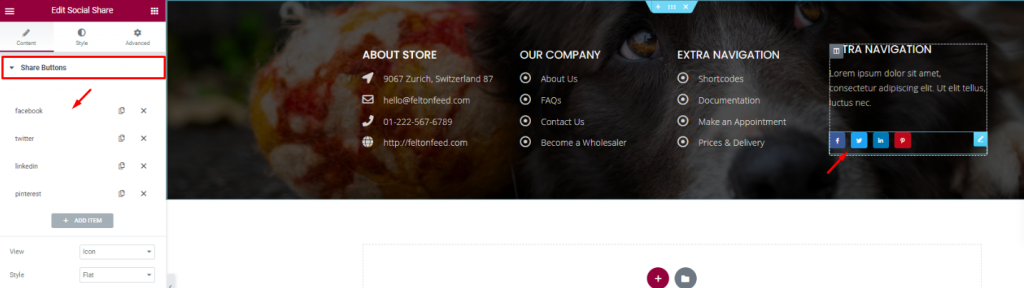
Put your social media links using the Social deling widget at the end of the footer. That’s it!
Like that, you can design a unique pet shop website and start your new business today.
Thank you for staying with us.
Største Elementor-skabelonpakke med den mest brugervenlige brugergrænseflade og 300+ nyttige Elementor-widgets. Byg hjemmesider fra nul til 100% Perfektion på ingen tid.
Denne hjemmeside er drevet af Element Pack Pro og Rooten Tema.
Copyright © 2026 BdTemaer. Alle rettigheder forbeholdes.