

A testimonial slider is a smart way to showcase customer feedback and build trust with your visitors. It presents reviews in a clean, rotating format that adds credibility and visual appeal to your WordPress site.
In this blog, I’ll show you how to create a testimonial slider using Elementor’s intuitive drag-and-drop interface. You’ll also learn how to customize it to match your brand and make your testimonials stand out easily.
Easiest Way to Add a Testimonial Slider to Your Elementor Site
There are various methods available for creating testimonial sliders. There are also multiple widgets and plugins available to create a professional, attractive Elementor testimonial slider easily.
To further enhance the potential of the Elementor page builder and extend its capabilities beyond the default options, you can install an Elementor addon.
A widely recognized and well-known addon is Element Pack. This powerful extension offers a wide range of advanced features, including an enhanced testimonials widget
Using the Element Pack, you can create more visually appealing and interactive testimonial sections. It also helps build trust with your audience and display customer feedback professionally and engagingly.

Element Pack is a widely used free add-on for Elementor that brings over 300 advanced widgets to your WordPress site. Users often appreciate its simple setup, flexible design options, and large collection of ready-to-use elements.
Element Pack includes many dedicated testimonial widgets. Such as,
- Karusell med vittnesmål
- Vittnesmål Grid
- Slider för vittnesmål
- Granskningskort
- Karusell för granskningskort
- Granskning av kortgalleri
These tools are user-friendly and offer advanced customization, making it easy to showcase customer feedback in a clean, rotating format.
With its built-in design controls, you can adjust colors, layout, typography, and more. Also, it ensures your testimonial slider fits seamlessly with your site’s branding and overall style.
How to Add a Testimonial Slider to Your Elementor Website
Let’s now walk through a step-by-step guide to help you add a testimonial slider to your Elementor website.
Required Setup:
- A WordPress theme is installed
- Elementor Page Builder plugin activated
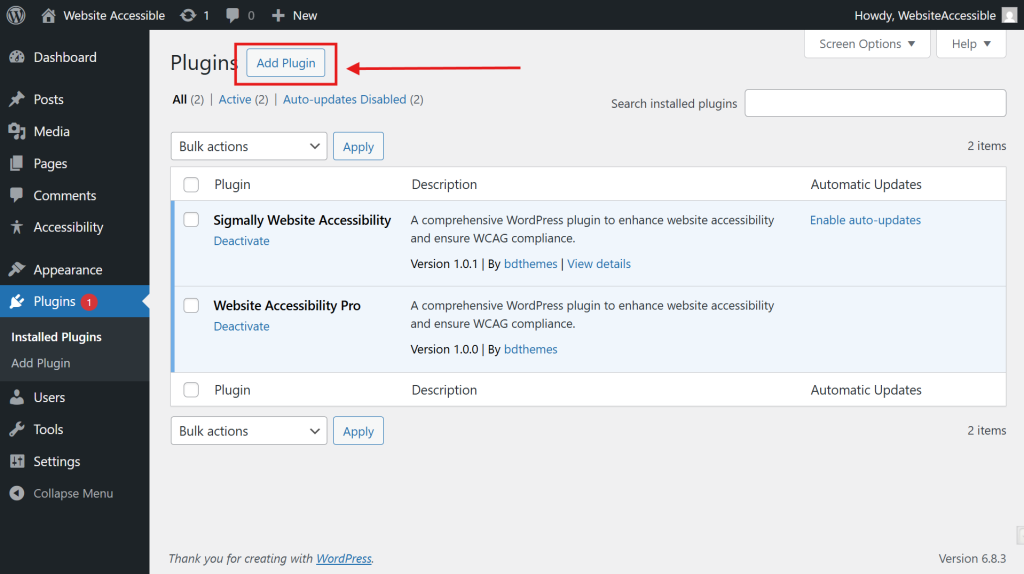
Step 1: Install the Element Pack Plugin and Activate
- From your WordPress admin dashboard, head to Plugins och klicka på Lägg till nytt to begin installing a new plugin.
- In the search bar at the top, type Element Pack to find the plugin.
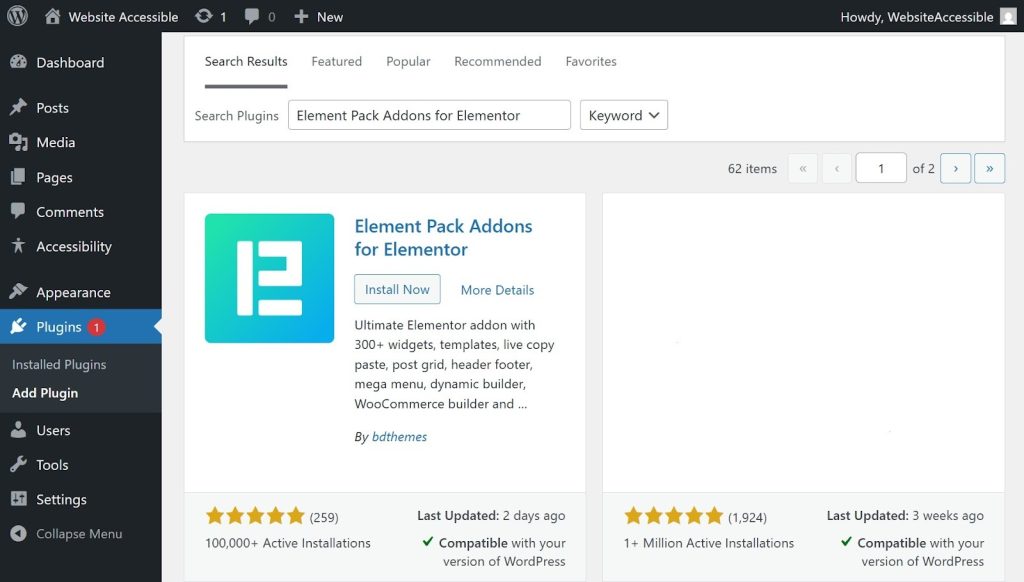
- Next, click Install Now to begin downloading the Element Pack plugin.

- Klicka på Aktivera för att aktivera insticksprogrammet.
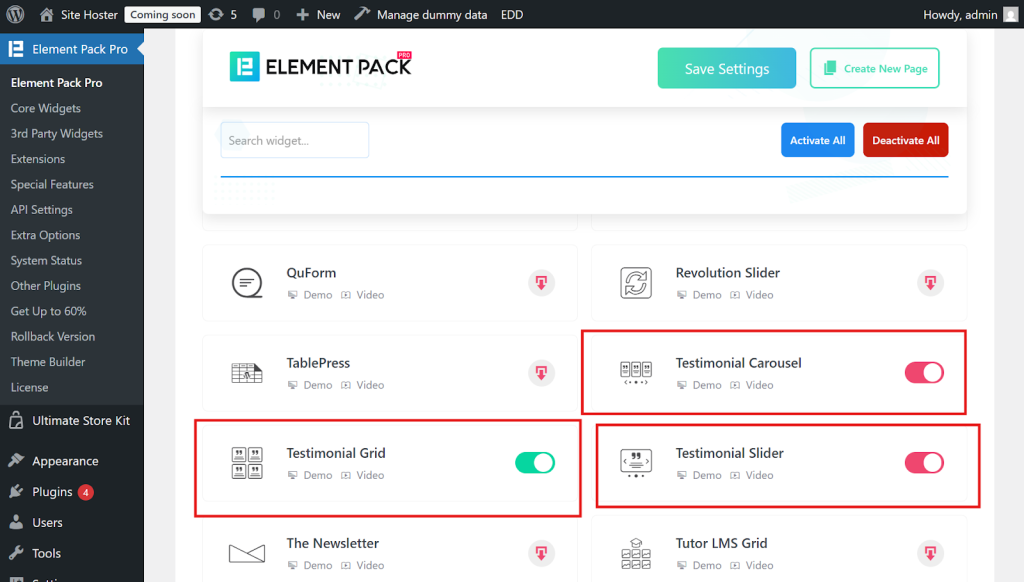
- Then open the plugin and activate the widgets you require, such as the testimonial slider widgets. Just go to Core Widgets and find Testimonial Carousel, Testimonial Grid, and Testimonial Slider, then activate them.
Step 2: Add Testimonial
- After activating the widgets, add your testimonials via the Testimonial section in the dashboard.
- So, go to Testimonials >> Add New Testimonials

- Now, add the testimonial author name, message, designation, company name, rating, review, and more details. Then click on the Publicera knapp.
Step 3: Adding The Testimonial Widget
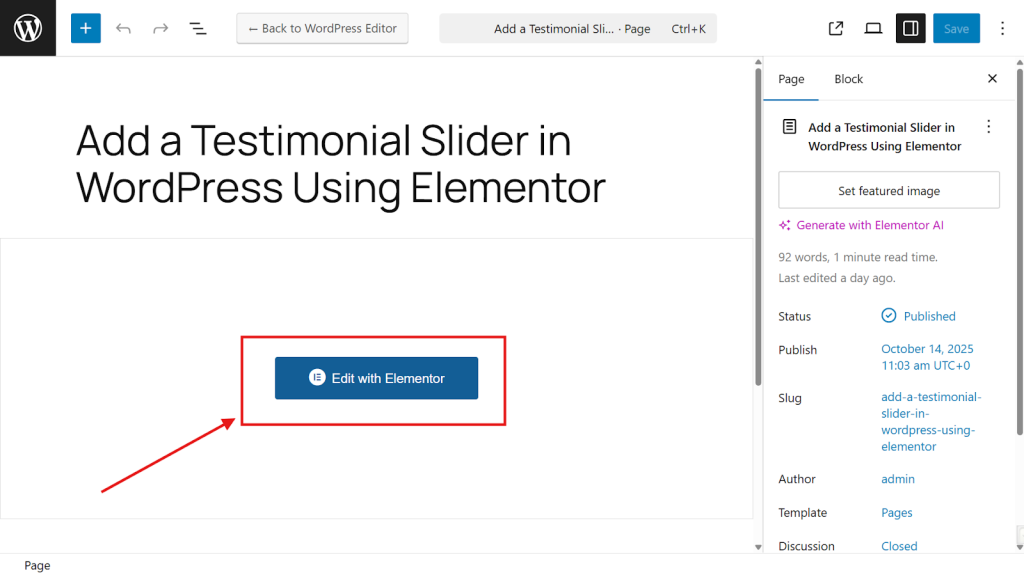
- Once you have added all the testimonials, open the page where you want to add the testimonial slider.
- Klicka på Redigera med Elementor on the page you wish to customize.
- Next, use the search bar in the left sidebar to look for Slider för vittnesmål.
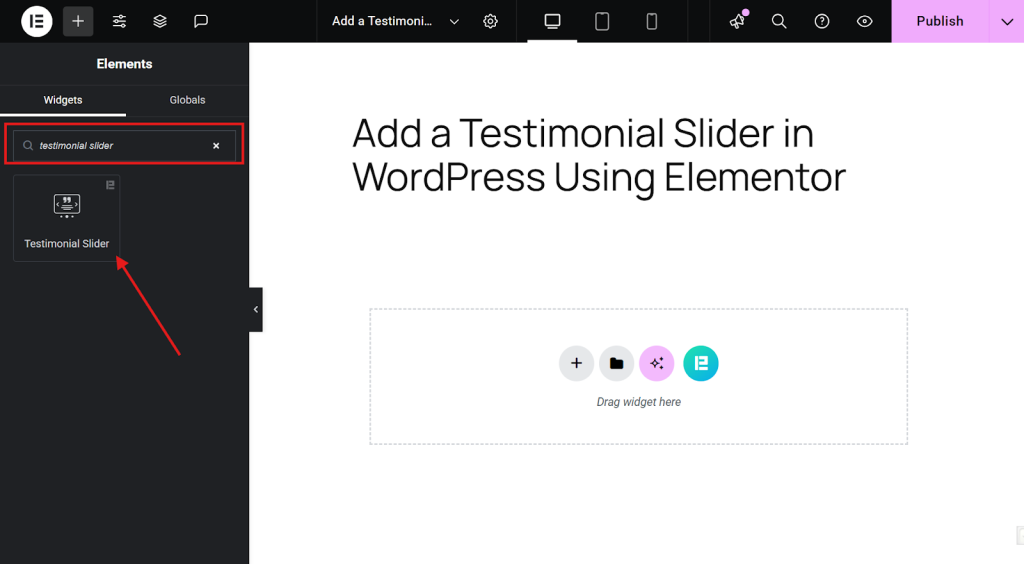
- Drag and drop the Element Pack Testimonial Slider widget into the section where you want it to appear on your page.
- You’ve now successfully added the testimonial slider widget. Next, let’s explore how to customize it to match your site’s style and branding.
Step 4: Customizing the Testimonial Widget
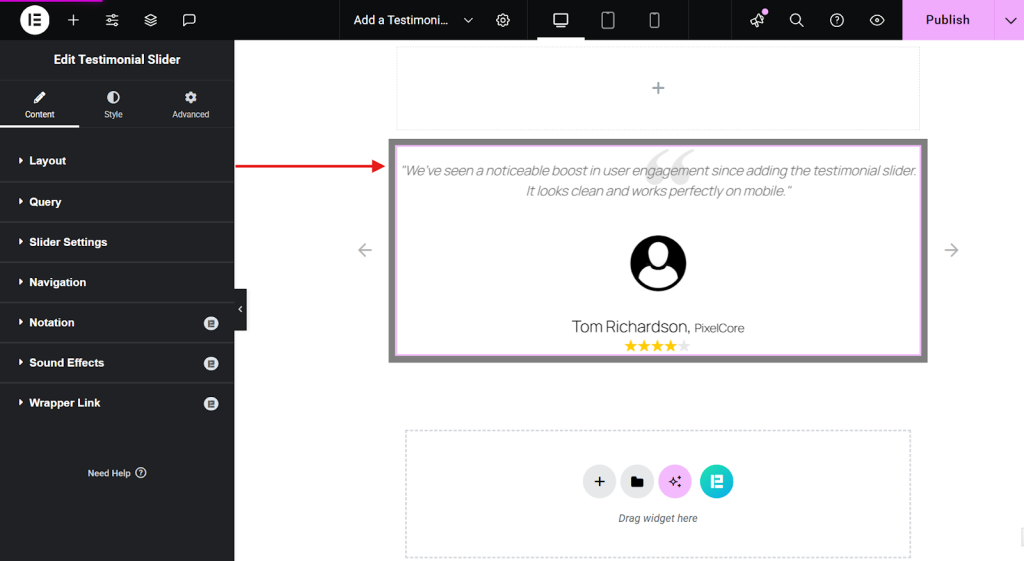
Once you’ve added your testimonial slider widget, you can fine-tune its layout and content using the Innehåll settings panel.
Here’s what each option lets you control:
Layout:
- Skin: Choose the overall style or layout preset for your slider (e.g., default, thumb, single).
- Testimonial Image: Toggle this on to display the reviewer’s photo or avatar.
- Titel: Show or hide the reviewer’s name or headline.
- Company Name/Address: Display the reviewer’s organization or location for added credibility.
- Meta Multiline: Enable this to display meta details (such as name and company) across multiple lines.
- Show Comma After Title: Decide whether to include a comma after the reviewer’s title for cleaner formatting.
- Text Limit: Set a character limit for each testimonial to maintain a tidy layout.
- Strip Shortcode: Remove any embedded shortcodes from the testimonial text to avoid formatting issues.
- Text Read More Toggle: Allow users to expand longer testimonials with a “Read More” link.
- Rating: Display star ratings to visually reinforce positive feedback.
- Review Platform: Show the source of the testimonial (e.g., Google, Facebook, Instagram).
- Meta Position: Choose where the meta info appears, top or bottom of the testimonial block.

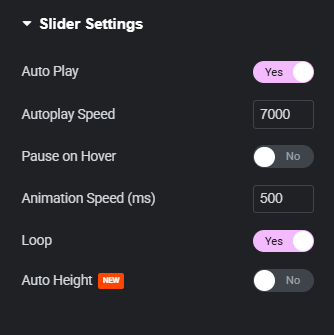
Slider Settings:
Once you’ve customized the layout, the next step is to fine-tune the Slider Settings. With this setting, you can control how your testimonial slider behaves on the page. Also, these options help you manage the slider’s motion, timing, and responsiveness:
- Auto Play: Enable this to make the slider rotate automatically without user interaction.
- Autoplay Speed: Set how long each testimonial stays visible (in milliseconds). Example: 7000 means 7 seconds.
- Pause on Hover: Choose whether the slider should stop moving when a user hovers over it.
- Animation Speed: Control how fast the transition between slides happens. Lower values = quicker transitions.
- Loop: Turn this on to keep the slider cycling continuously.
- Auto Height: Adjusts the slider height based on the content of each testimonial. Useful for mixed-length reviews.
Navigation:
Then, below that are the navigation functions. These navigation options will help you adjust the appearance and functionality of the navigation controls:
- Navigation Type: Choose how users navigate the slider, options include arrows, dots, or none.
- Show Scrollbar: Toggle this to display a scrollbar beneath the slider if needed.
- Arrows Position: Set where the navigation arrows appear (e.g., center, top, bottom).
- Arrows Icon: Select the style of arrow icons, default or custom designs.
- Hide Arrow on Mobile: Enable this to remove navigation arrows on smaller screens for a cleaner mobile layout.

This is how you can add, configure, and style the Elementor testimonial slider widget. Using all these features, you can create attractive, unique, and advanced testimonial sliders.

Bonus: Tips for Designing Testimonial Sliders Design

Designing an effective testimonial slider isn’t just about aesthetics. It’s about trust, clarity, and usability. Here are some pro tips on how to do it right:
Best Testimonial Structures
- Quote + Name + Role: Keep it simple and credible.
- Image + Quote + Rating: Adds visual trust and social proof.
- Logo + Quote: Ideal for B2B or client showcases.
- Video + Text Summary: Great for high-impact testimonials.

Standard Sizes for Client Testimonial Designs
- Image size: 80–120px square for profile photos.
- Slider width: 100% responsive (min. 300px, max. 1200px).
- Text length: 30–60 words per testimonial for readability.
Where to Place Testimonials
- Homepage: Near the call-to-action or product section.
- Landing pages: Just before the conversion form.
- About our services page: To reinforce credibility.
- Blog posts: As sidebar sliders or inline proof.
- Pricing page: After the pricing table.
Testimonial Features to Include
- Rating stars: Adds instant visual trust.
- Client name and role: Builds authenticity.
- Company logo or photo: Reinforces identity.
- Date or project name: Adds context.
Style to Match Your Brand
- Use your brand fonts and colors.
- Match button styles and hover effects.
- Keep spacing and typography consistent with your site.
Vary Your Content
- Mix short quotes with longer stories.
- Include different industries or user types.
- Rotate testimonials dynamically or by category.
A few more important things:
- Use a testimonial plugin for easy slider setup and management.
- Ensure sliders are responsive and keyboard-accessible.
- Keep navigation simple, dots, arrows, or swipe gestures.
- Maintain whitespace for readability and focus.
- Always test responsiveness.
Slutsats
The Element Pack’s testimonial slider widget is a sleek and engaging way to showcase customer feedback, build credibility, and boost conversions.
By following the steps and tips in this guide, you’ll be able to easily add and customize a testimonial slider that fits your site’s design and audience.
Want to explore more Elementor features? Check out these helpful tutorials: