Creating a clear and attractive Elementor pricing table widget is essential for helping your visitors compare plans and make informed decisions. But many WordPress users struggle to build effective pricing tables with Elementor, especially if they don’t have Elementor Pro.
While several plugins claim to offer pricing tables, most don’t integrate well with Elementor, leaving users frustrated. Some Elementor add-ons include pricing tables but often lack important features or require costly upgrades.
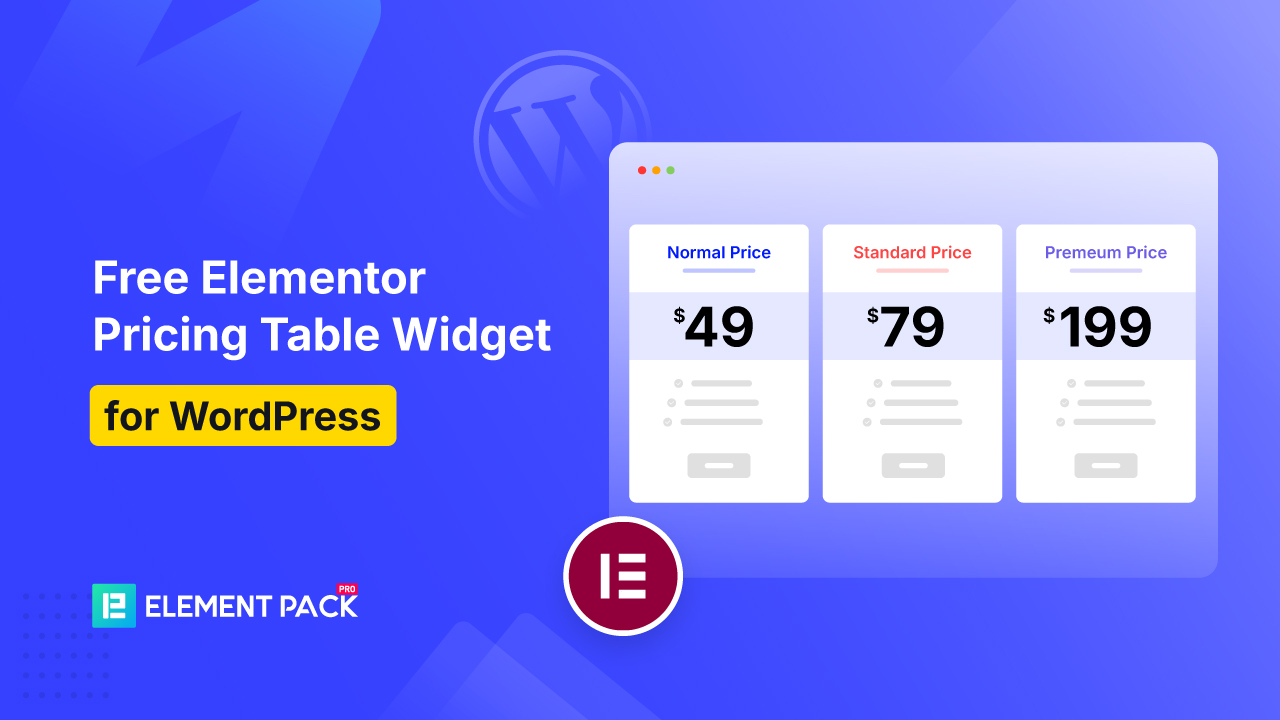
In this blog, you’ll discover a completely free Elementor pricing table widget that works seamlessly, no Elementor Pro needed. Let’s dive in and simplify your pricing display!
How to get a free Elementor pricing table widget
You can build a professional price table in Elementor without paying for third‑party addons by using Elementor’s free widgets. Below is a simple, practical method:
Choose and install an addon plugin
There are many free pricing table plugins available in the WordPress repository. The “Pricing Table” widget comes from various free addon packs that allow you to quickly add and customize pricing tables in Elementor.
Among them, you can get a free Elementor pricing table widget by installing a plugin like Elementor Pack. It offers advanced features that are not usually found in other page builder plugins.
While many free plugins offer basic pricing table features, we recommend Element Pack for its advanced options and ease of use.
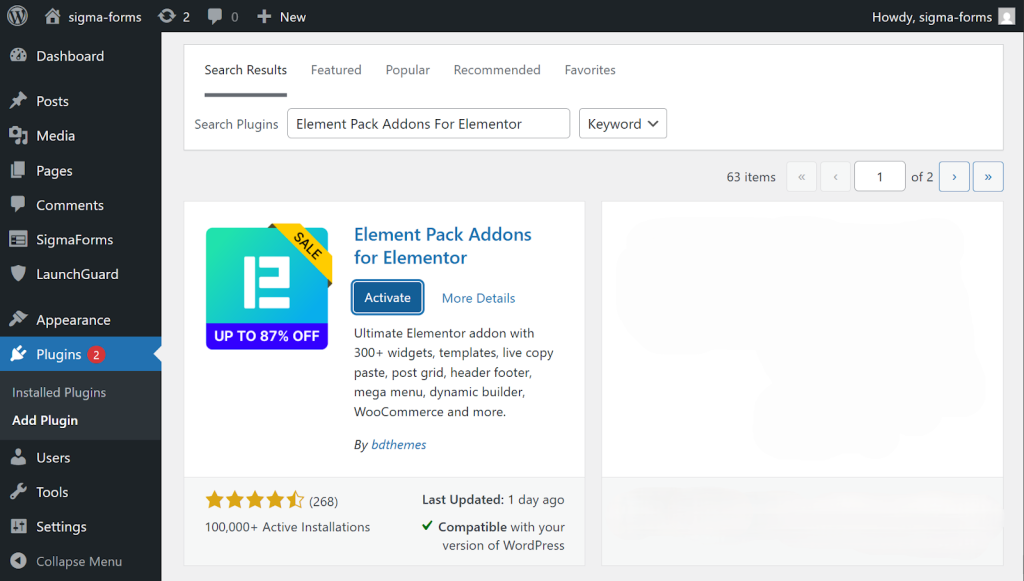
- So, to install the Element Pack page builder, go to the WordPress admin dashboard. Then navigate to the Plugins > Añadir nuevo.
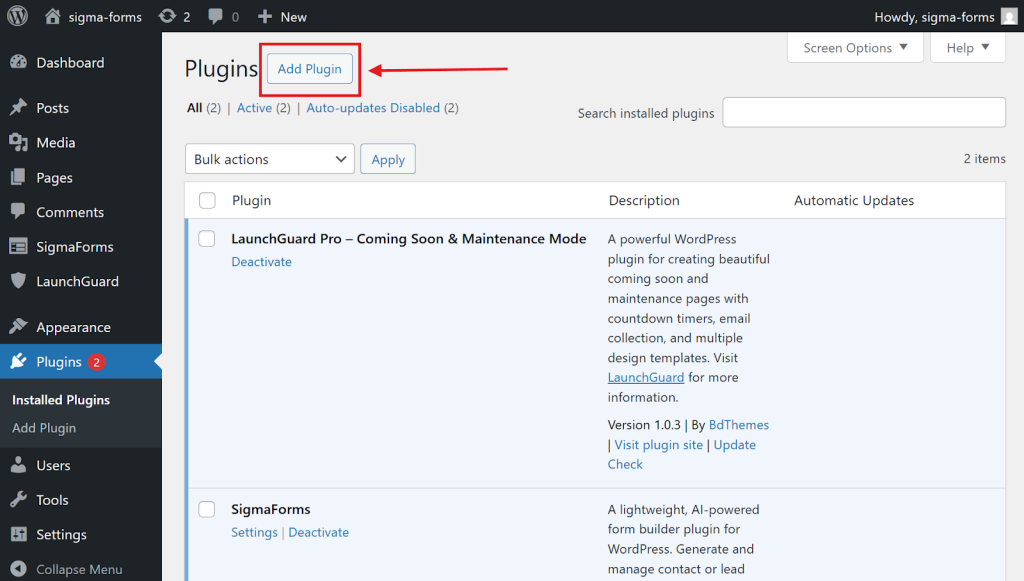
- In the search bar at the top, type Element Pack to find the plugin.

- Then, install the plugin.
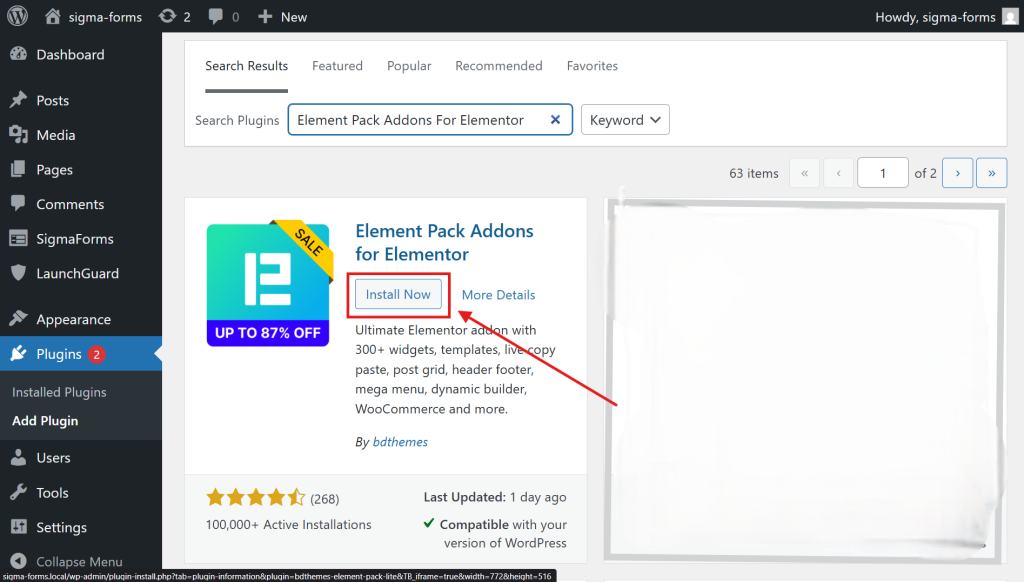
- Now, click Activar para activar el plugin.
Find and activate the widget
- Then open the plugin and activate the widgets you require, such as the Tabla de precios widget. Just go to Widgets principales and find the Price List and Tabla de precios, then activate them.
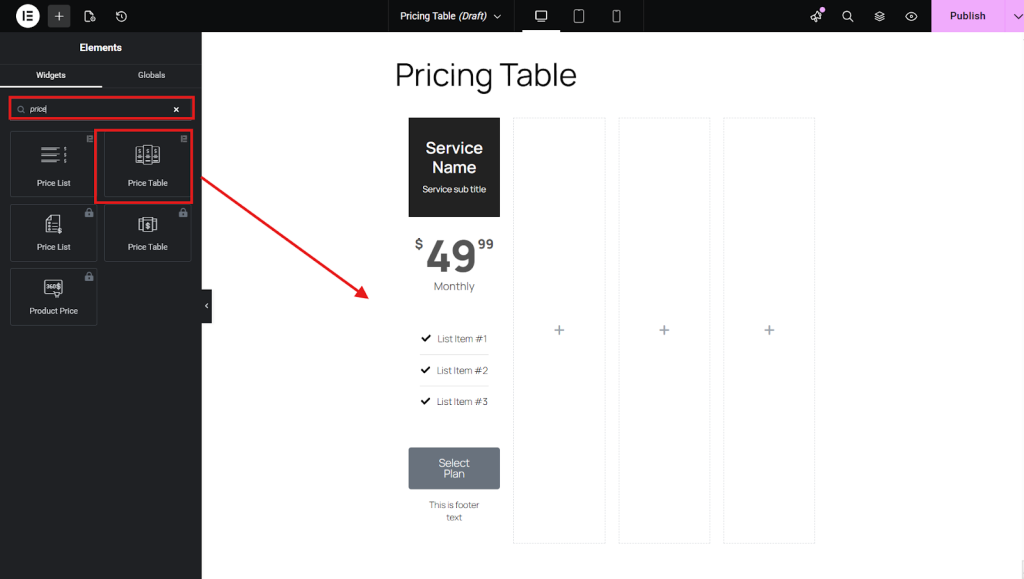
Add the widget to the page
Open your page in the live page builder Elementor, search for “Pricing Table” in the widgets list, then drag and drop it into the desired section of the page.
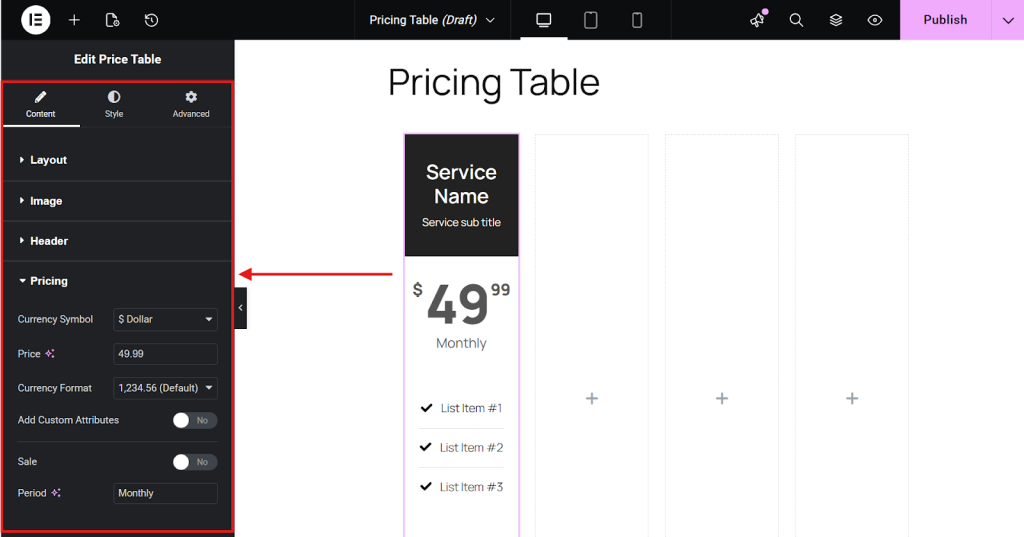
Configure the pricing table
Edit the widget content to set plan names, prices, features, badges (e.g., “Popular”), and buttons with links, then adjust colors, typography, and layout in the Style/Advanced tabs.
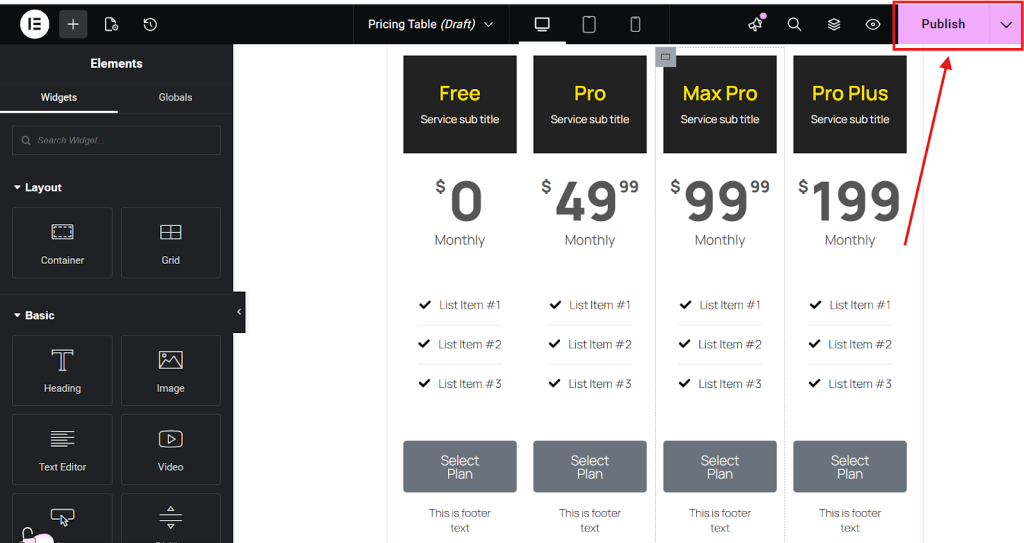
Save and publish
Click Update/Publish in the builder to save the layout and make the pricing table live on your WordPress website
Common features of the pricing table widget include customization options for layout, color, and font. There’s also the ability to highlight specific plans or features, and a responsive design that adapts to different screen sizes.
Common features of Pricing Table widgets
Many widgets allow you to add icons, tooltips, and call-to-action buttons. And there are some plugins that support advanced features like animations, featured plan badges, and multiple billing cycles.
Features that should be included for customization and design:
- Styling: Full control over colors, fonts, and spacing to match your website’s branding.
- Elements: Customization options for different parts of the table, such as the header, footer, pricing details, and feature list.
- Icons: The ability to add icons next to features, adjust their color and size, and customize the spacing.
- Animation: The option to add subtle animations to make the table more dynamic and attractive.
- Diseño adaptable: Ensures that the table displays correctly and is easy to navigate on different devices, including mobile phones.
Features that should be included for content and functionality:
- Features and Description: The ability to list features, add a description for each plan, and include icons or checkmarks to indicate included features.
- Call-to-Action Button: A prominent button on each plan, often customizable, to encourage users to sign up or learn more.
- Billing Cycle: Support for different pricing models, such as monthly, annual, or other subscription options.
- Tooltips: The option to add tooltips to provide additional information about a feature without cluttering the table.
- Featured Plans: The ability to highlight a specific plan, often with a “Most Popular” or “Recommended” badge.
Reflexiones finales
I hope this blog will help you create your own pricing tables using the Elementor page builder. You can also create unique pricing tables that perfectly match your brand.
Free Elementor pricing table widgets from add-ons like Element Pack let you quickly create professional-looking tables, save money, and match any brand.
Try Element Pack now to display pricing tables on your favorite SaaS, agency, or product websites.
Latest Post
- Free Elementor Pricing Table Widget for WordPress
- 7 Best Essential Addons for Elementor Alternatives: Complete 2026 Guide
- Lanzamiento de la versión 9 de Element Pack Pro: ¿Qué hay de nuevo?
- Cómo añadir un slider de testimonios en WordPress usando Elementor
- ¿Cómo se mantiene el acordeón cerrado por defecto en Elementor?